One summer activity that we’re starting to get fired up about is grilling. Whether you’re a seasoned grill master or have never before ventured near an open flame, get out of the frying pan and get your hands on some good old fashioned backyard barbecue.
If you’re just starting out, here’s everything you need to know to learn the basics of grills, grilling maintenance and supplies, and grilling tools so you can get going!
Table of Contents
Choosing a Grill

Charcoal and propane are the two main types of grills to decide between. There’s a few things to keep in mind when choosing which type will suit you best.
1. Charcoal
The grill you probably think of when someone mentions a barbecue, these grills are so aptly named because they use charcoal briquettes to heat things up. This traditional grill will have you feeling like a barbecue grill master in no time.
Pros:
- Price: Charcoal grills usually tend to lean to the less expensive side, with standard units running at about one hundred dollars. High end grills with added features like side racks, temperature readers, and automatic fuel starters can be a pricier option, but any basic charcoal grill without the flashy features will cook your food just fine at a reasonable cost.
- Taste: Charcoal purists argue that the smoky flavor charcoal creates will make using briquettes well worth any extra work. Taste is also created by the drippings of the meat hitting the heat source, then adding to the smoke which coats the meat in flavor.
- Portability: These grills tend to be easily portable, as their main components can be as simple as a grate and receptacle. If you move frequently or want to grab your barbecue and grill in the park, this is an important point to consider.
- Temperature: While gas grill temperatures can be monitored, charcoal grills in general provide higher heat so can be used easily for searing meats.
Cons:
- Clean-up: Because of the ash and residue left from the charcoal fuel, clean-up can be messy. A little bit of charcoal dust can’t be avoided, but ash catchers and grill brushes can both be used to help the clean-up process.
- Ease-of-Use: Charcoal takes time to light and often in the range of fifteen to twenty minutes to heat up. Flare-ups from meat drippings can also make cooking tricky, along with knowing how to regulate the temperature of the grill.
2. Propane
This type of grill uses propane to get the job done. Recommended as a good beginner grill because they have an easy dial for adjusting temperature, propane grills turn up the heat on any barbecue.
Pros:
- Convenience: Firing up the grill is made simple with propane, where knobs control the temperature up and down. They also heat up in about ten minutes, relatively fast compared to a charcoal grill.
- Clean-up: After finishing your cookout, you can just turn the gas dial down and shut off the propane without dealing with a messy cleanup.
- Seasonality: Propane grills can be used more easily year round than charcoal grills because the propane heat source doesn’t rely on good weather to get started. Starting the fire with propane is a huge plus if you live in a colder area or just don’t want to wait until summertime.
Cons:
- Price: Most propane grills come at a higher price than their counterparts, where some with all the extras can cost around ten thousand dollars. Accessories like side burners, spice racks, storage drawers, and rotisserie attachments can also be taken into account for price. Infrared propane grills also err on the expensive end of grill options. However, more simple gas grills retail for a few hundred dollars a unit for a standard grill.
- Maintenance: Sometimes after a few years gas grills will require some TLC because of their many working parts like burners and venturi tubes. Cleaning all the complex internal parts increases the lifespan of the grill, but may get somewhat expensive in the long run.
How to Start
Charcoal: Before you start, make sure the grill is clean so that debris left over from previous cooking sessions doesn’t burn or cause the food to cook unevenly. There are two kinds of charcoal you can choose from:
- Briquettes are manufactured charcoal pieces that tend to burn the longest because manufacturers often add binders or other products to improve performance.
- Lump charcoal is made from burned down pieces of wood, and typically burn hotter than briquettes.
Then, to start and maintain your fire, you can use one of the following:
- Newspaper can be used as an inexpensive starter, but the burnt pieces of paper can get a little messy.
- A chimney starter can be used to get the fire going and calls for less cleanup afterwards.
- Of course, you can opt for a match or lighter fluid as well. However, some people warn against using lighter fluid as the chemical smell can infuse into the meat – so we’d suggest sticking to matches. As a general rule, charcoal grills get hotter than other grills on the market due to the radiant heat of the less-contained flames, and sometimes take about 20 to 30 minutes to reach their peak heat.
With a charcoal grill, you’ll want to get the most bang for your buck to ensure that the fuel burns as long as possible. The deviously named minion method of cooking can help charcoal burn steadier and longer than the standard method. The method involves not lighting every briquette at once. Begin by filling the charcoal chamber with unlit briquettes, and then light about half of the coals. Once the coals are covered with gray ash, they can be spread evenly over the rest of the unlit briquettes. Keep all the vents open. This way not all the briquettes burn at once, ultimately keeping the temperature lower than the standard method but more consistent, and therefore more budget-friendly. The ratio of lit to unlit charcoal can be played with to match your target temperature. Once you’re finished cooking, close all the vents to kill the fire – the fuel that wasn’t burned can be saved for next time.
Gas: Gas grills heat up quickly and run on either natural gas or propane canisters. The heat is controlled by turning the burner to a higher or lower temperature with the dial. Before cooking, it’s important to check the level of fuel in the canisters to make sure there’s enough to keep the grill going for as long as you want to cook. Multiple burners allow for two or more cooking zones, where different sections of the grill can operate at different temperatures at the same time.
An infrared grill is a variation on the propane grill for people looking to turn up the heat even more. In a gas grill the flame heats the grill directly, but infrared technology adds a ceramic or metal plate component to the standard model. The gas heats the plate, which radiates higher heat than other burners, often reaching temperatures up to twice as hot as your standard gas grill.
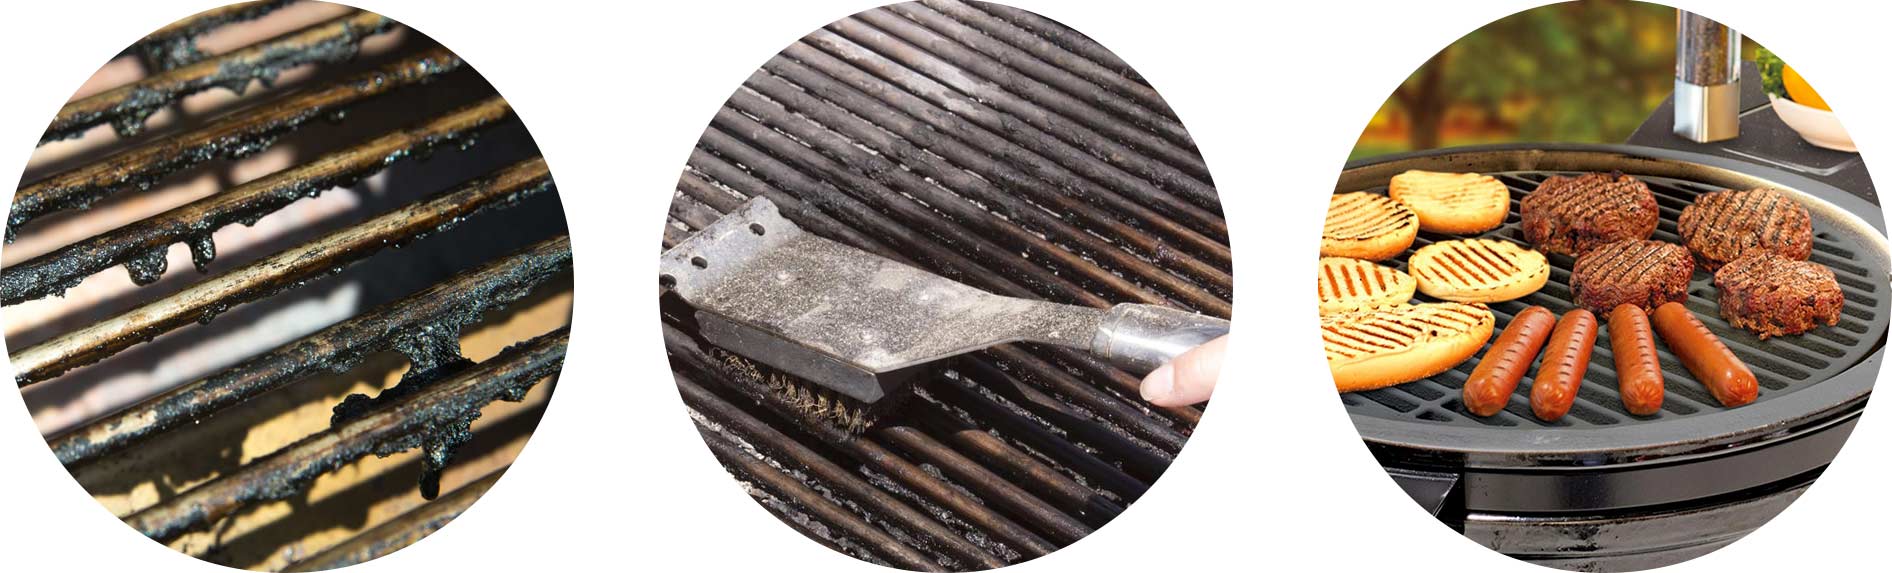
How to Clean
Before: If it’s your first time ever cooking on a new grill, wash down all the parts to remove any excess manufacturing material that may have remained from the shipping and packaging process, because it’s not likely you want your meal to taste like cardboard. To be sure it’s completely clean, before putting anything on the grill for the first time, a dry run can burn away remnants you don’t want ending up in your food.
The grate of any grill should be oiled before cooking food in order to make sure that nothing will stick. If the grill has a hood, don’t ignite the flame with the hood on, which may cause flare-ups to occur. Grills should be preheated for at least ten minutes before adding any food to make sure that it has reached an appropriate cooking temperature.
After: Proper cleaning of a grill lengthens its lifespan and keeps your food tasting fresh. After cooking, clean grates with a stiff wire brush to remove any leftover food particles. Clean when the grill is still warm, but not too hot. Ash catchers should be emptied after every use.
Some gas grills come with a cleaning setting, which is good for burning debris that may have fallen down into the grill, but despite its name it doesn’t get the grill completely clean. The cooking grate should be regularly washed after every few uses. An outdated method, which requires using foil to burn off any excess grime on the grill, is not a safe way to clean the grill, because the heat may become too intense and create a safety hazard. If you’re cooking with a gas grill, the propane tank should be shut off after each use and prior to cleaning to ensure safety.
If the paint on the grill is starting to fade or rust, most hardware stores offer grill-safe paint that will get your grill looking like new in no time.
Tools of the Trade

Once you’ve got the basics down, you can step up your grilling game by adding grilling tools into the mix. Definitely make sure you start off with these handy grilling essentials so you can hit the ground running.
Tongs: Arguably the most essential of grilling accessories, anyone looking for a successful barbecue needs a good pair of tongs to flip and move food as needed.
Spatula: A spatula can also take on the task of flipping food, and is usually used when making burgers or fish, or any more delicate food that tongs could damage.
Grilling Gloves: Beat the heat of the open flames with a flame-resistant glove. These gloves absorb heat and make outdoor cooking less painful.
Squirt Bottle: Keep a squirt bottle on hand full of water so in the case of any unexpected flare-ups, you’ll be ready to fight the fire and keep it under control.
Thermometer: Stick a thermometer in your food to make sure the meat’s cooked to perfection, and at a safe temperature to eat. Thermometers come in instant-read, leave-in, or pop-up varieties. Instant-read thermometers are useful for foods that cook quickly, and leave-in or pop-up thermometers work well with thicker meats.
Grill Brush: Having a grill brush handy will help motivate you to clean your grill right after grilling. Most come with wire bristles to wear away tough buildup.
Chimney Starter: Chimney starters reduce the need for lighter fluid, which can sometimes add an unwanted flavor to your food. Chimney starters are typically upright metal cylinders that allow you to put the coal directly in the starter and light the briquettes from the bottom.
Grilling Plank: Cooking foods that flake easily, like fish, can be difficult. Adding a plank over the fire can be the solution you need to cooking trickier types of food.
Get Going

Draw from recipes for some inspiration. The internet is like one big cookbook with endless recipes for grilling to your heart’s content.
Join a Community
Barbecuing is always better when you’re grilling with a group, so get connected to the biggest community available. Barbecuing blogs and online communities are a great place to go when you have a question to ask, or just want to show off a picture of your latest and greatest grilling session.
Grill Facts On-the-Go
Now that you know the components of choosing, prepping, and cleaning a grill, go forth on your way to becoming a grill master. For quick facts to help you in a pinch, check out our infographic, and get grillin’!


- The Ultimate 4th of July Grilling Guide Fire up the barbecue and celebrate the most patriotic day of the year - June 26, 2015
- What To Wear To A Wedding: Men’s Outfits For Every Dress Code & Season From the beach to the ballroom, we have every ceremony covered - June 12, 2015
- The Making of a Man Cave We're offering inspiration to create the ultimate sanctuary - May 29, 2015