
The skinny tie struck your fancy? This simple Skinny Tie DIY will show you how to morph your beloved standard tie into your new favorite skinny tie.
Whether you’re looking to try out a new style or looking for an update for a treasured heirloom, this simple tutorial will make for an easy transition.
If you’re unfamiliar with the different components of the tie that are mentioned here, check out our post on Necktie Anatomy .
(See next – DIY: How to Distress Denim )


Looking for a necktie that’s sophisticated enough for the office but still appropriate for casual gatherings? Look no further than our Gresham tie, which features a simple white checkered pattern against a navy blue background. A cotton accessory like this one adds a touch of refinement to any ensemble.
Table of Contents
Things You’ll Need

- Your standard or regular width tie
- A skinny tie to use as a template
- Pins
- Needle
- Thread (match the color to the thread on your garment. We used red in this post for visibility)
- Iron
- Scissors
- Pen/fine point marker
- Ruler
Step 1: Remove the keeper loop and label
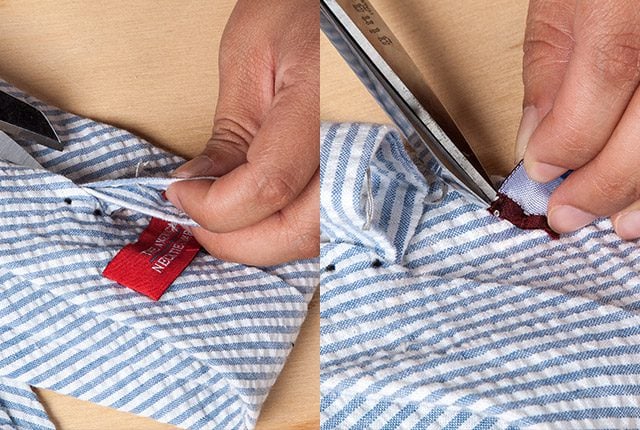
Remove keeper loop and label on the back of the tie. Set it to the side to reattach after tie is completed.
Step 2: Cut off bar tac
Cut the bar tac so that the slip stitch is easy to remove.
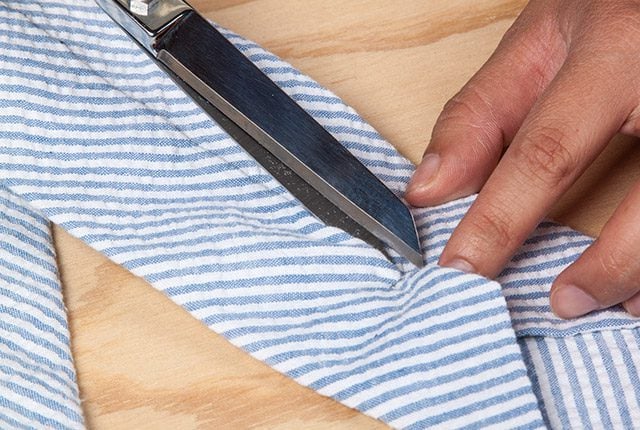
Step 3: Open and pull out slip stitch

Gently open up the tie and pull out the slip stitch holding it together. Using the skinny tie, match up the point at which both ties are the same width. Usually about half way up the entire length of the tie (unfolded).
Step 4: Tie a knot in the slip stitch
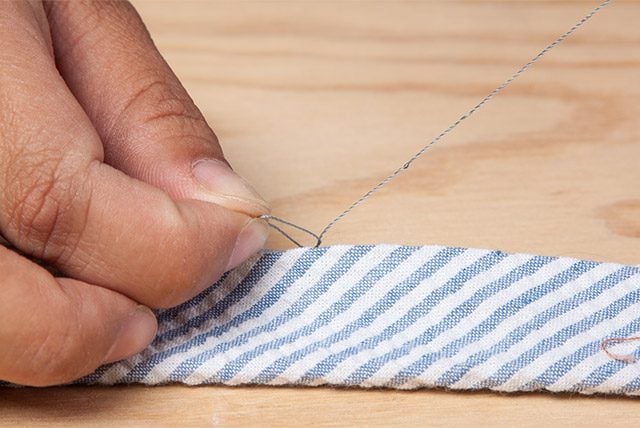
Tie a knot to to prevent the slip stitch from unraveling further.
Step 5: Pull out interlining

Open up the tie up to the knot and gently pull out the interlining from under the tipping.
Step 6: Trace skinny tie on to interlining

Place skinny tie over interlining matching up the tips and make 2-3 marks to guide the outline of the skinny tie onto the interlining.
Step 7: Finish outlining and trim

Use a ruler to connect the marks on the interlining, completing the outline of the skinny tie. Cut along the lines to remove excess lining.
Step 8: Tuck interlining back into tipping
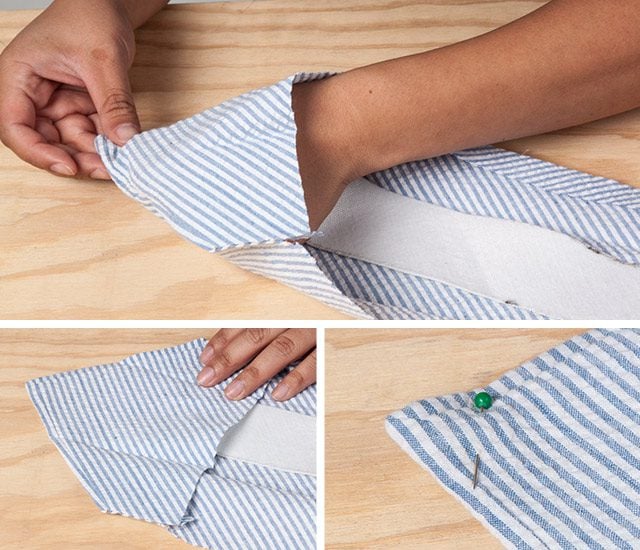
Place the interlining back into the tie’s tipping and secure with a pin on the outside of the tipping to hold it in place.
Step 9: Fold fabric around interlining and iron
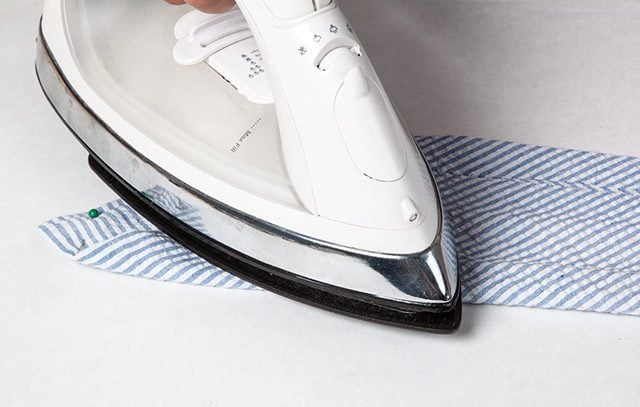
Fold one of the edges over the interlining and iron into place. Be wary: the iron’s heat setting will depend on the type of fabric the tie is made of. Check the care and origin tag if you are unsure of the tie’s material.
Step 10: Cut excess fabric
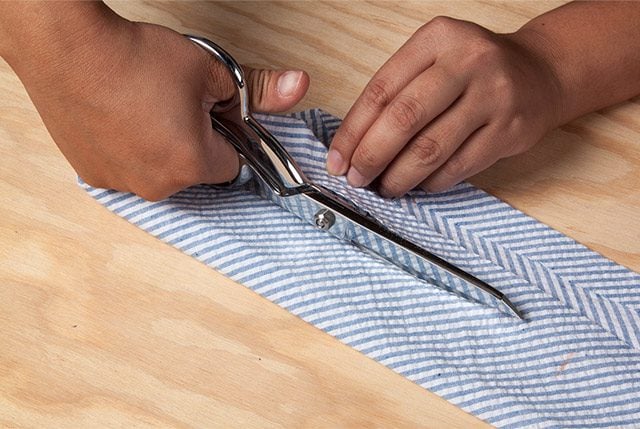
Once one side of the tie is folded over and ironed there may be excess fabric. If when folded over, the edge goes beyond the interlining, cut the portion surpassing the interlining.
Cutting excess fabric eliminates the possibility of creating excess bulk in the back of the tie.
Step 11: Fold opposite side and cut excess fabric
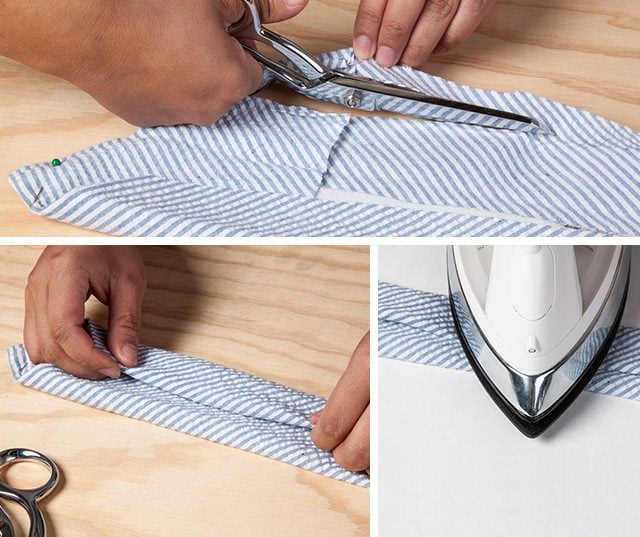
Repeat step 10 on the opposite side, eliminating additional excess fabric. Tuck about 1 inch of the top flap under and adjust until the crease is centered down the tie. Iron into place.
Step 12: Prepare the new slip stitch

Using thread that is the same color as the tie prepare for sewing the slip stitch (we used red thread to aid the visibility of the steps).
To determine how much thread you need, either measure the thread against the tie or measure the length of the slip stitch that you removed.
Double loop the thread onto the needle and tie a knot at the end of the thread that cannot be pulled through the fabric.
Step 13: Begin your slip stitch
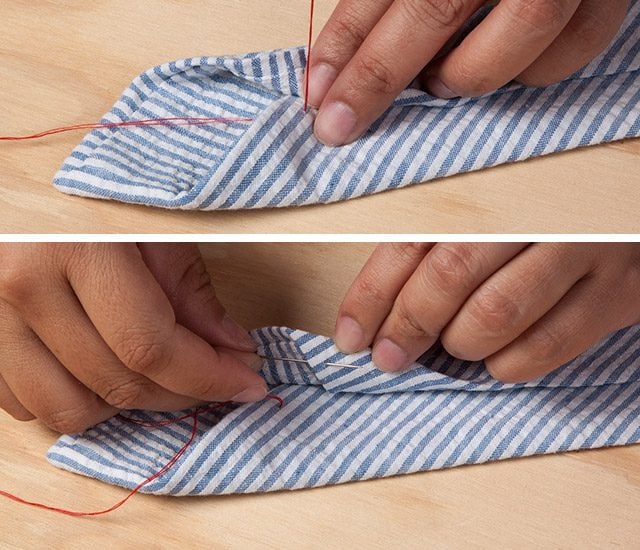
Start sewing at the bottom undermost blade so that the knot is hidden. Pull the thread through and pull needle through to the tucked in portion on the back of the top blade.
Step 14: Sew the new slip stitch
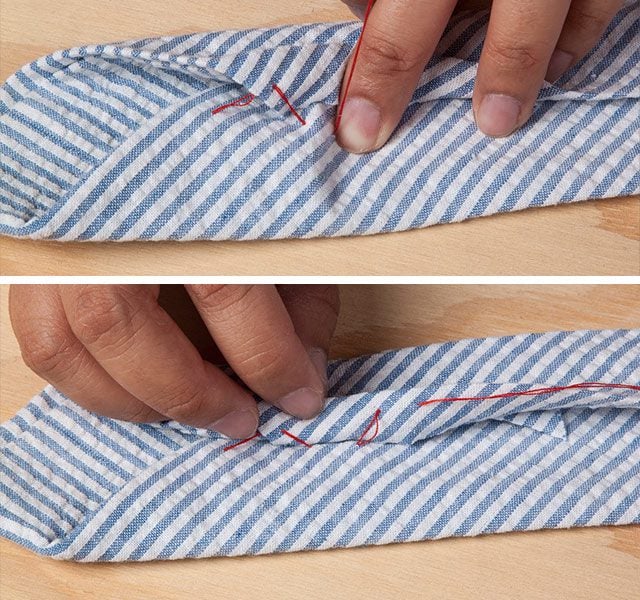
Repeat step 13 until your tie is completely stitched together up to the knot of the old slip stitch.
Step 15: Continue sewing the slip stitch
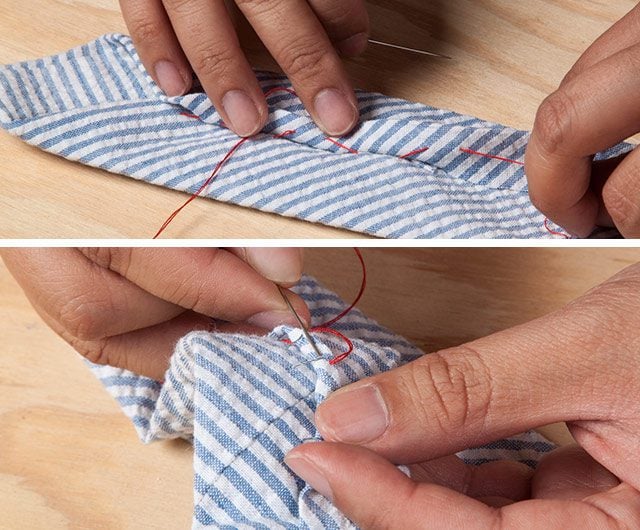
Once you reach the knot you had previously made in the original slip stitch, prepare to tie a finishing knot.
Step 16: The finishing knot
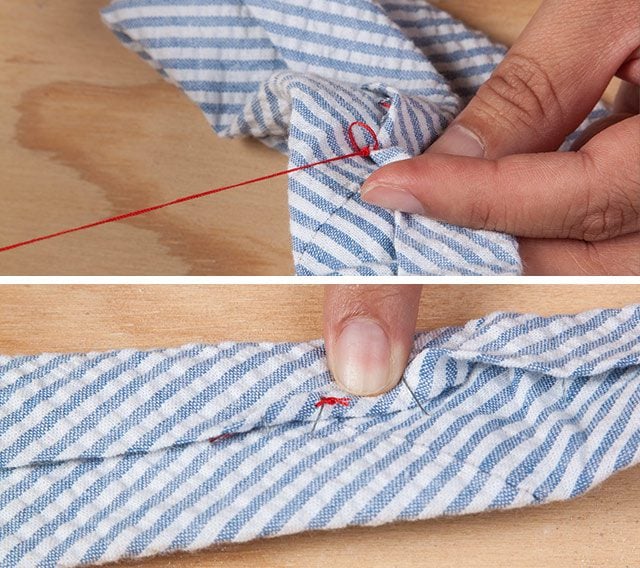
This sturdy knot will keep your new slip stitch in place and keep your newly crafted skinny tie from unraveling. Thread the needle through the fabric to the back of the top blade.

Hold the needle with one hand and thread in the other. Loop the thread around the needle counterclockwise 3 times over the needle and simply pull needle through while holding the knot near the fabric.
Step 17: Reattach the keeper loop

Pin your keeper loop to the back of the tie. Stitch the keeper loop back in place by using the same stitch as step 12. If the keeper loop exceeds the width of the tie, cut it down to size.

Congrats, you’ve transformed your standard tie into a skinny tie and introduced hip new look to your wardrobe. In the name of change, check out our guide awesome tie knots to add a little something extra to your new look.

This festive tie features an array of gray bats flying across a black background. Our Bats Skinny Tie is perfect for any spooky occasion.