
How to Tie the Half Windsor KnotHalf Windsor Knot
//www.youtube.com/embed/iVmOzdAopFI?modestbranding=1&rel=0" title="how to tie it video" frameborder="0" allowfullscreen>
About the
About the Half-WindsorHalf-Windsor Knot
The Half Windsor knot is an extremely versatile knot. Unlike what the name suggests, the Half Windsor knot is actually
closer to three-quarters the size of the Windsor knot. The Half Windsor is medium in size, nearly symmetrical and, when
tied correctly, it produces a deep and substantial dimple. Best used with neckties of a medium to light thickness.
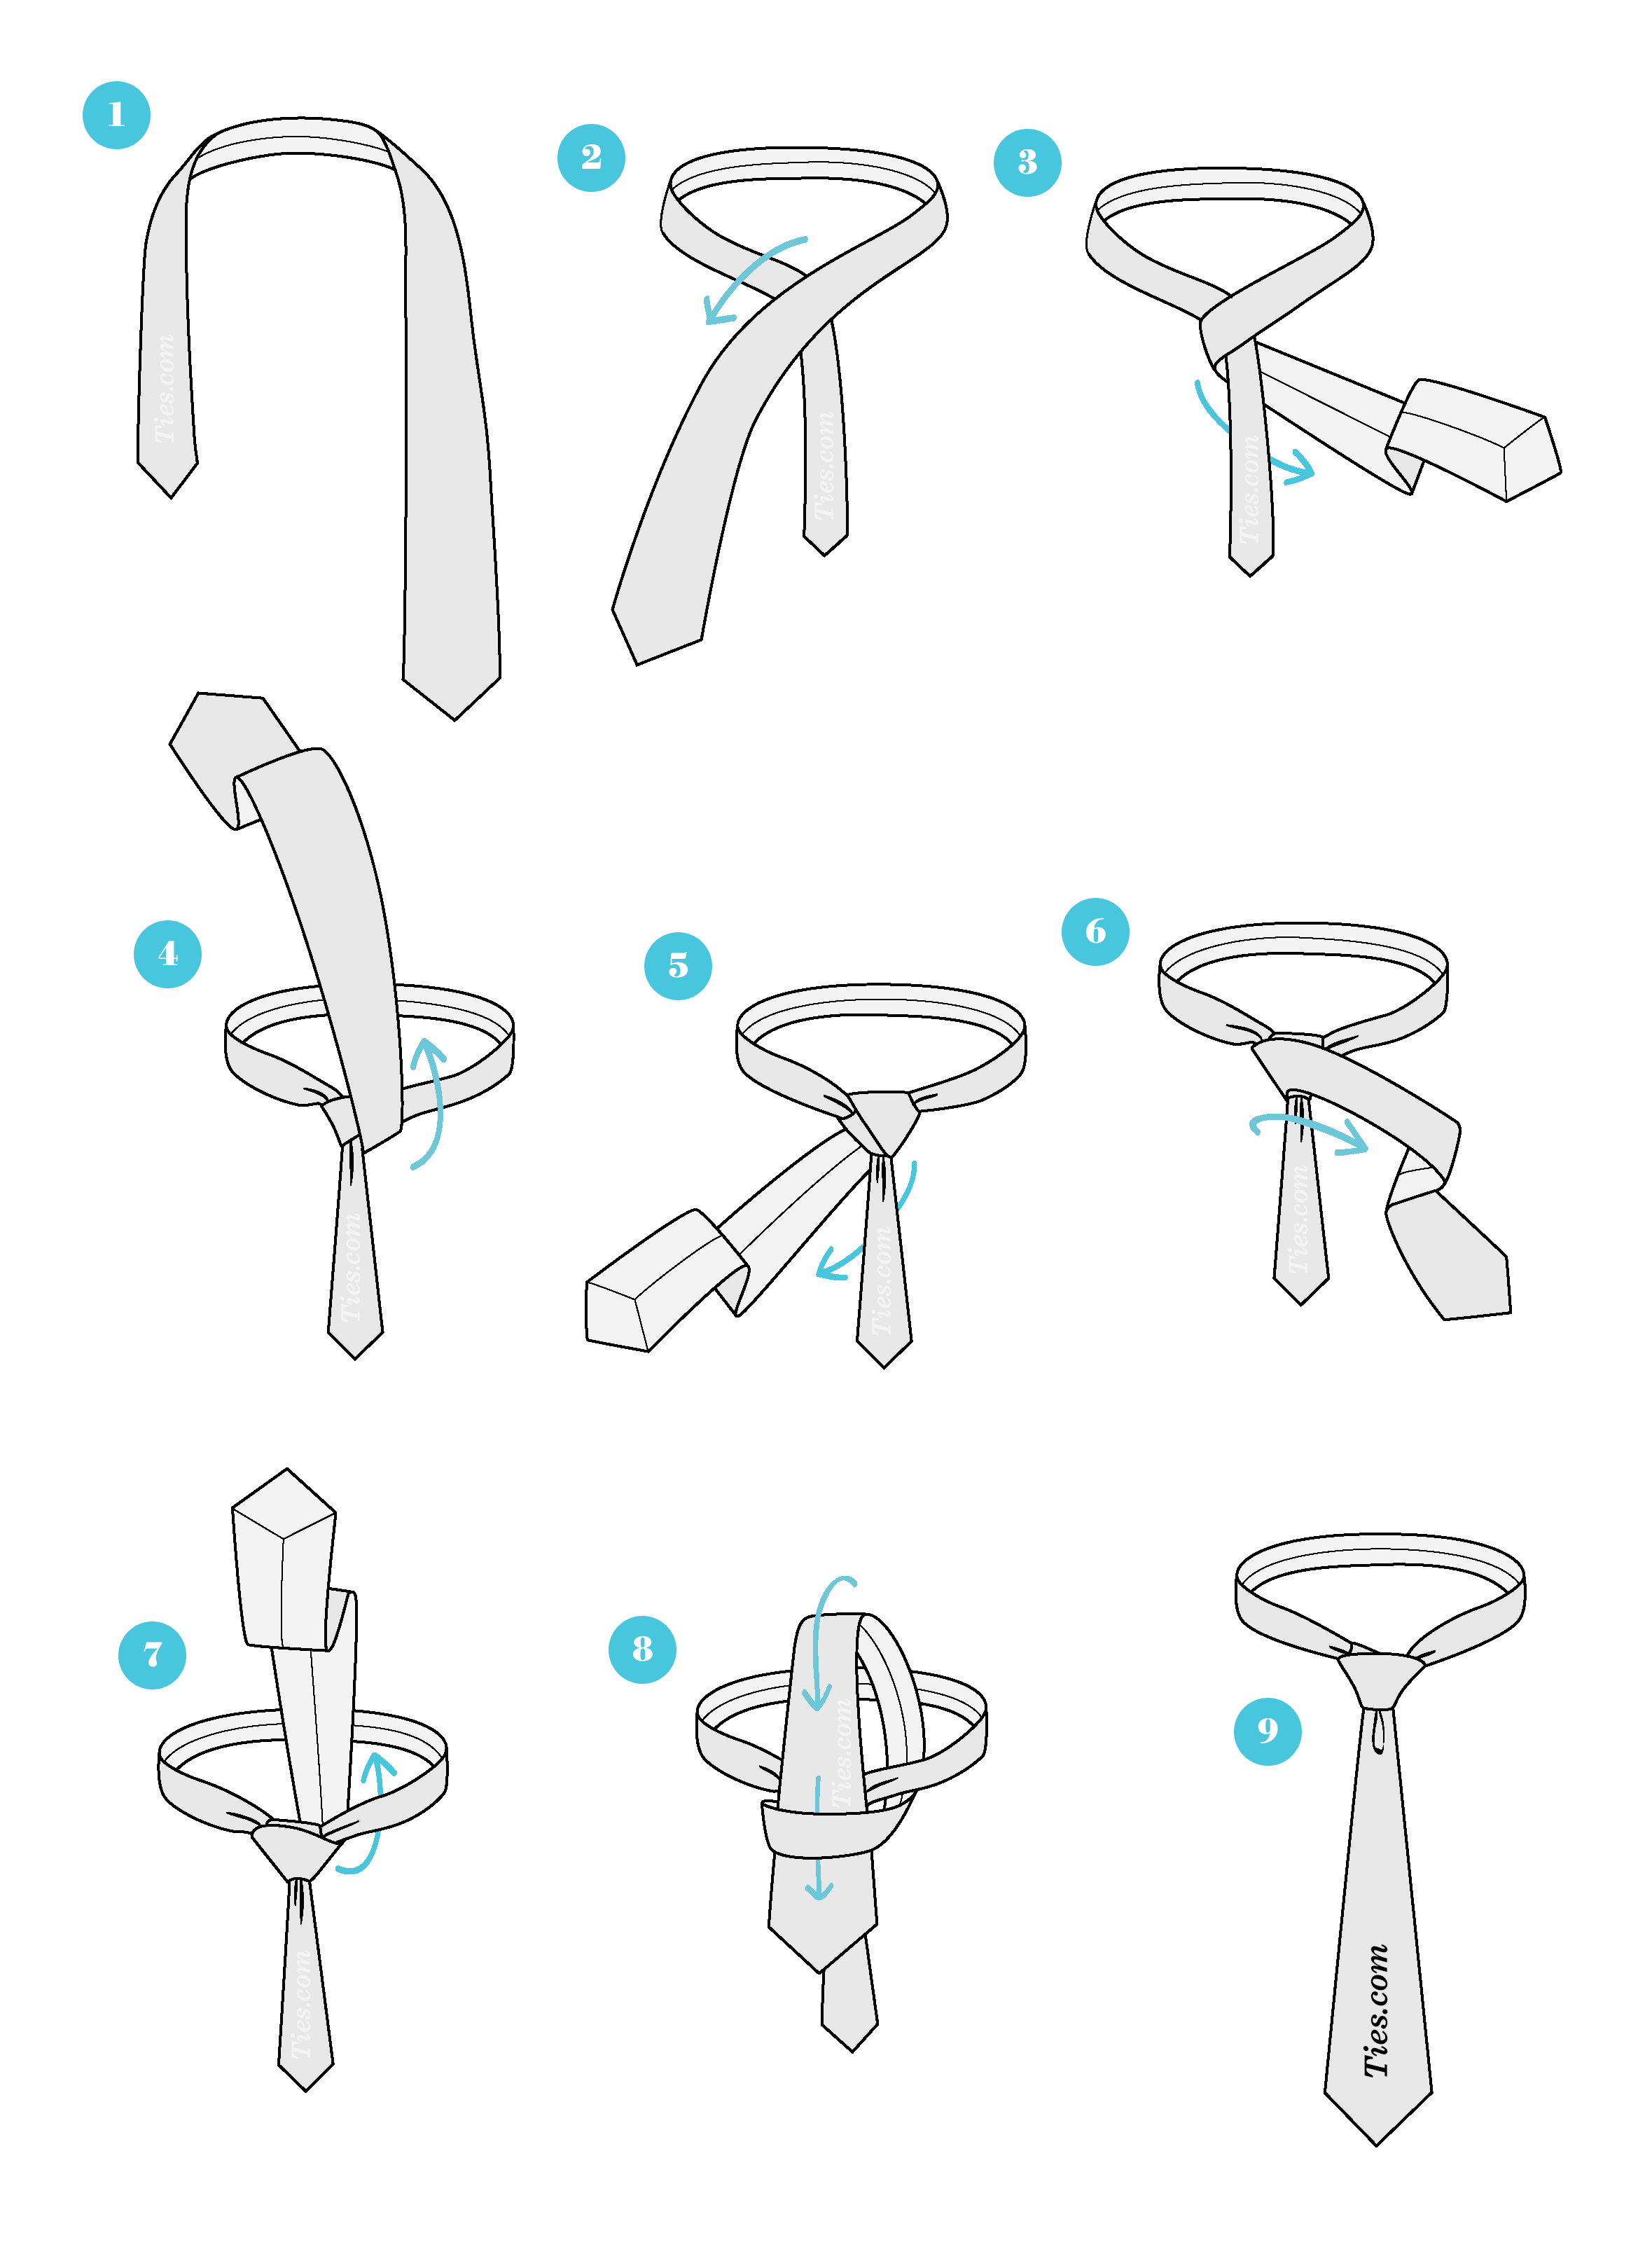
The Half Windsor Knot Tying Instructions

 -knot-tying-instructions-03.png" class="instructions-img sm" alt="Step 3">
Half Windsor KnotHalf Windsor Knot Step-by-Step Guide

STEP 1
Start with the wide end of the tie on the right and the small end on the left. The tip of the small end should
rest slightly above your belly-button (this will vary depending on your height and the length & thickness of your
tie). Only move the active (wide) end.
-button (this will vary depending on your height and the length & thickness of your
tie). Only move the active (wide) end.
STEP 1
Start with the wide end of the tie on the right and the small end on the left. The tip of the small end should
rest slightly above your belly-button (this will vary depending on your height and the length & thickness of your
tie). Only move the active (wide) end.


 eldredge-knot.jpg" class="knot-thumb" alt="KELVIN
 van-wijk-knot.jpg" class="knot-thumb" alt="PRINCE ALBERT
 trinity-knot.jpg" class="knot-thumb" alt="PRATT
 eldredge-knot.jpg" class="knot-thumb" alt="TRINITY
 murrell-knot.jpg" class="knot-thumb" alt="ELDREDGE
 van-wijk-knot.jpg" class="knot-thumb" alt="MURRELL
 balthus-knot.jpg" class="knot-thumb" alt="VAN WIJK


