- NECKTIES
- SKINNY TIES
-
NOVELTY TIES

- EXTRA LONG TIES
- BOYS TIES
- BOW TIES
-
SOCKS
- SHIRTS
- TIE BARS
- TIE RACKS
- POCKET SQUARES
-
MORE ACCESSORIES
- WEDDING SHOP
- GUAPBOX
- ON SALE
- NEW ARRIVALS
- GIFT CERTIFICATES
1 (800) 289-2843
Contact Us
About Ties.com
Get $10
The Man Academy
How to Tie a Tie
How to Fold a Pocket Square
Our Blog
Testimonials
Become an Affiliate
How to Tie the https://www.facebook.com/TiesDotCom" class="social-link" target="fb_tab" rel="nofollow">

About the Windsor Knot
Although the Duke of Windsor never specifically used the Windsor knot, he did favor a wide triangular knot. In actuality,
the Duke achieved his trendsetting look by tying a Four-in-Hand with specially made wide and extra thick ties. The Windsor
knot was invented by the public as a way to imitate the Duke's knot style. There are several derivatives of the Windsor
that are all referred to by the same name. The Windsor delivers a symmetrical and solid triangular knot that works best
with a spread collar.
This knot is also mistakenly referred to as the “Double Windsor” knot.
The Windsor Knot Tying Instructions
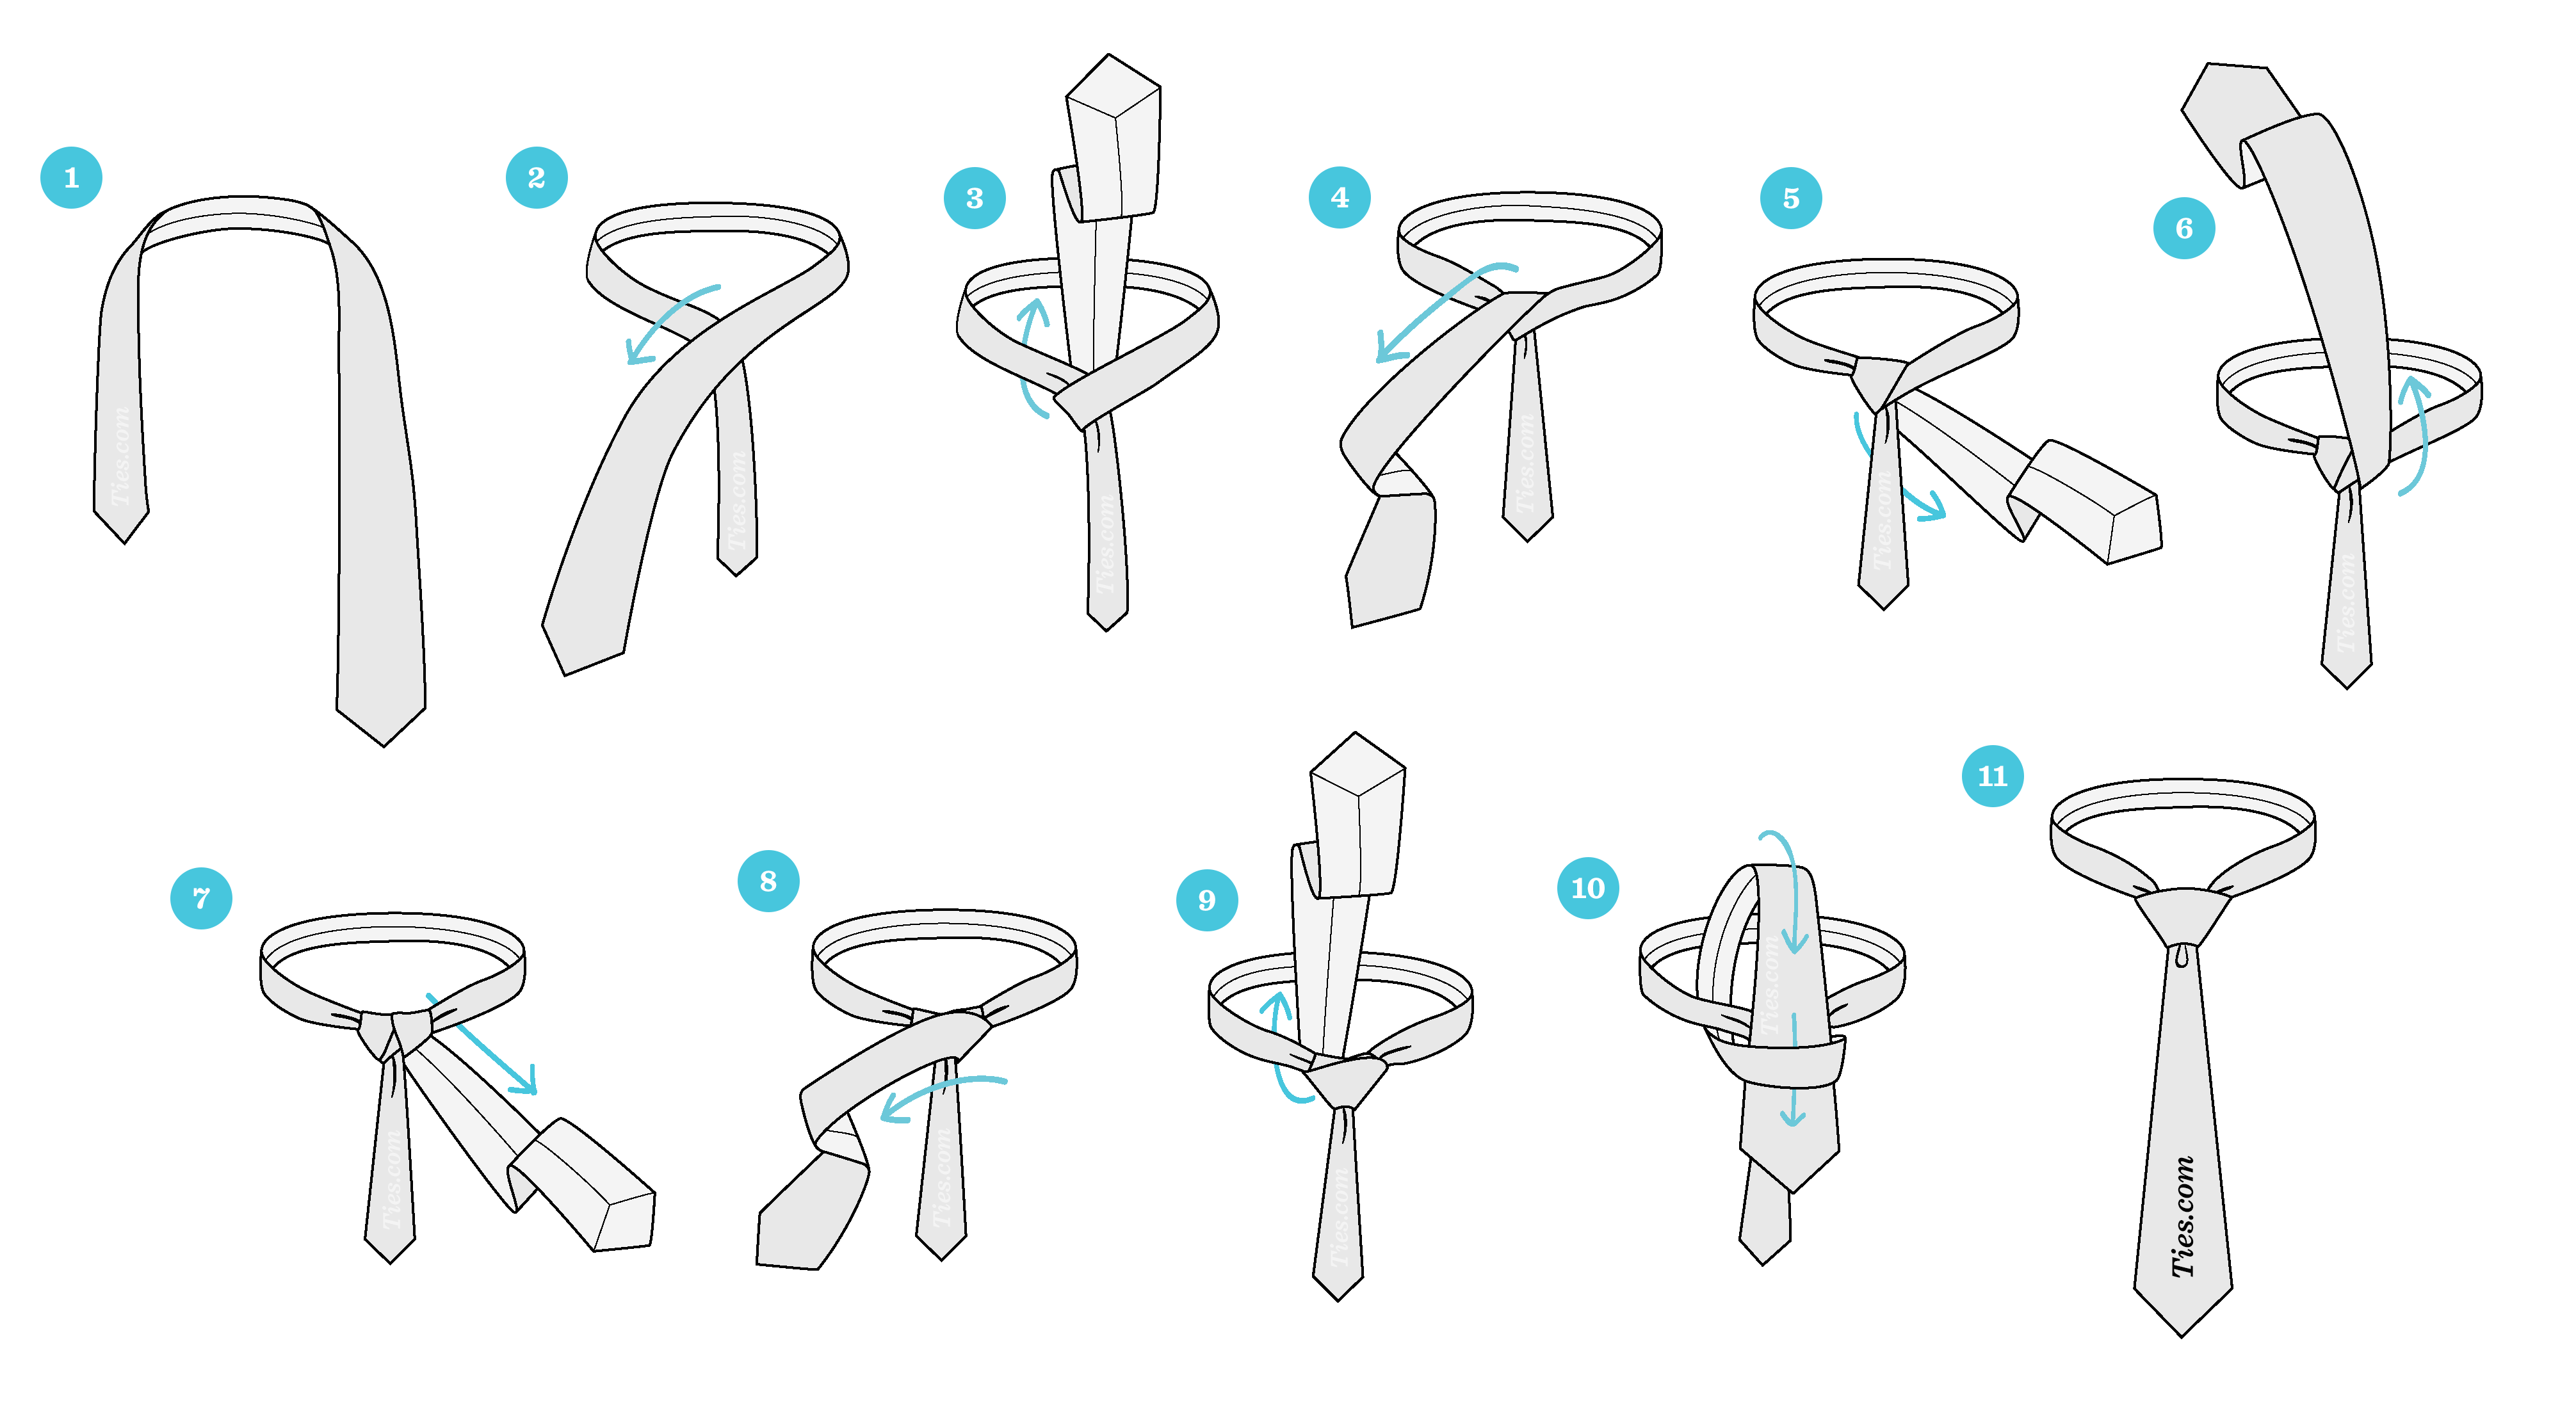
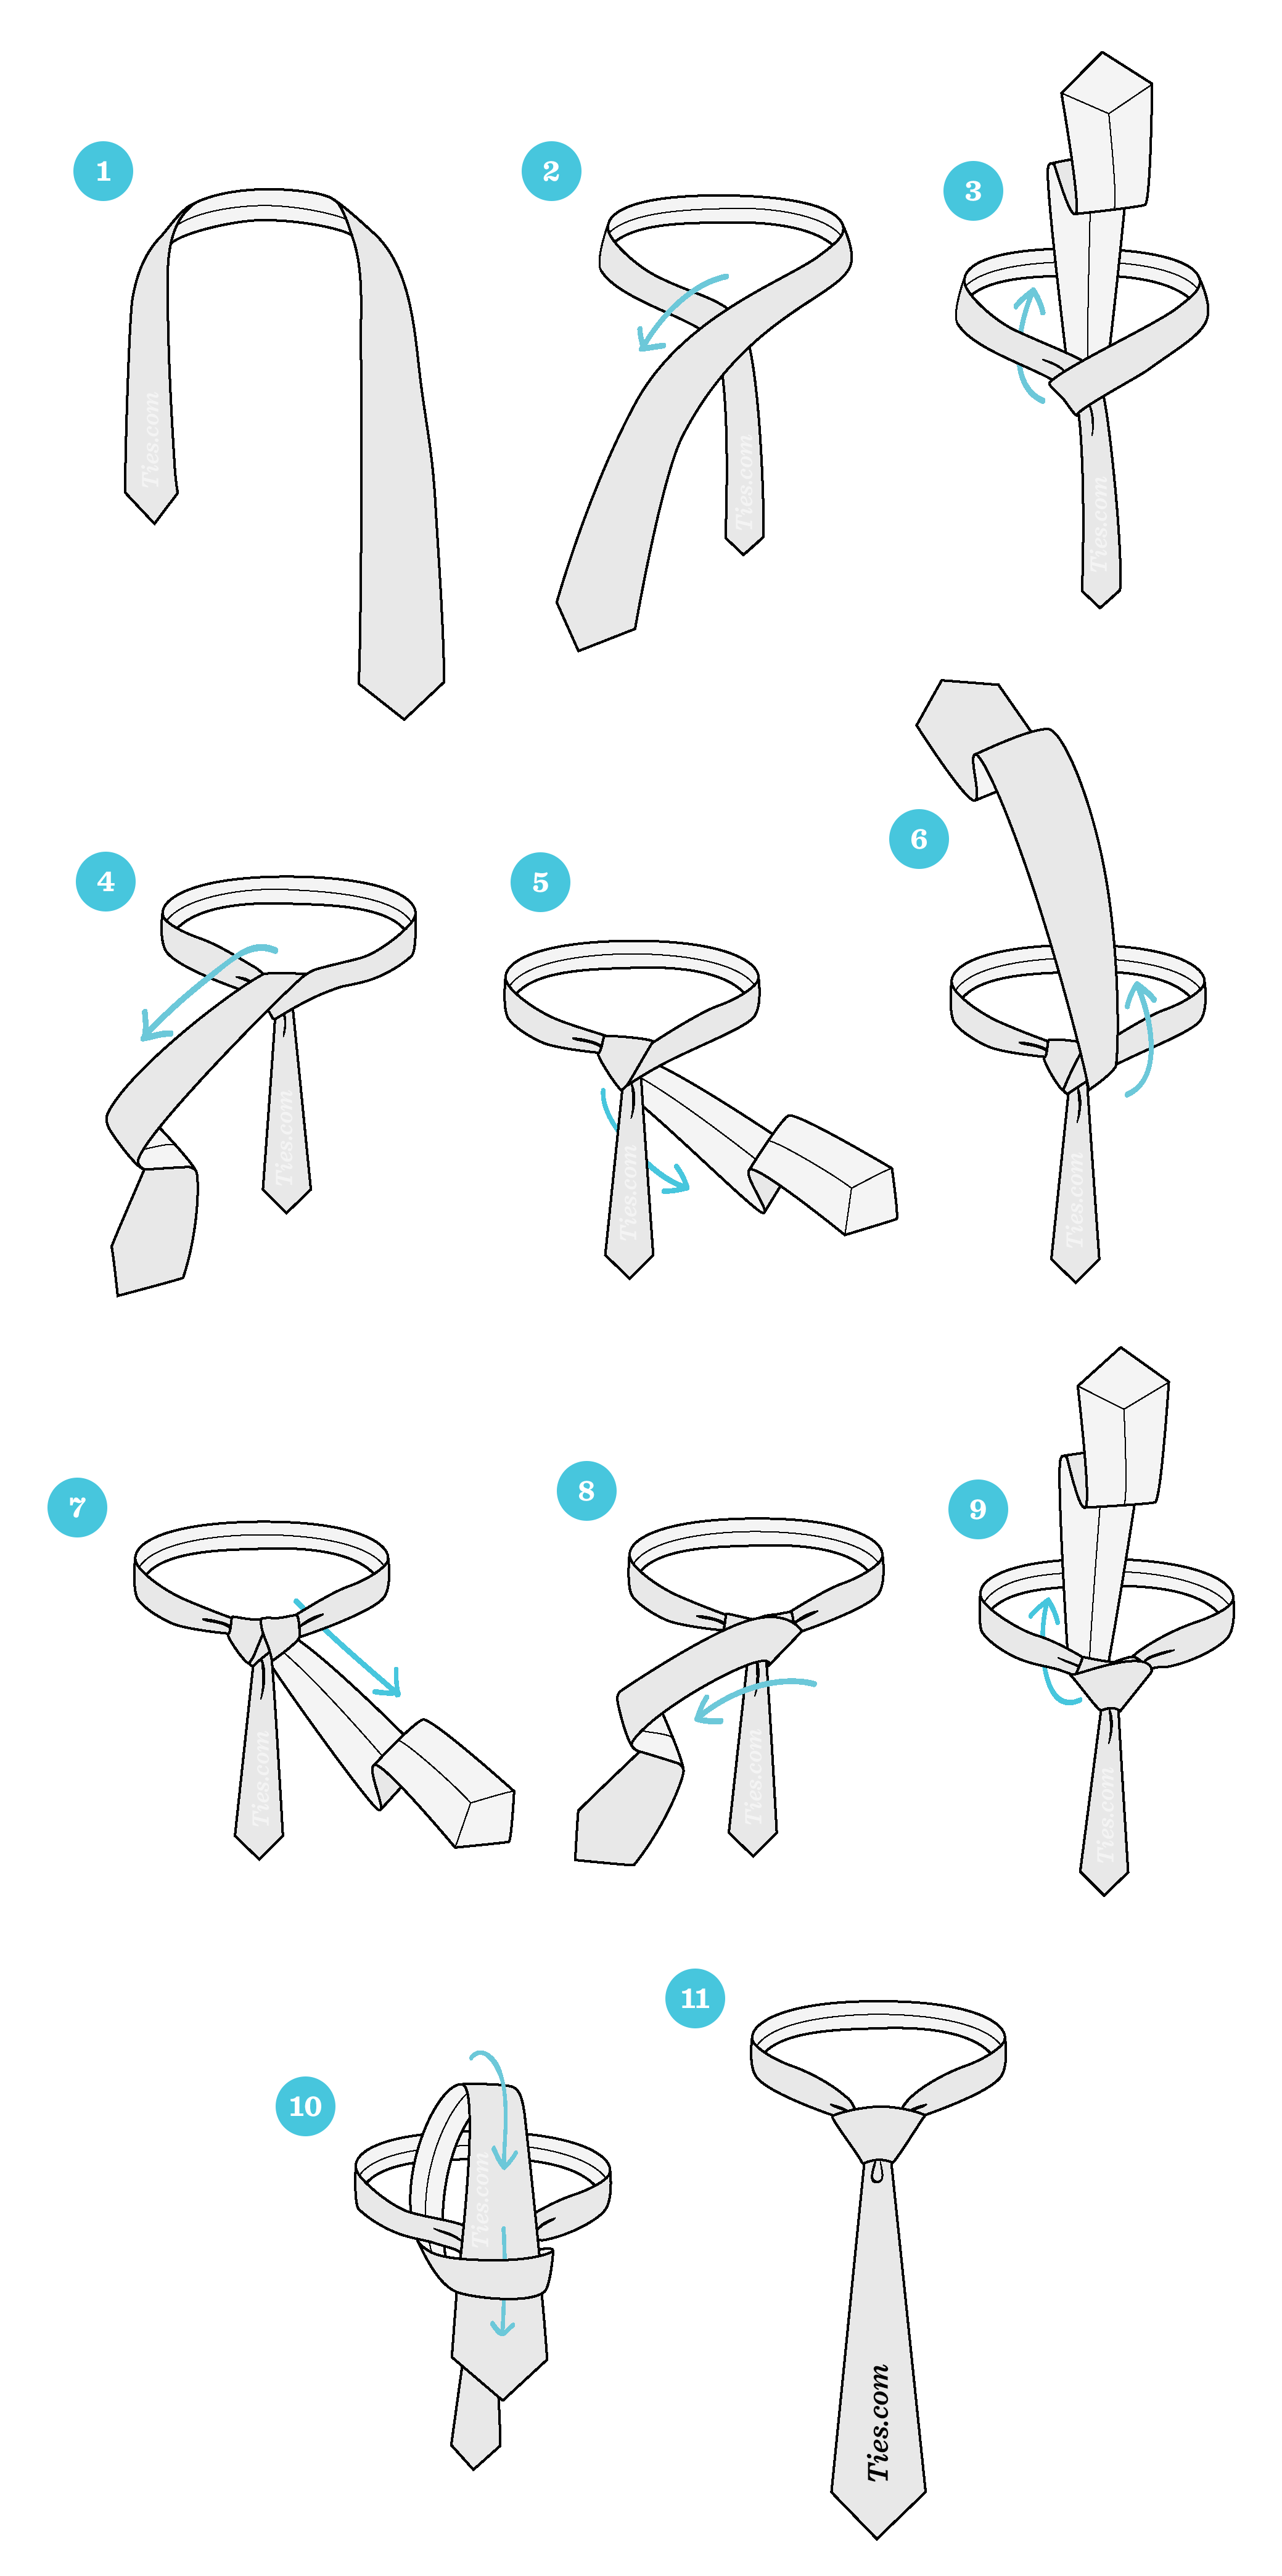
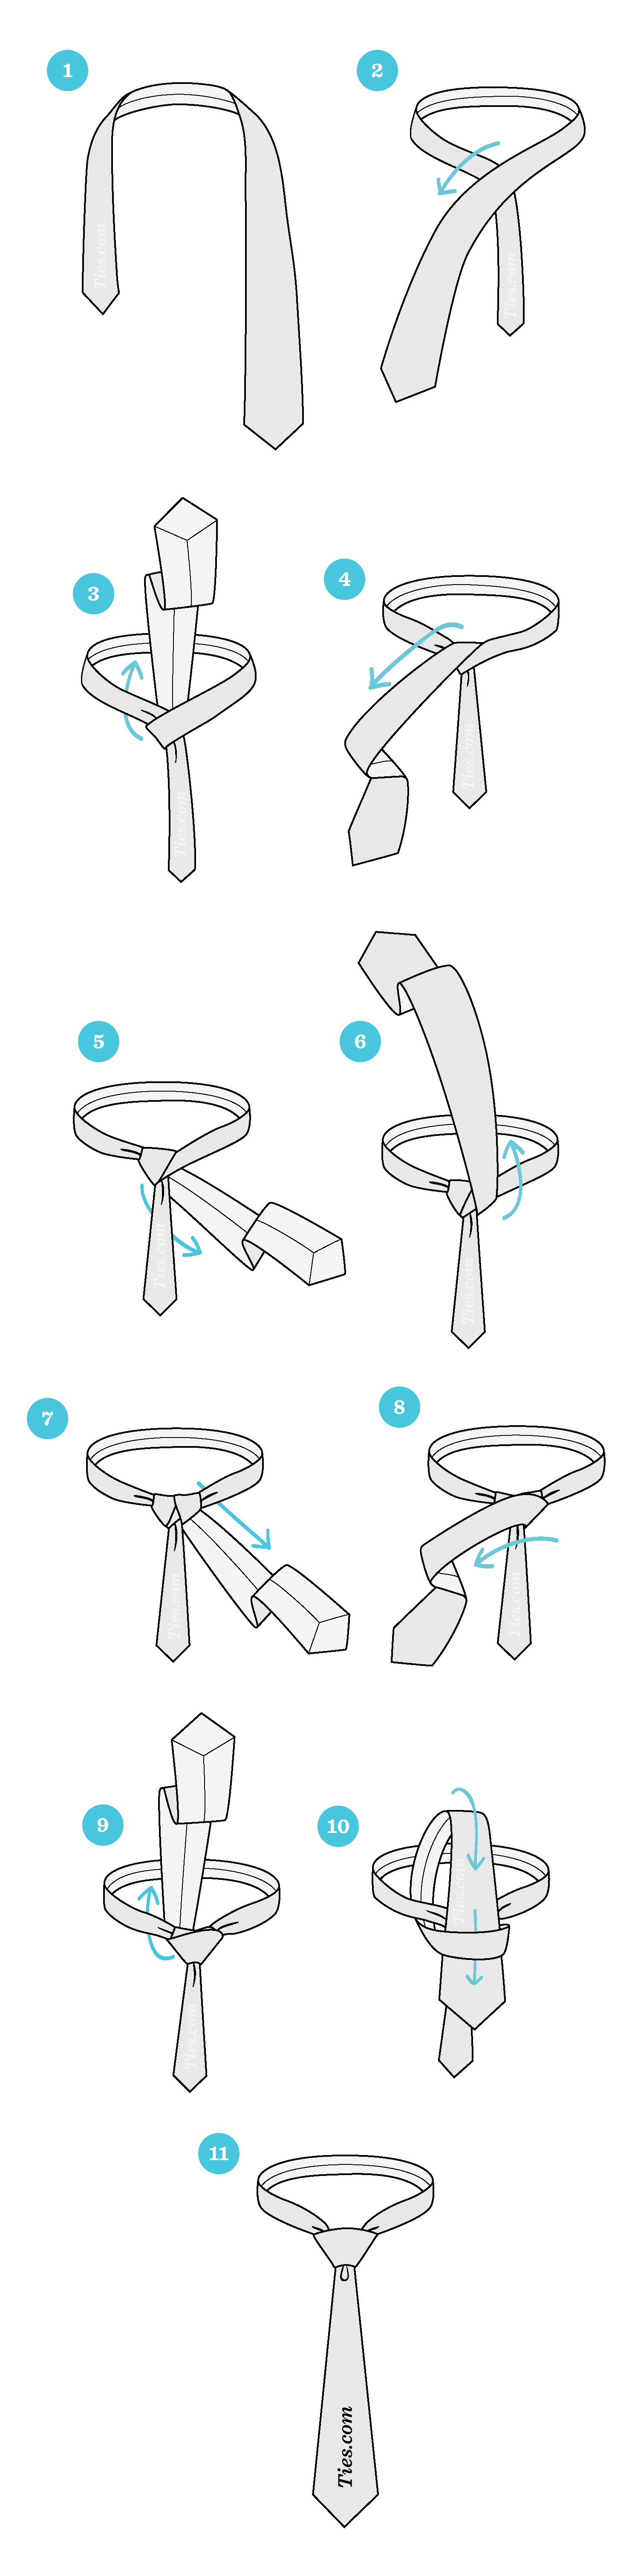
Windsor Knot Step-by-Step Guide

STEP 1
Start with the wide end of the tie on the right and the small end on the left. The tip of the small end should
rest slightly above your belly-button (this will vary depending on your height and the length & thickness of your
tie). Only move the active (wide) end.
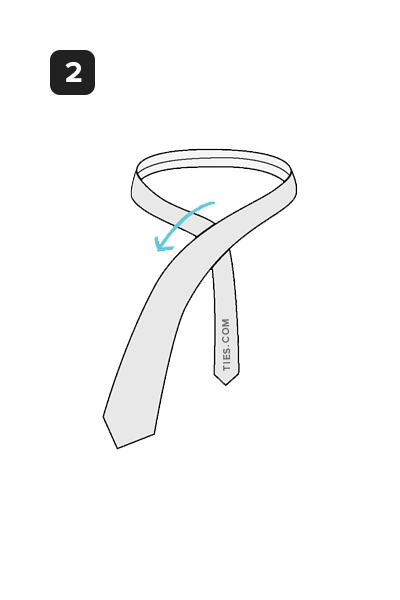
STEP 2
Wide end over the small end to the left.
STEP 3
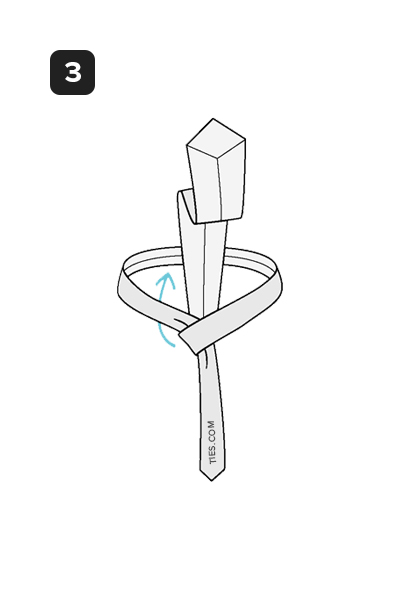
Up into the neck loop from underneath.
STEP 4
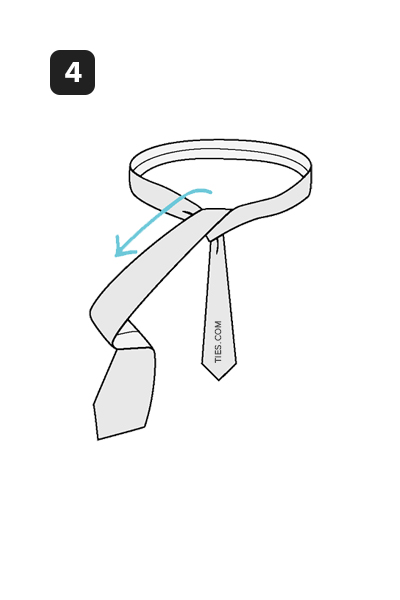
Down to the left.
STEP 5
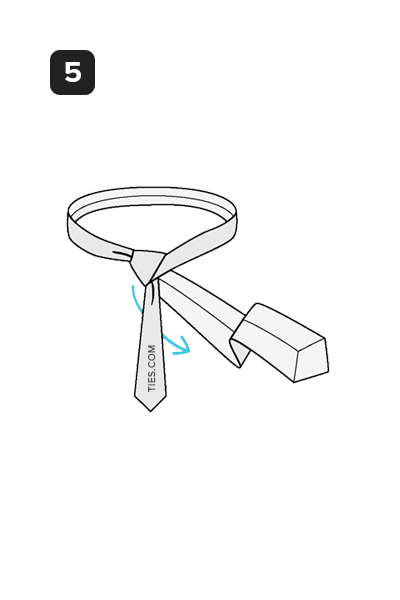
Around the back of the small end to the right.
STEP 6
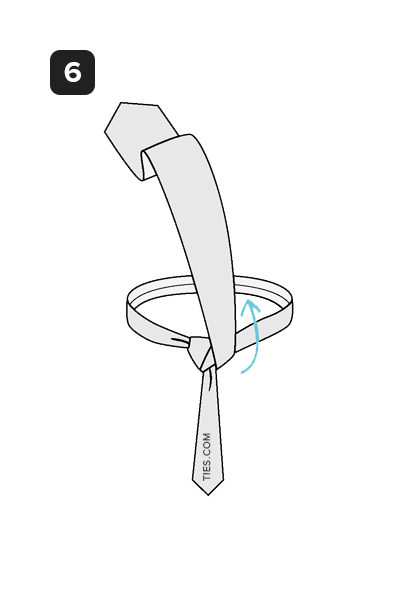
Up to the center, towards neck loop.
STEP 7
Through the neck loop and down to the right.
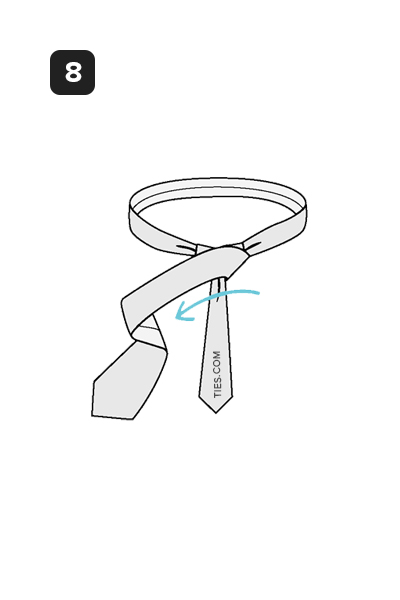
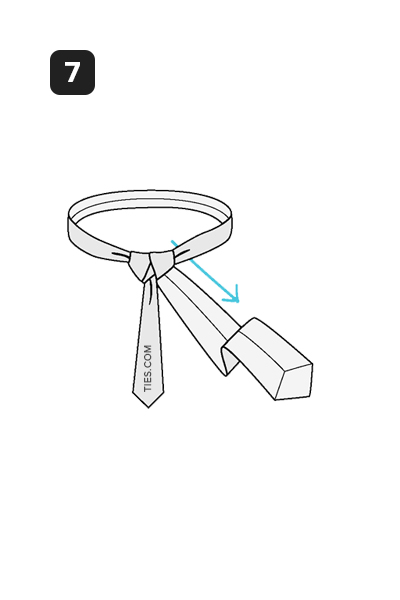
STEP 8
Across the front to the left.
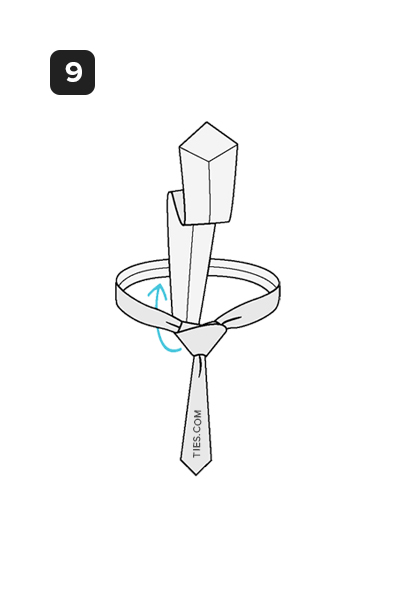
STEP 9
Up into the neck loop from underneath.


windsor
-knot-step-by-step-11.jpg" alt="Step 11" />
STEP 11
Tighten the knot by pulling down on the wide end. Slide the knot up & adjust.


 windsor-knot.jpg" class="knot-thumb" alt="30% Sitewide | Use Code: EASY30
Windsor Knot">
windsor-knot.jpg" class="knot-thumb" alt="30% Sitewide | Use Code: EASY30
Windsor Knot">


 eldredge-knot.jpg" class="knot-thumb" alt="Eldredge Knot">


 Shop All Neckties
 Best - Sellers


