
How to Tie a Bow TieBow Tie
About the Bow TieBow Tie
The bow tie is a descendant of the knotted cravat. It was born from the need for neckwear that was easier to wear
than the cravat and that would last throughout a more active day. By the end of the 19th century, the butterfly and
batwing bow tie were commonplace. Black bow ties were worn with dinner jackets and white bow ties with evening tails.
Today bow ties are mainly worn on formal occasions, however, in the past decade bow ties for everyday wear have seen
a rise in popularity. A bow tie is perfect for any man who likes to stand out among his peers.
Bow Tie Tying Instructions


 -instructions-03.png" class="instructions-img sm" alt="Step 3">
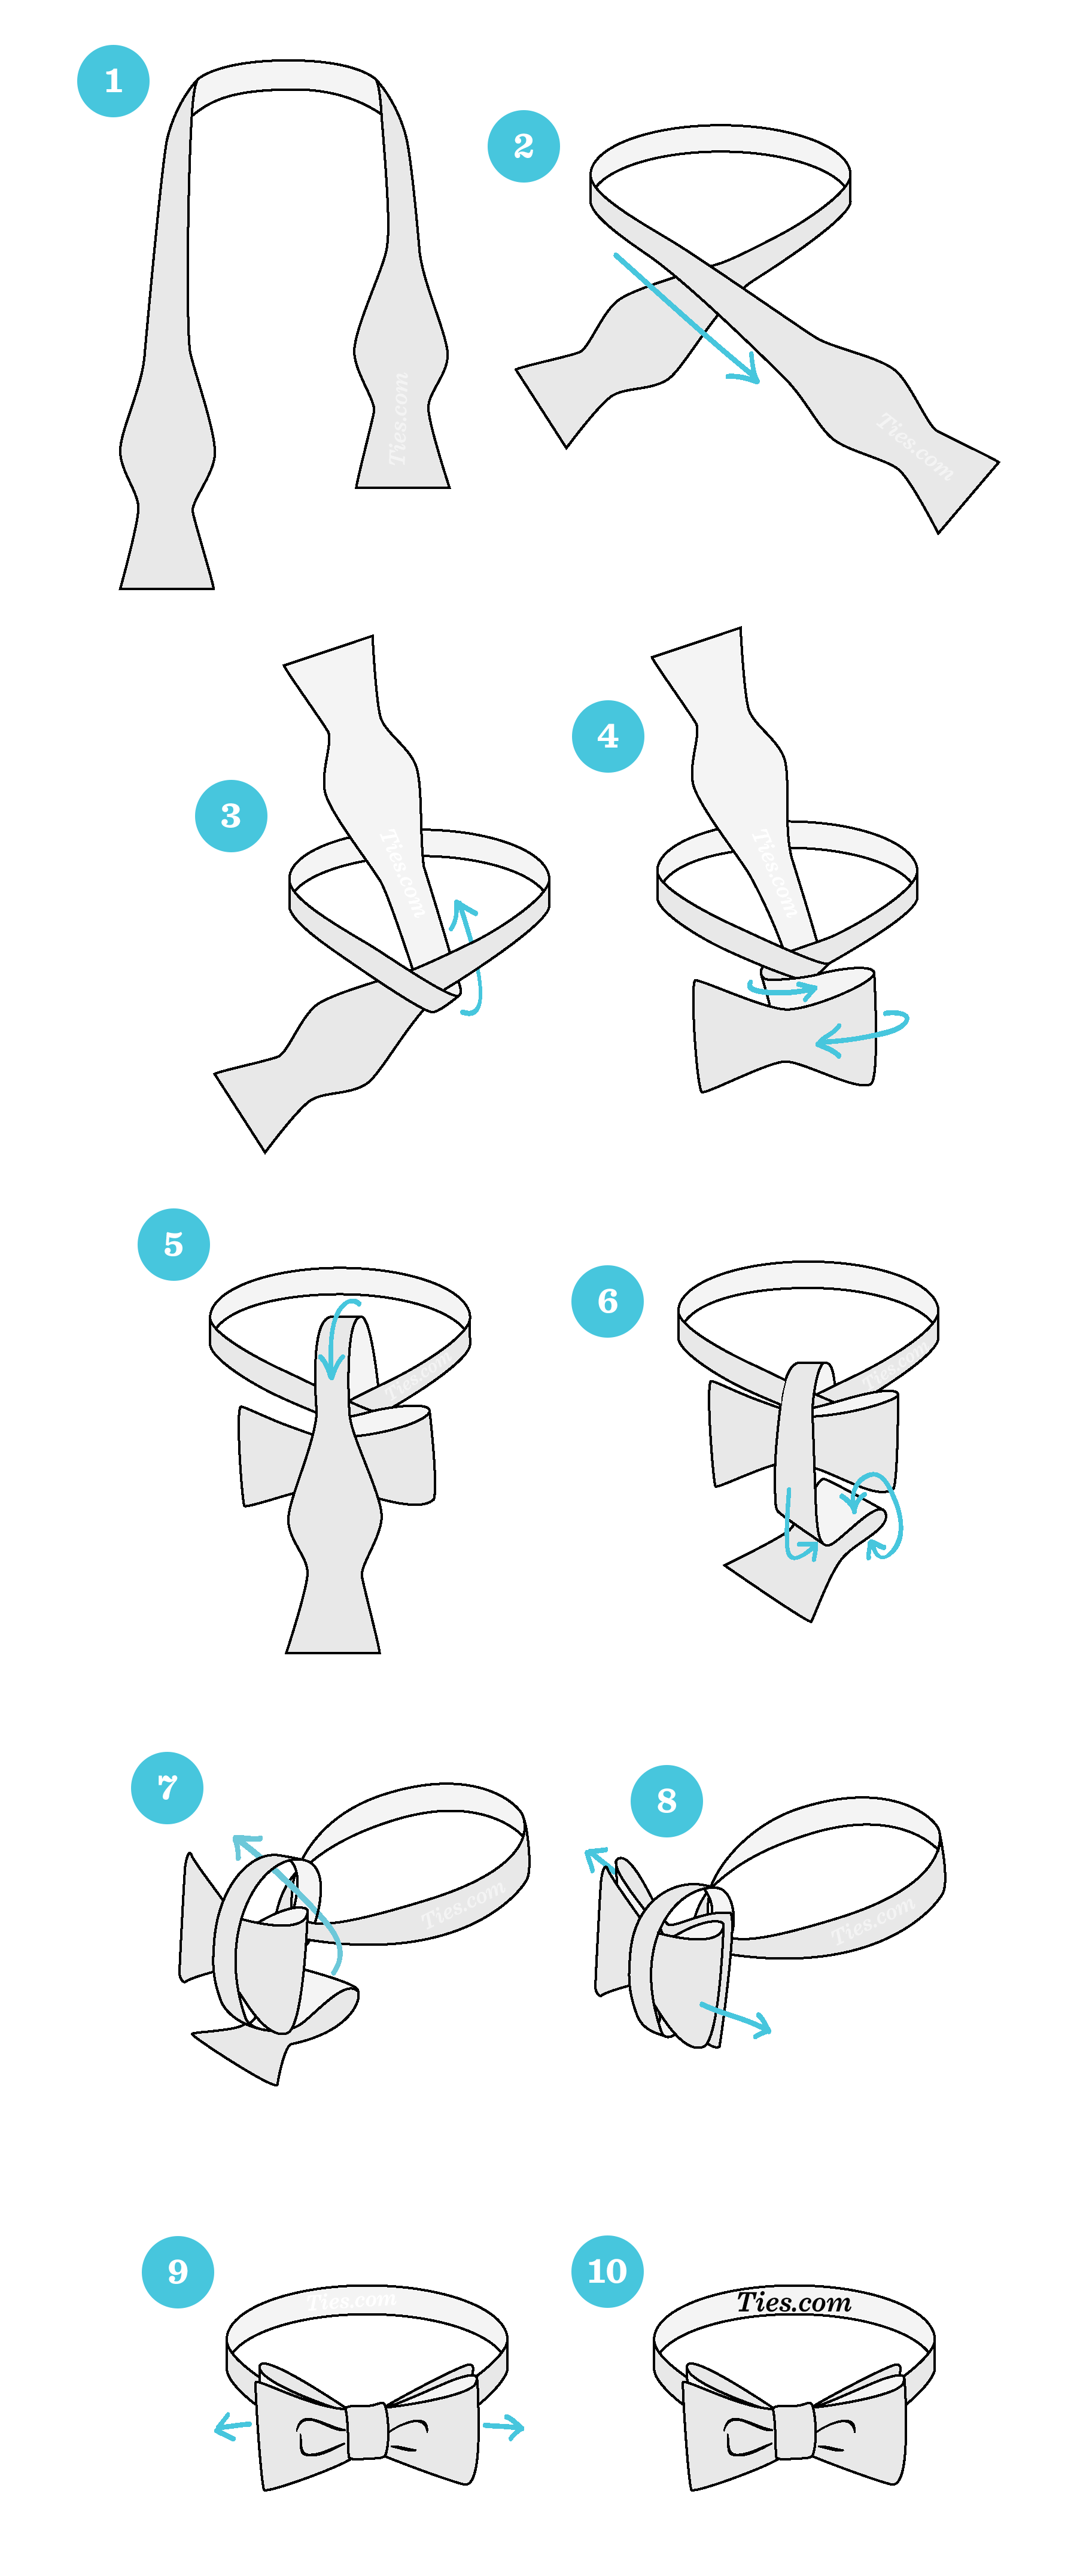
Bow TieBow Tie Step-by-Step Guide
Step-by-Step Guide


STEP " />
STEP 11
Start with the bowtie lying face up. Adjust the bowtie so right side is shorter than the left. The end on the
left will be referred to as A and the end on the right will be referred to as B.


STEP 2" />
STEP 2
2
Move A to the right side, across B.
Move A to the right side, across B.


STEP 3" />
STEP 3
3
Bring A under B and up through the neck loop.Bring A under B and up through the neck loop.


STEP -step-by-step-4
At the joint, fold B towards the right and then towards the left to create a the bow shape.
4.jpg" alt="Step
STEP 5" class="step">
 At the joint, fold B towards the right and then towards the left to create a the bow shape.
Bow TieBow Tie Step-by-Step Guide
Step-by-Step Guide
STEP " />
STEP 11
Start with the bowtie lying face up. Adjust the bowtie so right side is shorter than the left. The end on the
left will be referred to as A and the end on the right will be referred to as B.
STEP 2" />
STEP 2
2
Move A to the right side, across B.
STEP 3" />
STEP 3
3
Bring A under B and up through the neck loop.Bring A under B and up through the neck loop.
STEP -step-by-step-4
At the joint, fold B towards the right and then towards the left to create a the bow shape.
STEP 5" class="step">
At the joint, fold B towards the right and then towards the left to create a the bow shape.

STEP -step-by-step-05
Bring A straight down over the middle of the bow shape that was made with B.
STEP 6" class="step">
 Bring A straight down over the middle of the bow shape that was made with B.

STEP -step-by-step-6
0Fold A back towards the chest and pinch the fold.


