
How to Tie the Windsor Knot
About the Windsor Knot
Although the Duke of Windsor never specifically used the Windsor knot, he did favor a wide triangular knot. In actuality,
the Duke achieved his trendsetting look by tying a Four-in-Hand with specially made wide and extra thick ties. The Windsor
knot was invented by the public as a way to imitate the Duke's knot style. There are several derivatives of the Windsor
that are all referred to by the same name. The Windsor delivers a symmetrical and solid triangular knot that works best
with a spread collar.
This knot is also mistakenly referred to as the “Double Windsor” knot.
The Windsor Knot Tying Instructions
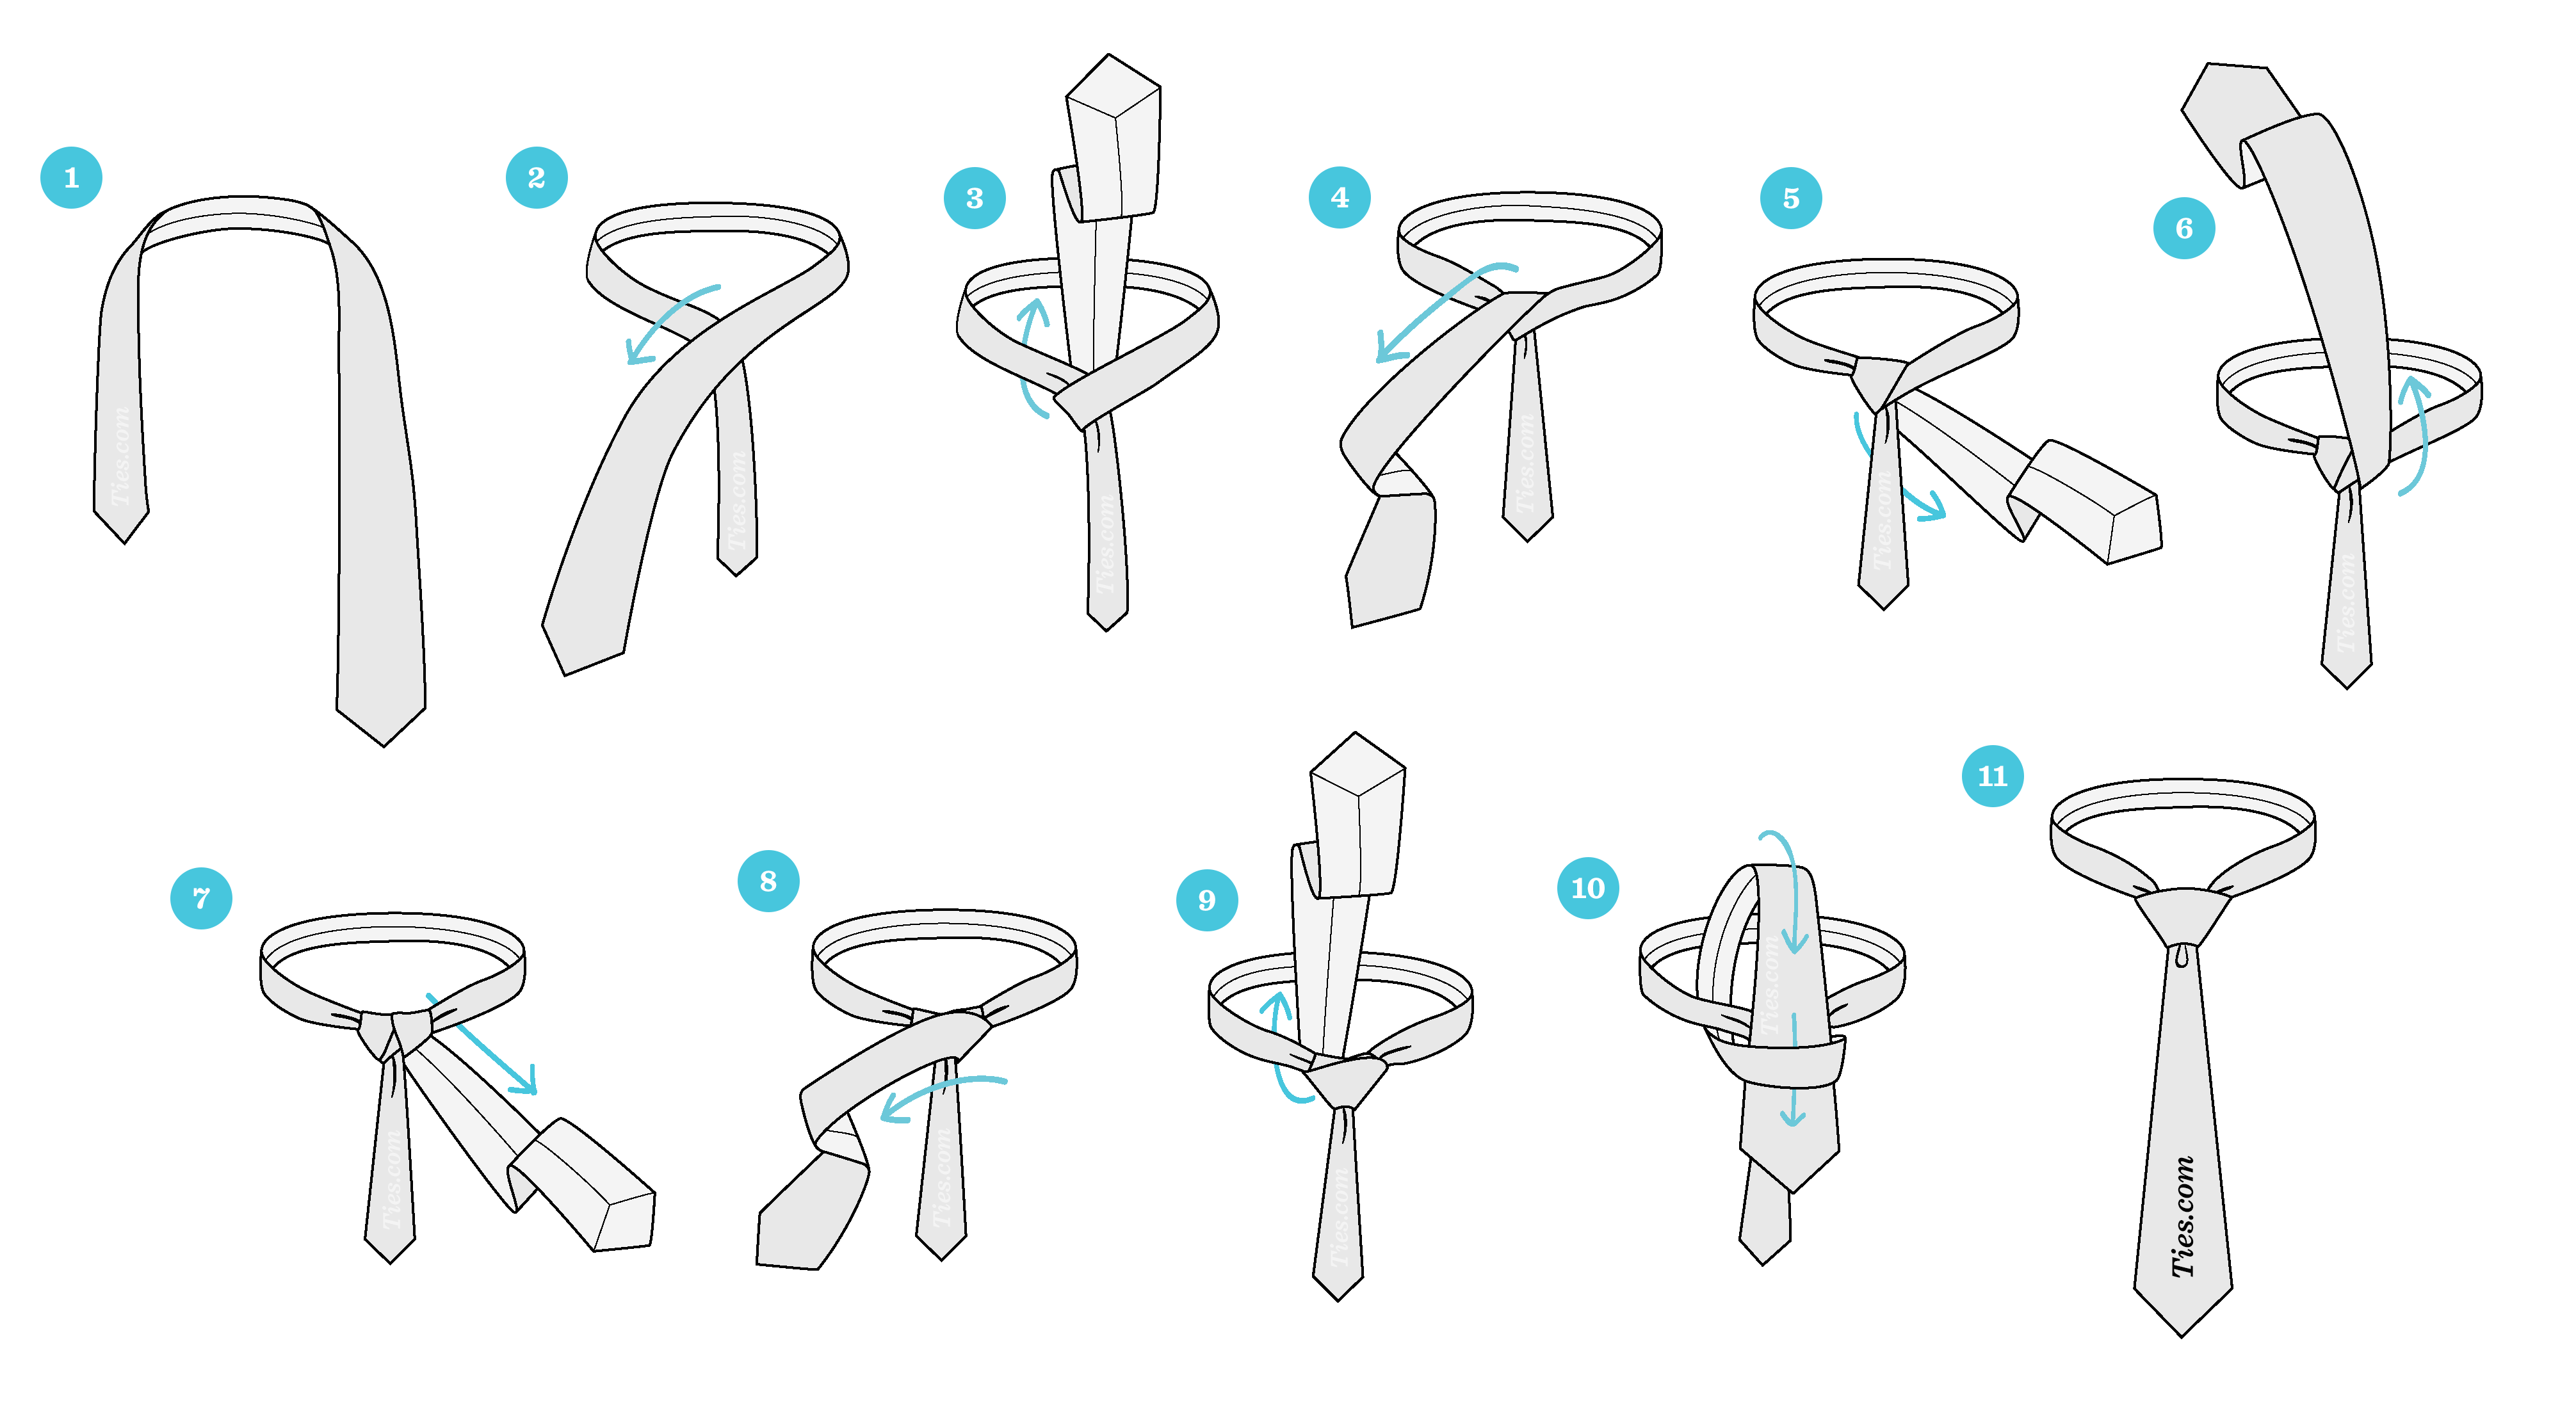
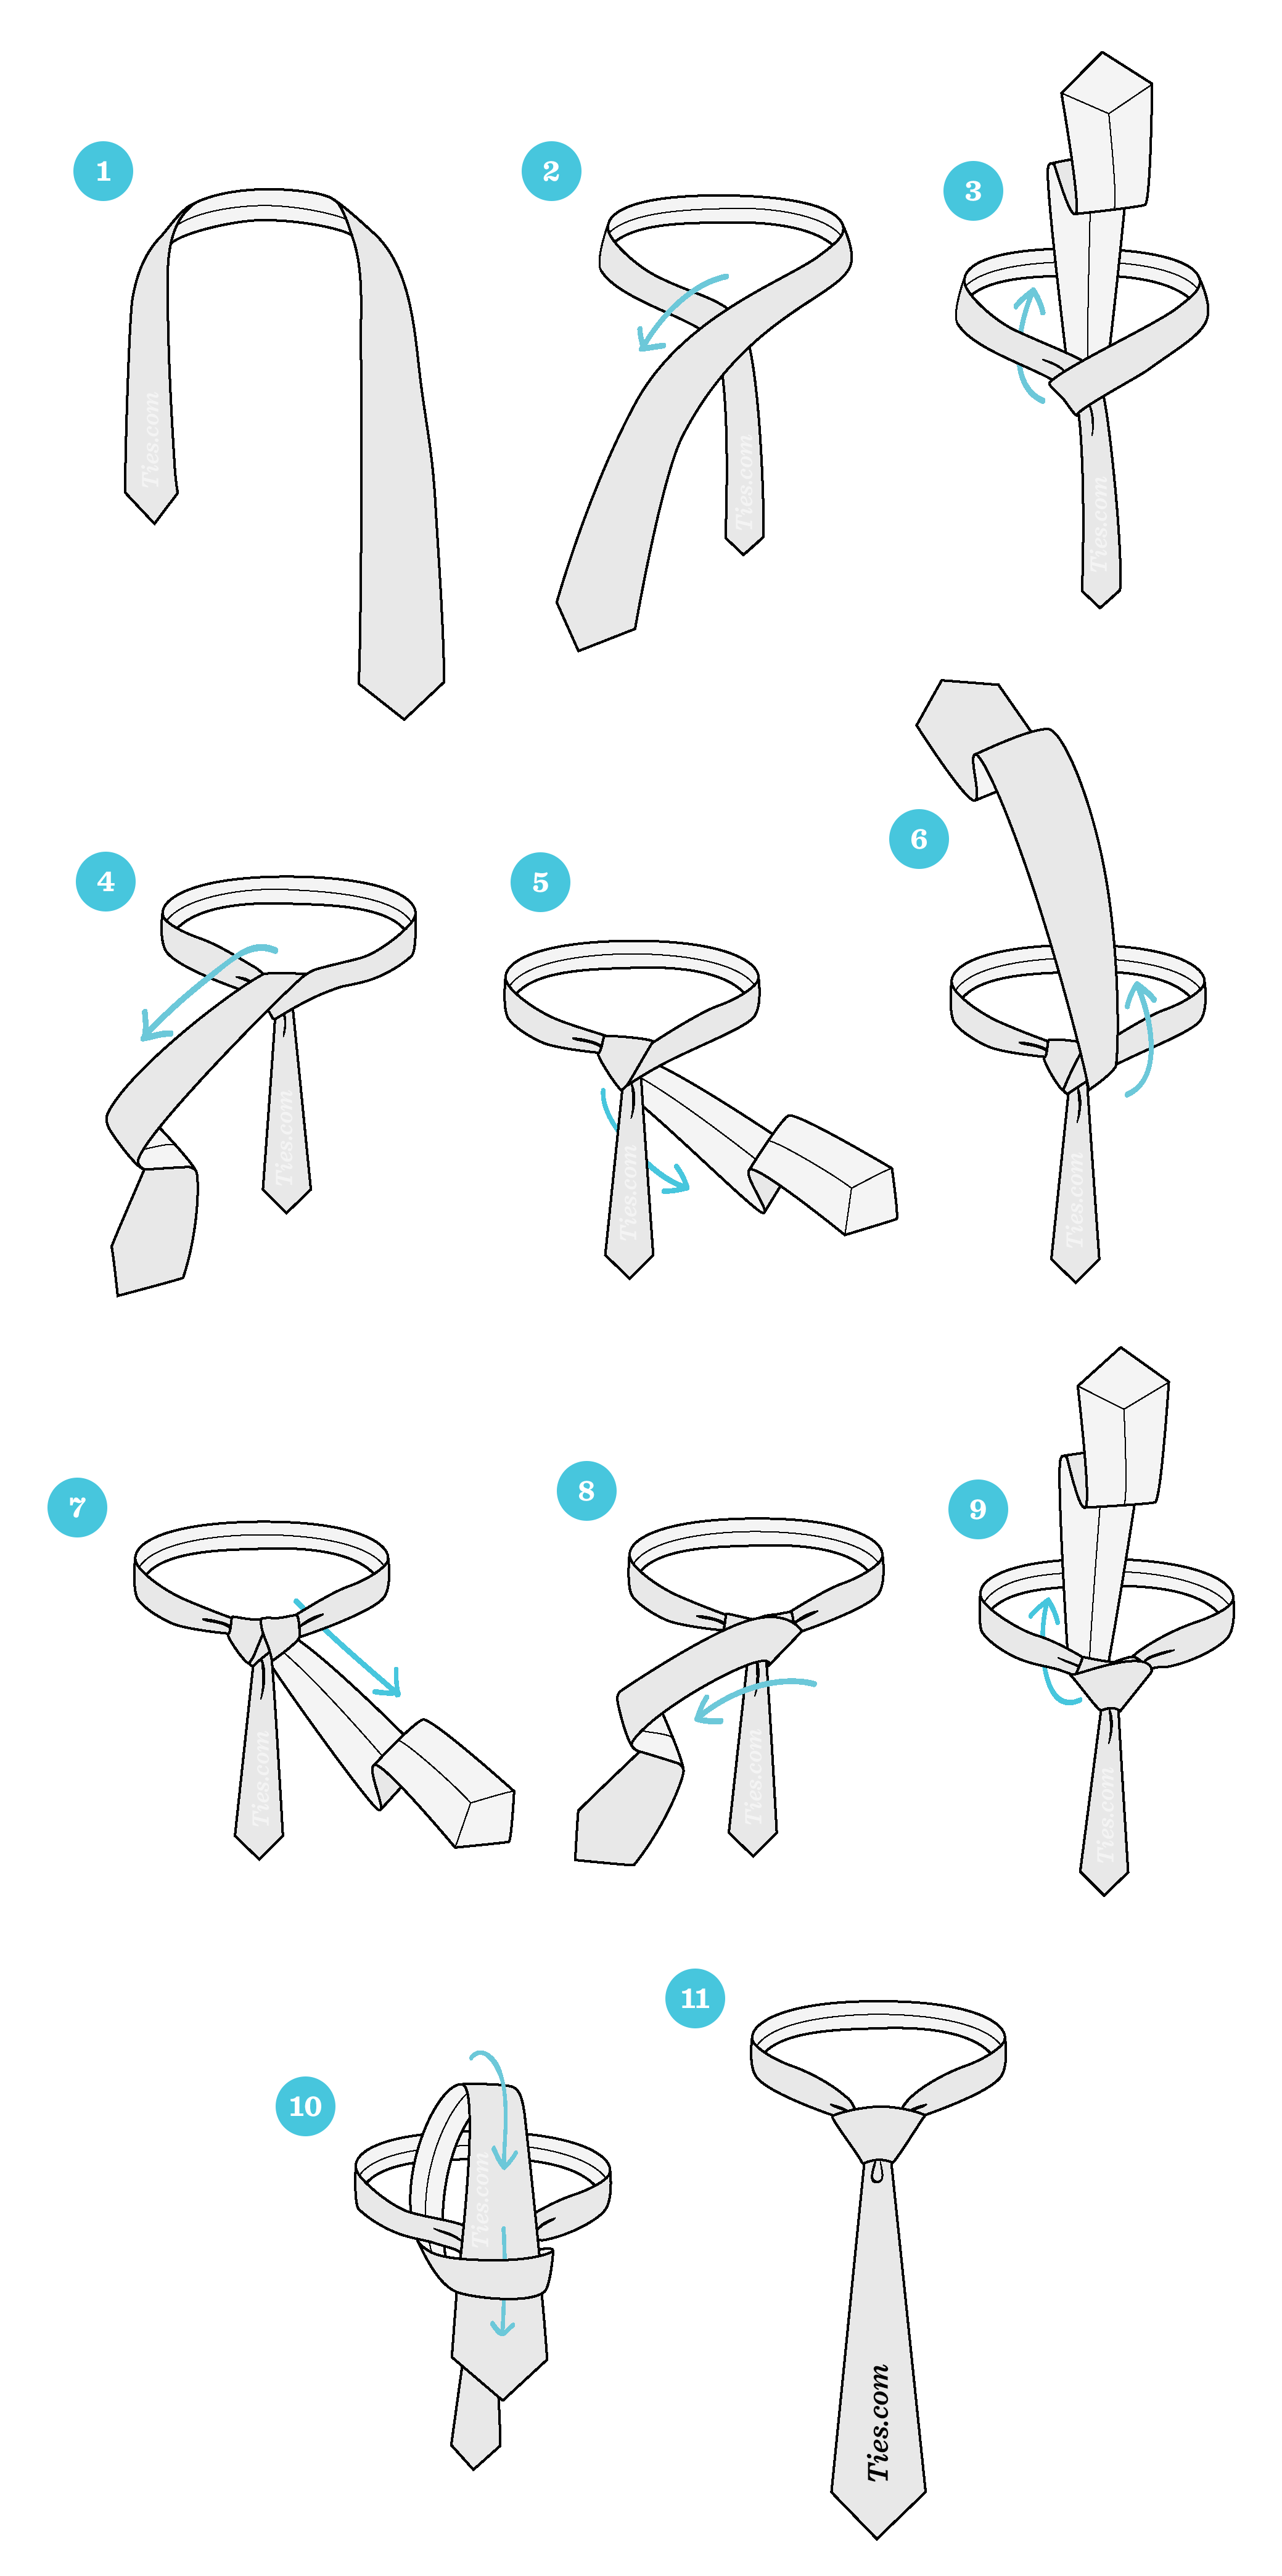
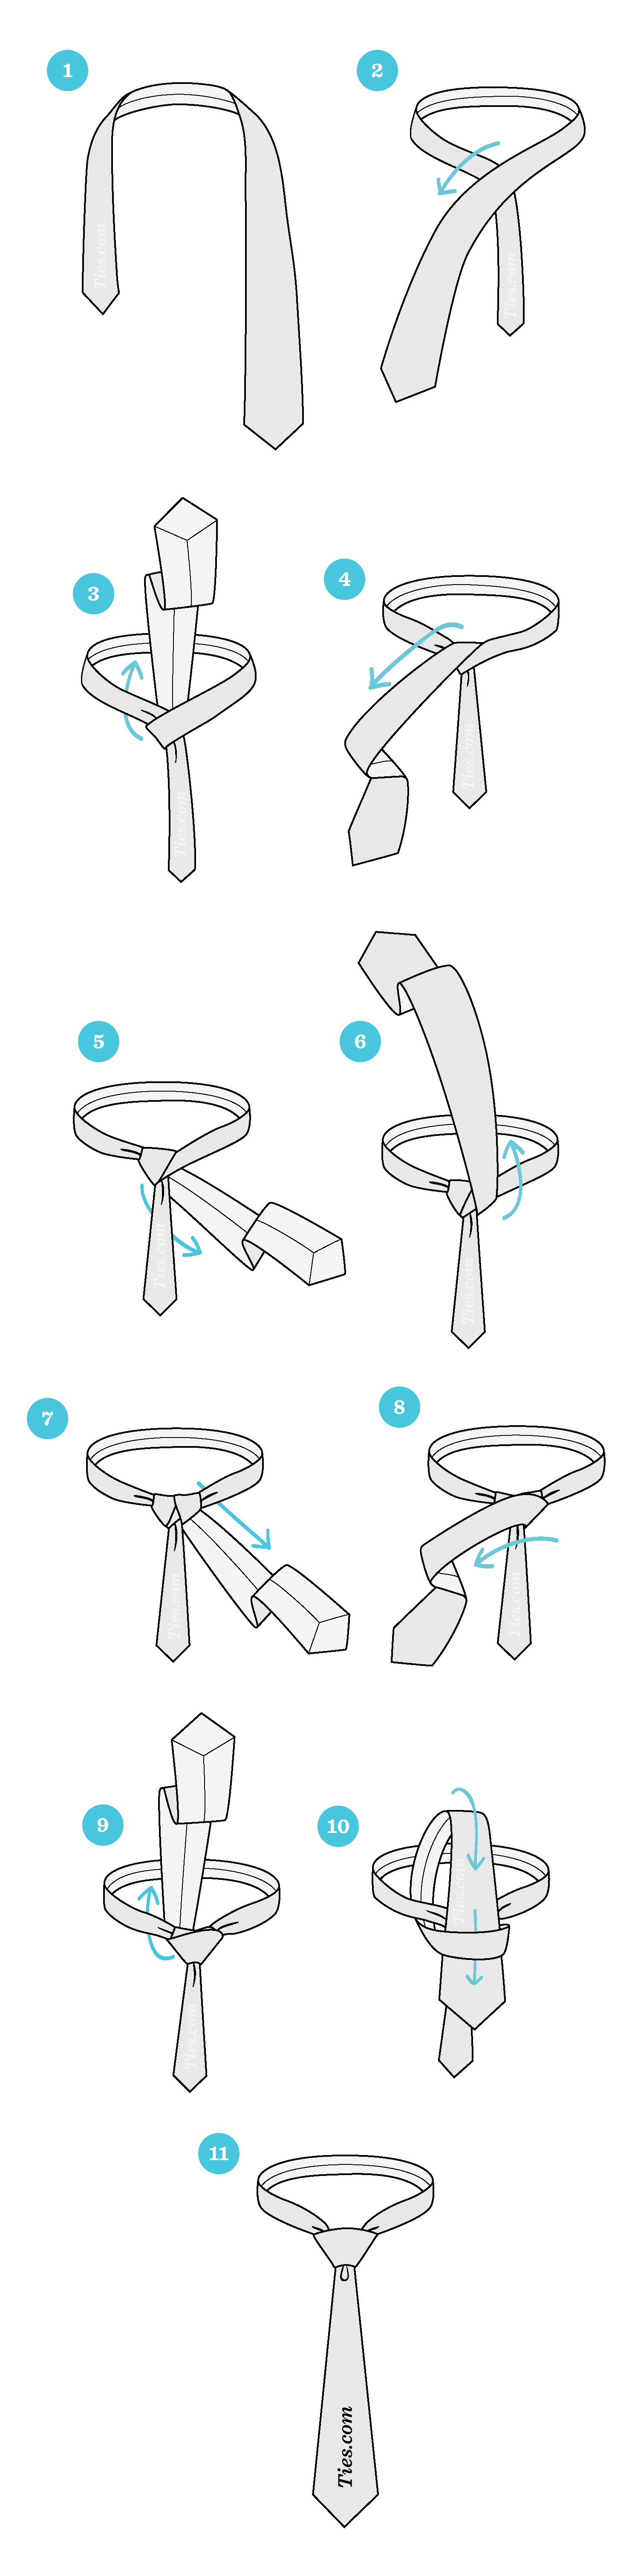
Windsor Knot Step-by-Step Guide

STEP 1
Start with the wide end of the tie on the right and the small end on the left. The tip of the small end should
rest slightly above your belly-button (this will vary depending on your height and the length & thickness of your
tie). Only move the active (wide) end.
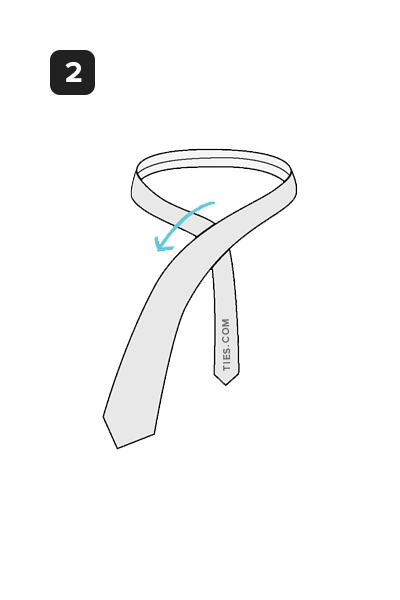
STEP 2
Wide end over the small end to the left.
STEP 3
Up into the neck loop from underneath.
STEP 4
Down to the left.
STEP 5
Around the back of the small end to the right.
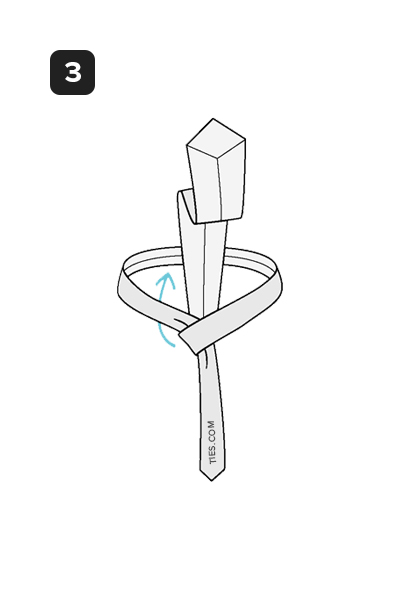
STEP 6
Up to the center, towards neck loop.
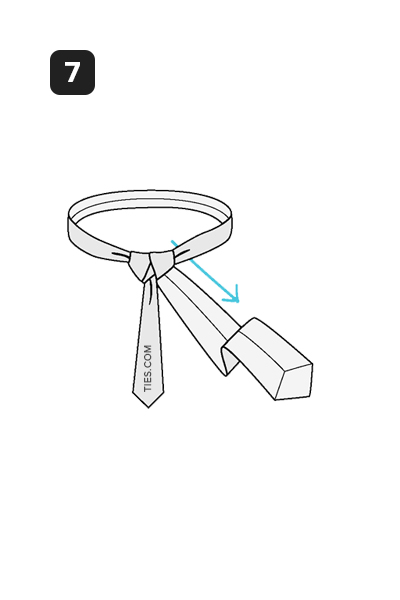
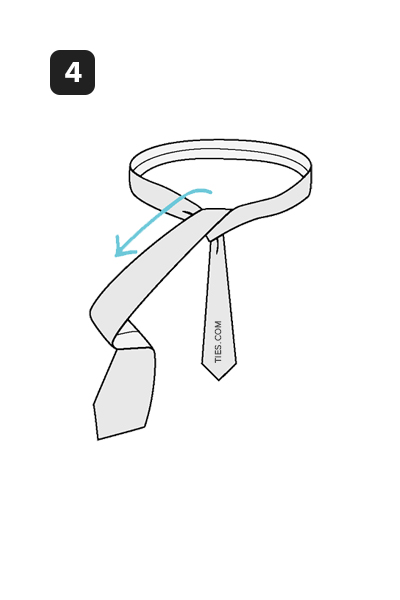
STEP 7
Through the neck loop and down to the right.
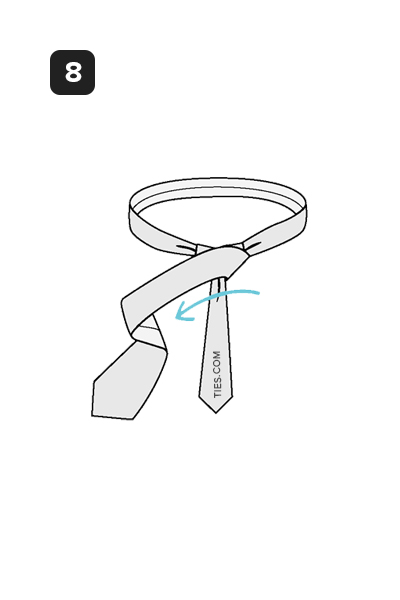
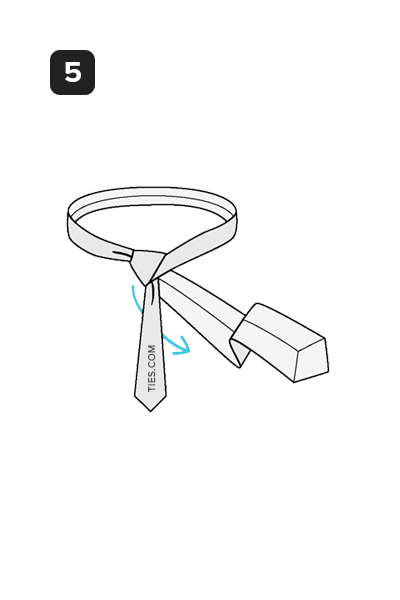
STEP 8
Across the front to the left.
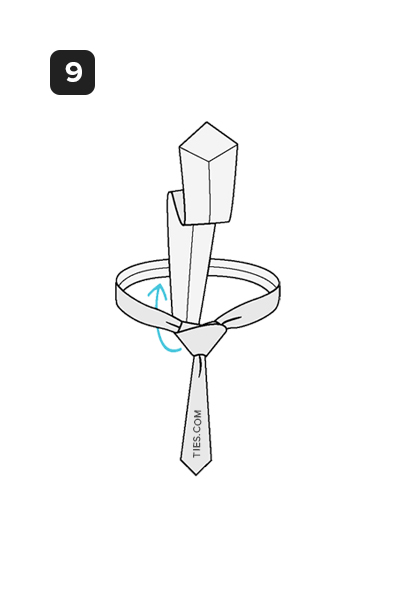
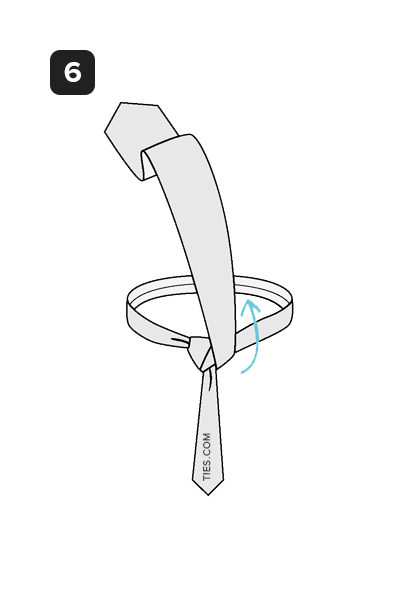
STEP 9
Up into the neck loop from underneath.
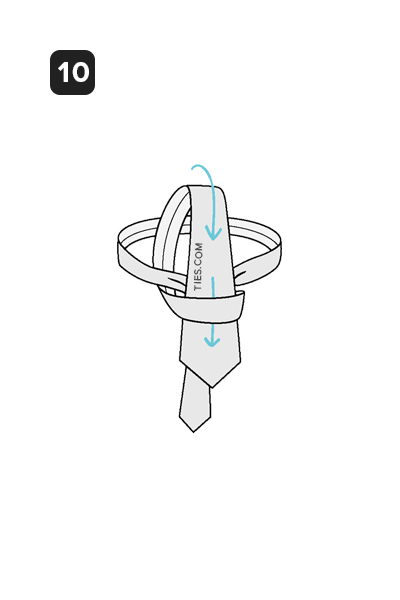
STEP 10
Down through the loop you've just created in the front.
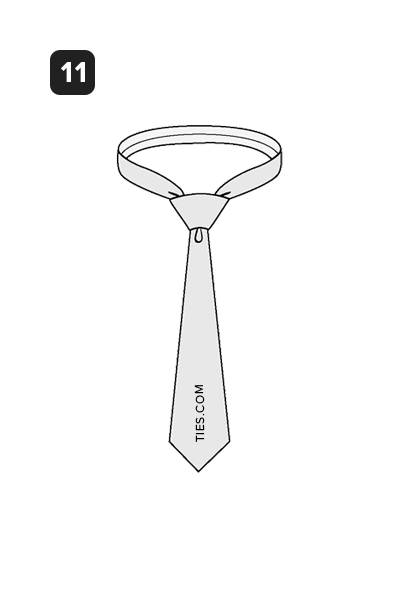
STEP 11
Tighten the knot by pulling down on the wide end. Slide the knot up & adjust.


