
How to Tie the Van Wijk Knot
About the Van Wijk Knot
The incredibly tall and cylindrical Van Wijk knot was invented by artist Lisa van Wijk in an attempt to create
the tallest wearable knot possible. The Van Wijk is an augmentation of the Prince Albert, adding a third turning
of the active end. When tied correctly, this long and slender knot creates a striking and unmistakable helical effect.
The Van Wijk Knot Tying Instructions
Van Wijk Knot Step-by-Step Guide
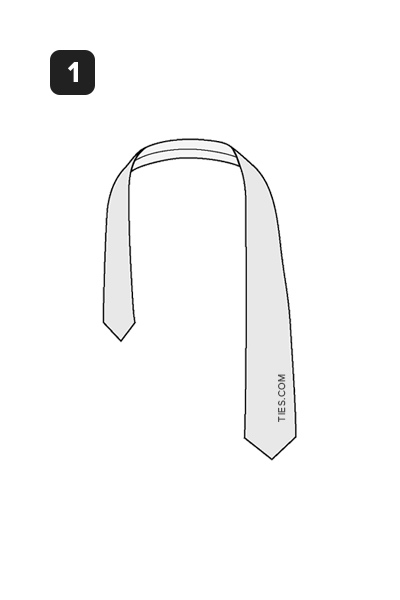
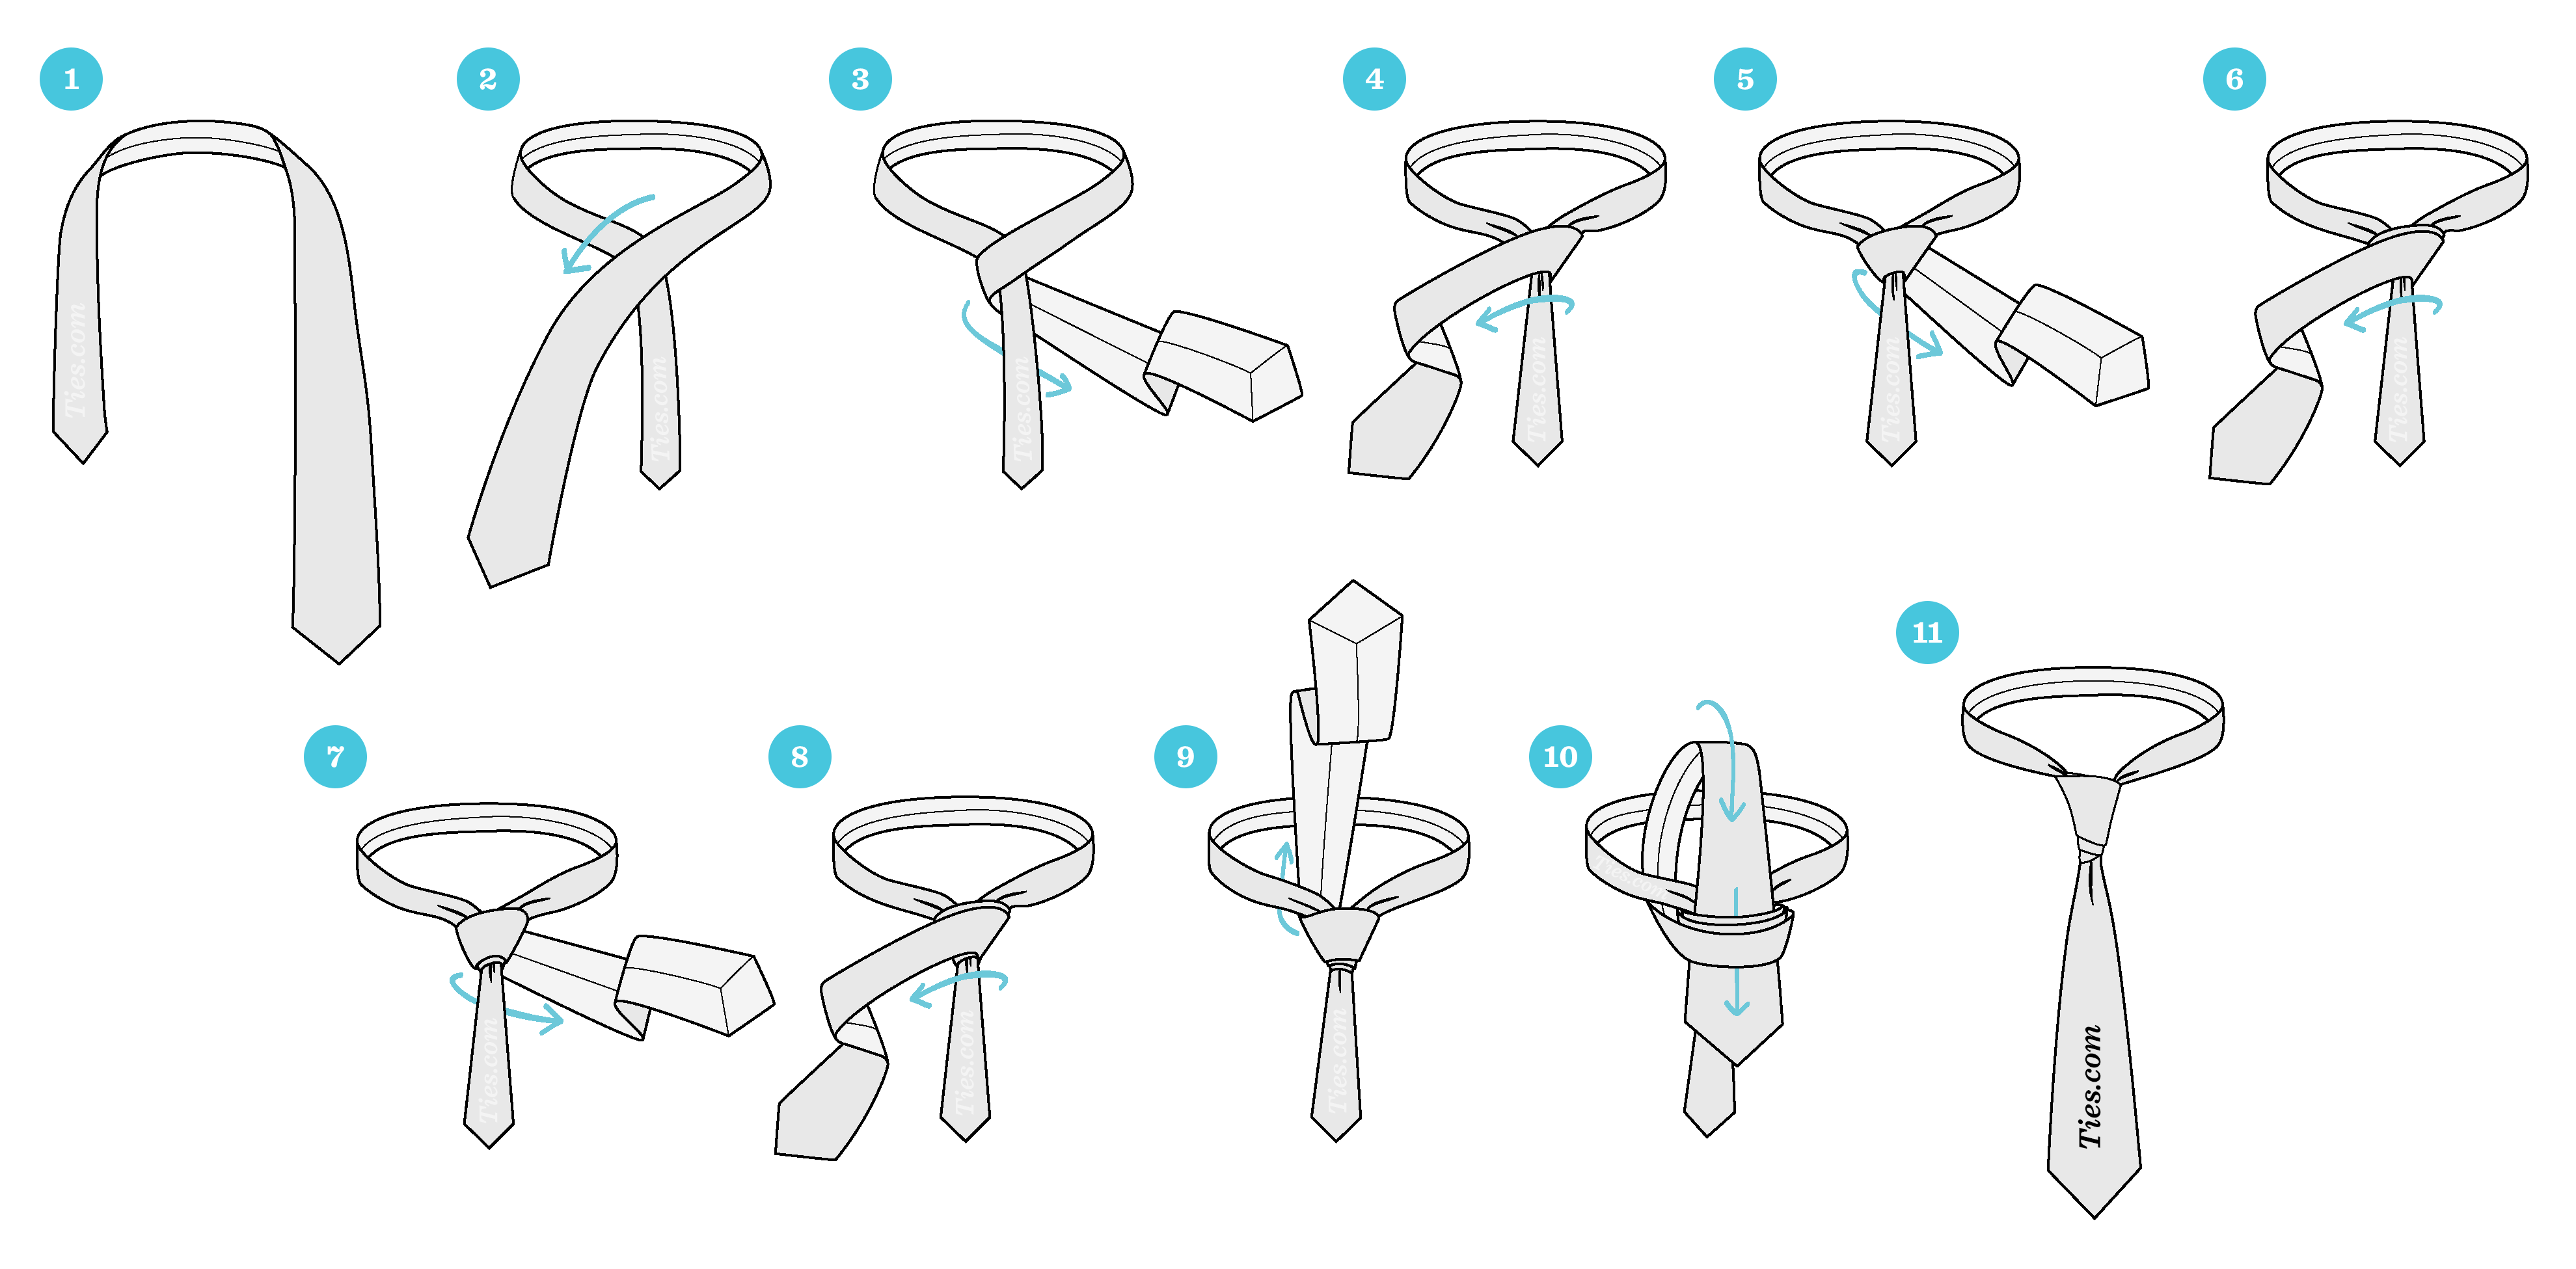
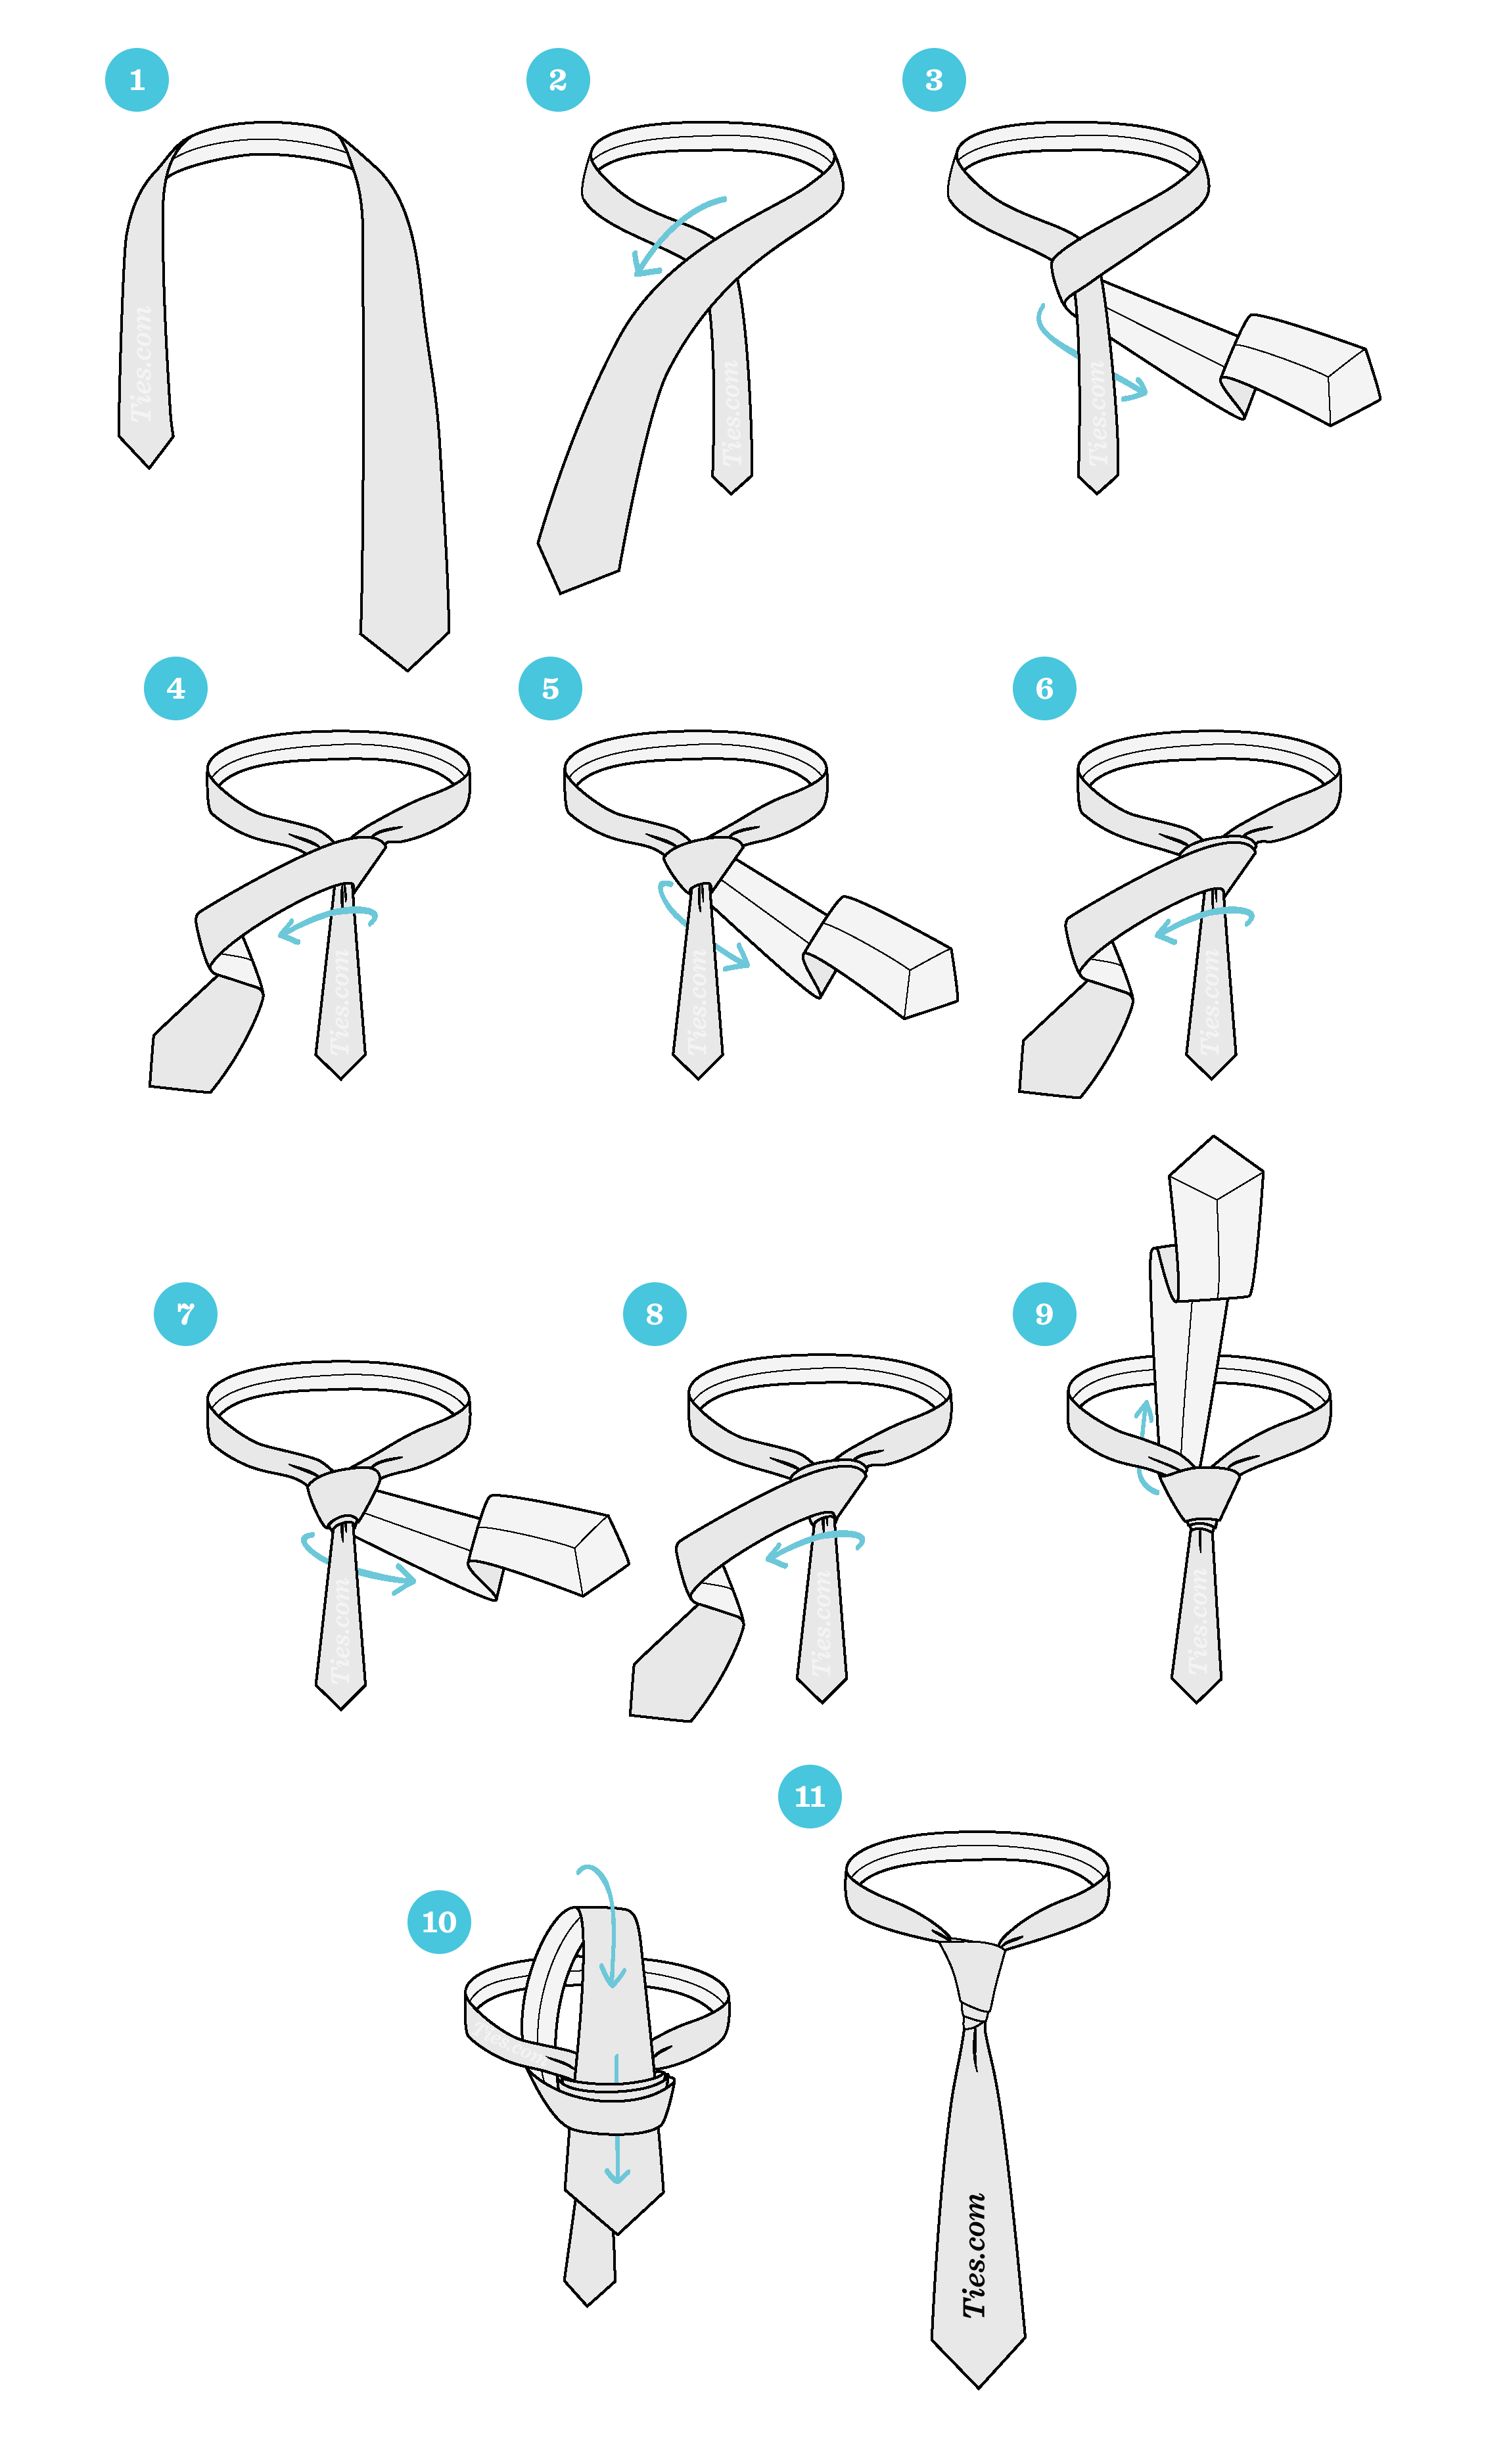
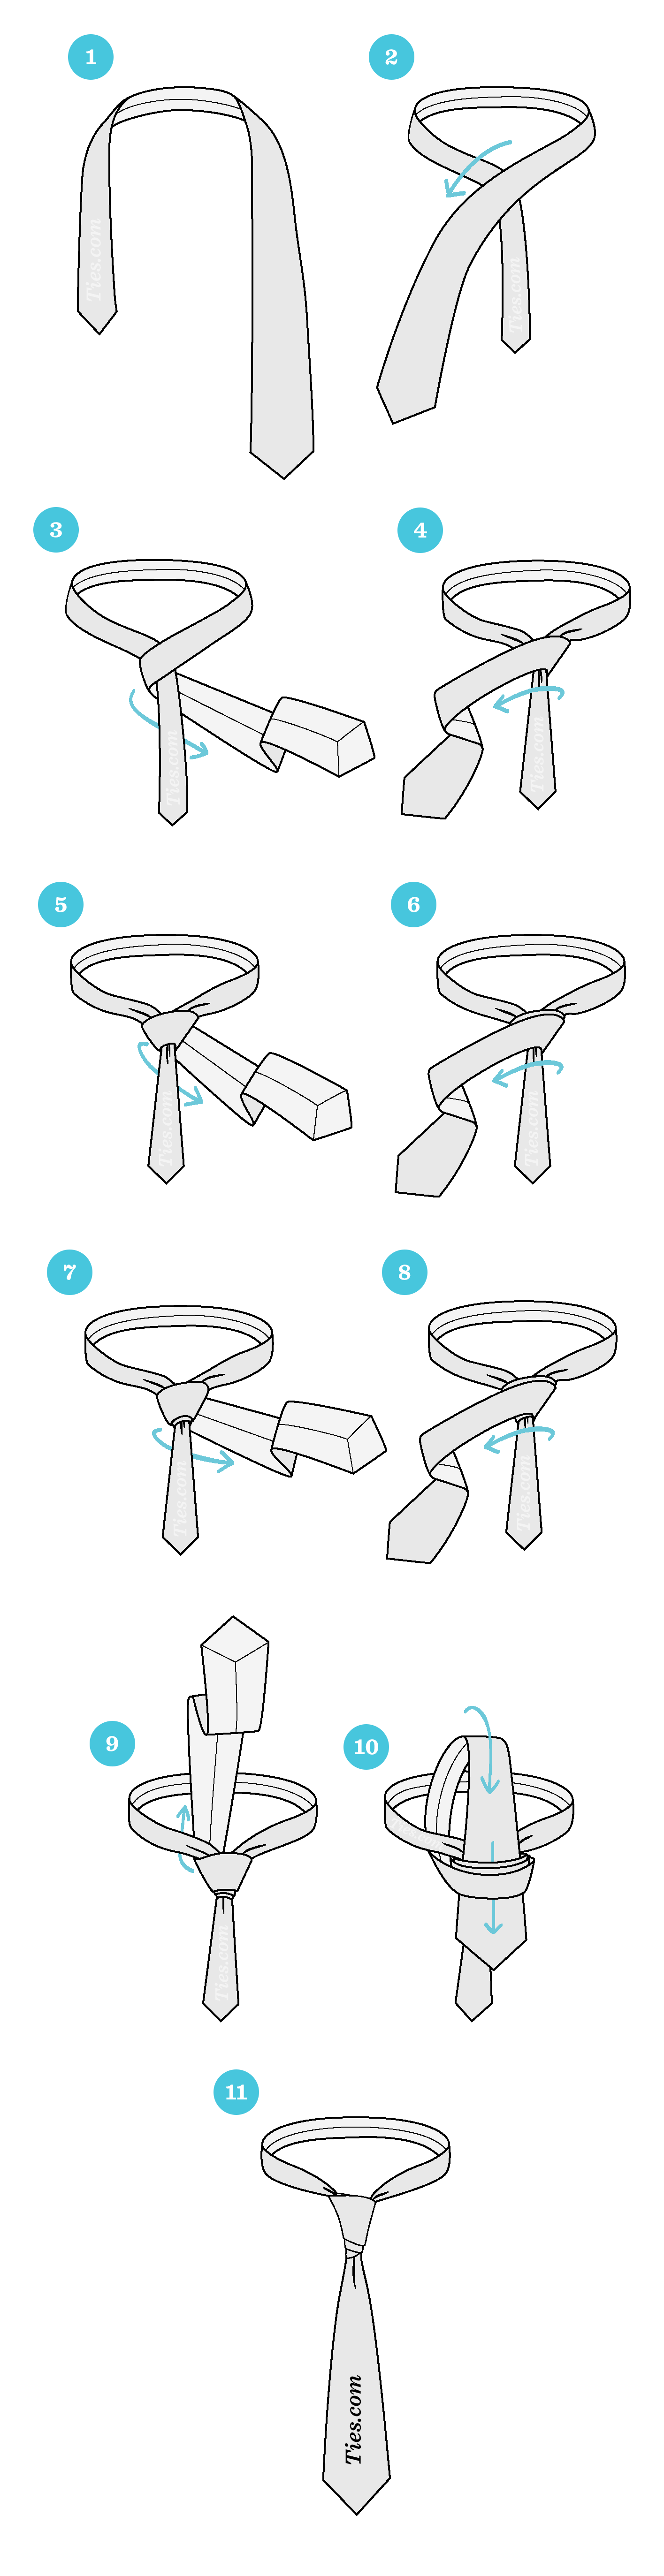
STEP 1
Start with the wide end of the tie on the right and the small end on the left. The tip of the small end should
rest slightly above your belly-button (this will vary depending on your height and the length & thickness of your
tie). Only move the active (wide) end.
STEP 2
Wide end over the small end to the left.
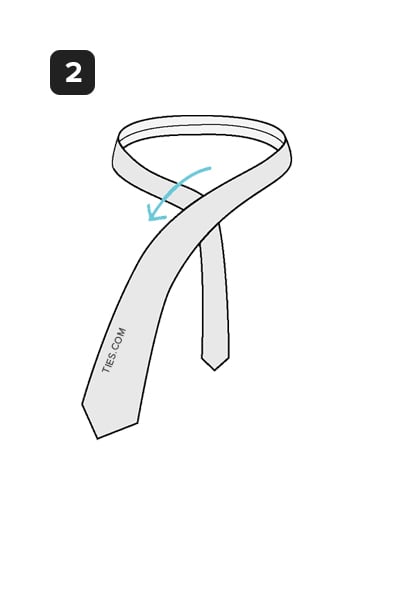
STEP 3
Under the small end and to the right.
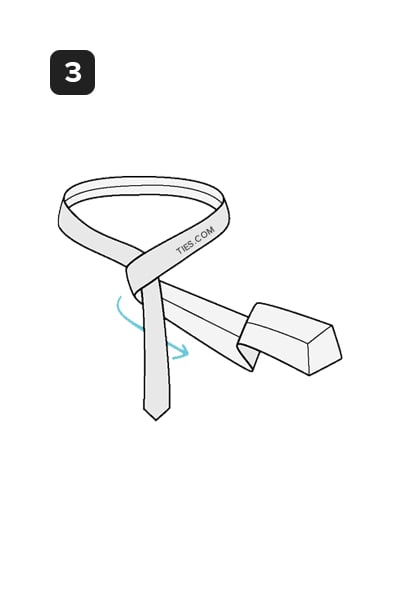
STEP 4
Across the front and to the left.
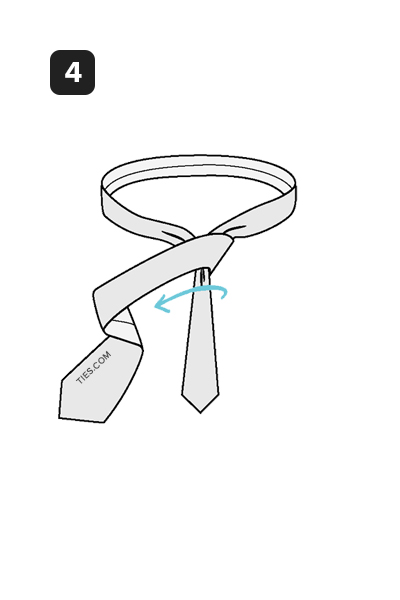
STEP 5
Under the small end and to the right.
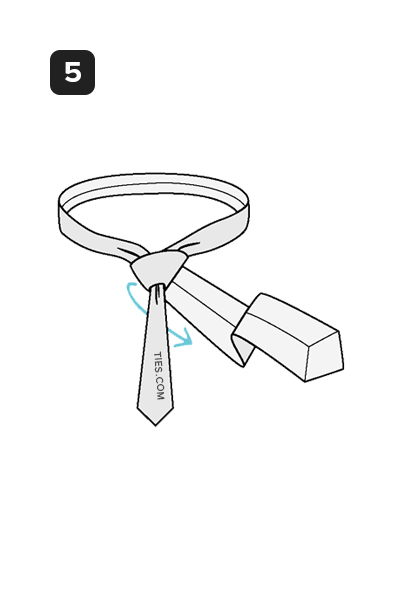
STEP 6
Across the front and to the left.
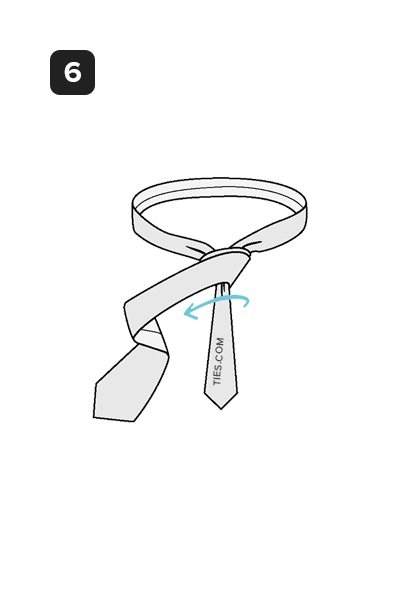
STEP 7
Under the small end and to the right.
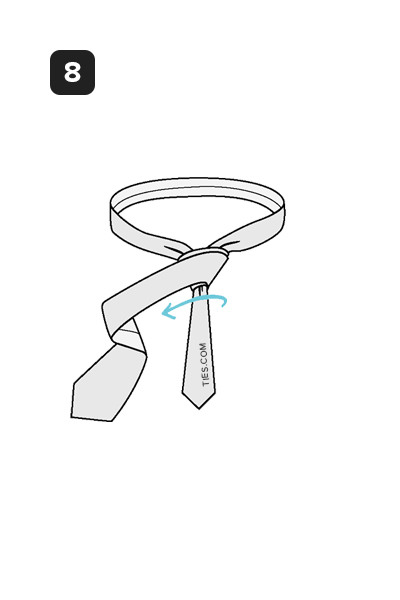
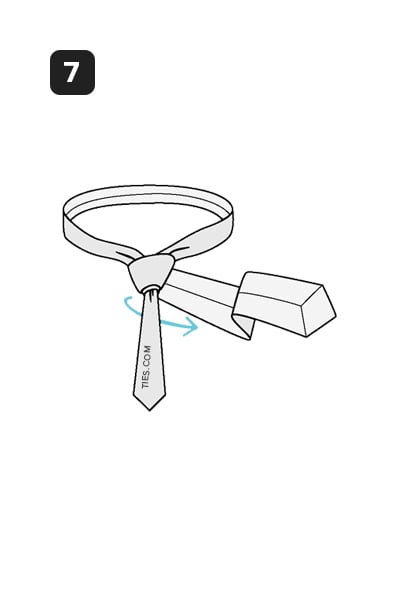
STEP 8
Across the front and to the left.
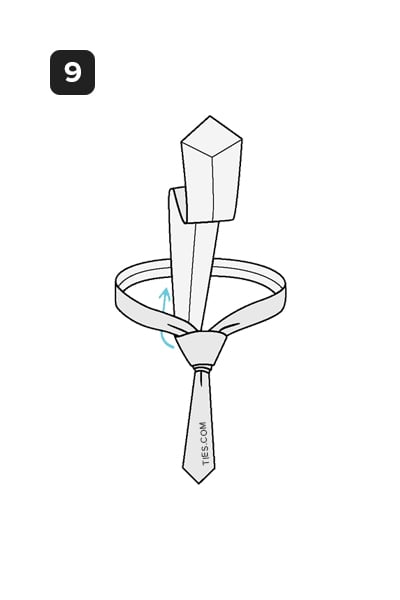
STEP 9
Up into the neck loop from underneath.
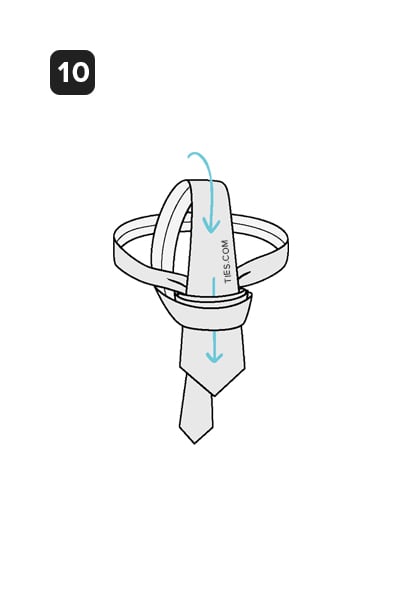
STEP 10
Down through all three loops in the front.
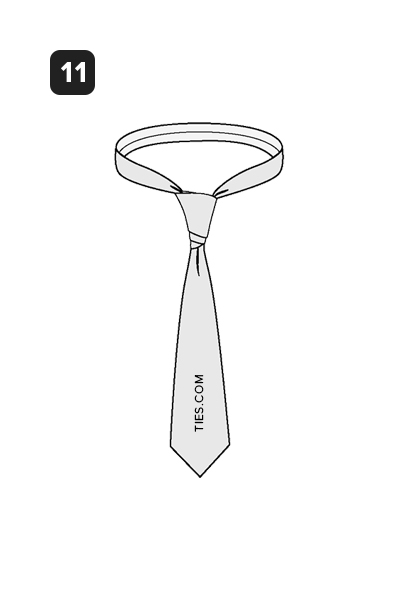
STEP 11
Tighten the knot by pulling down on the wide end. Slide the knot up & adjust. The first and second loop should
show slightly underneath the third loop.


