















How to Tie the Eldredge Knot
About the Eldredge Knot
The Eldridge is a unorthodox, complex & eye-catching necktie knot that involves 15 separate steps. It was invented
by Jeffrey Eldredge in 2007 and achieved internet fame in 2008. As opposed to the vast majority of tie knots, the
Eldredge knot is produced by using the small end as the active end. When completed, the remaining small end is hidden
behind the shirt collar. The knot is large (larger than the Windsor) and creates a tapered fishtail braid-like effect.
Not for the faint of heart, this knot must be worn with caution.
The Eldredge Knot Tying Instructions
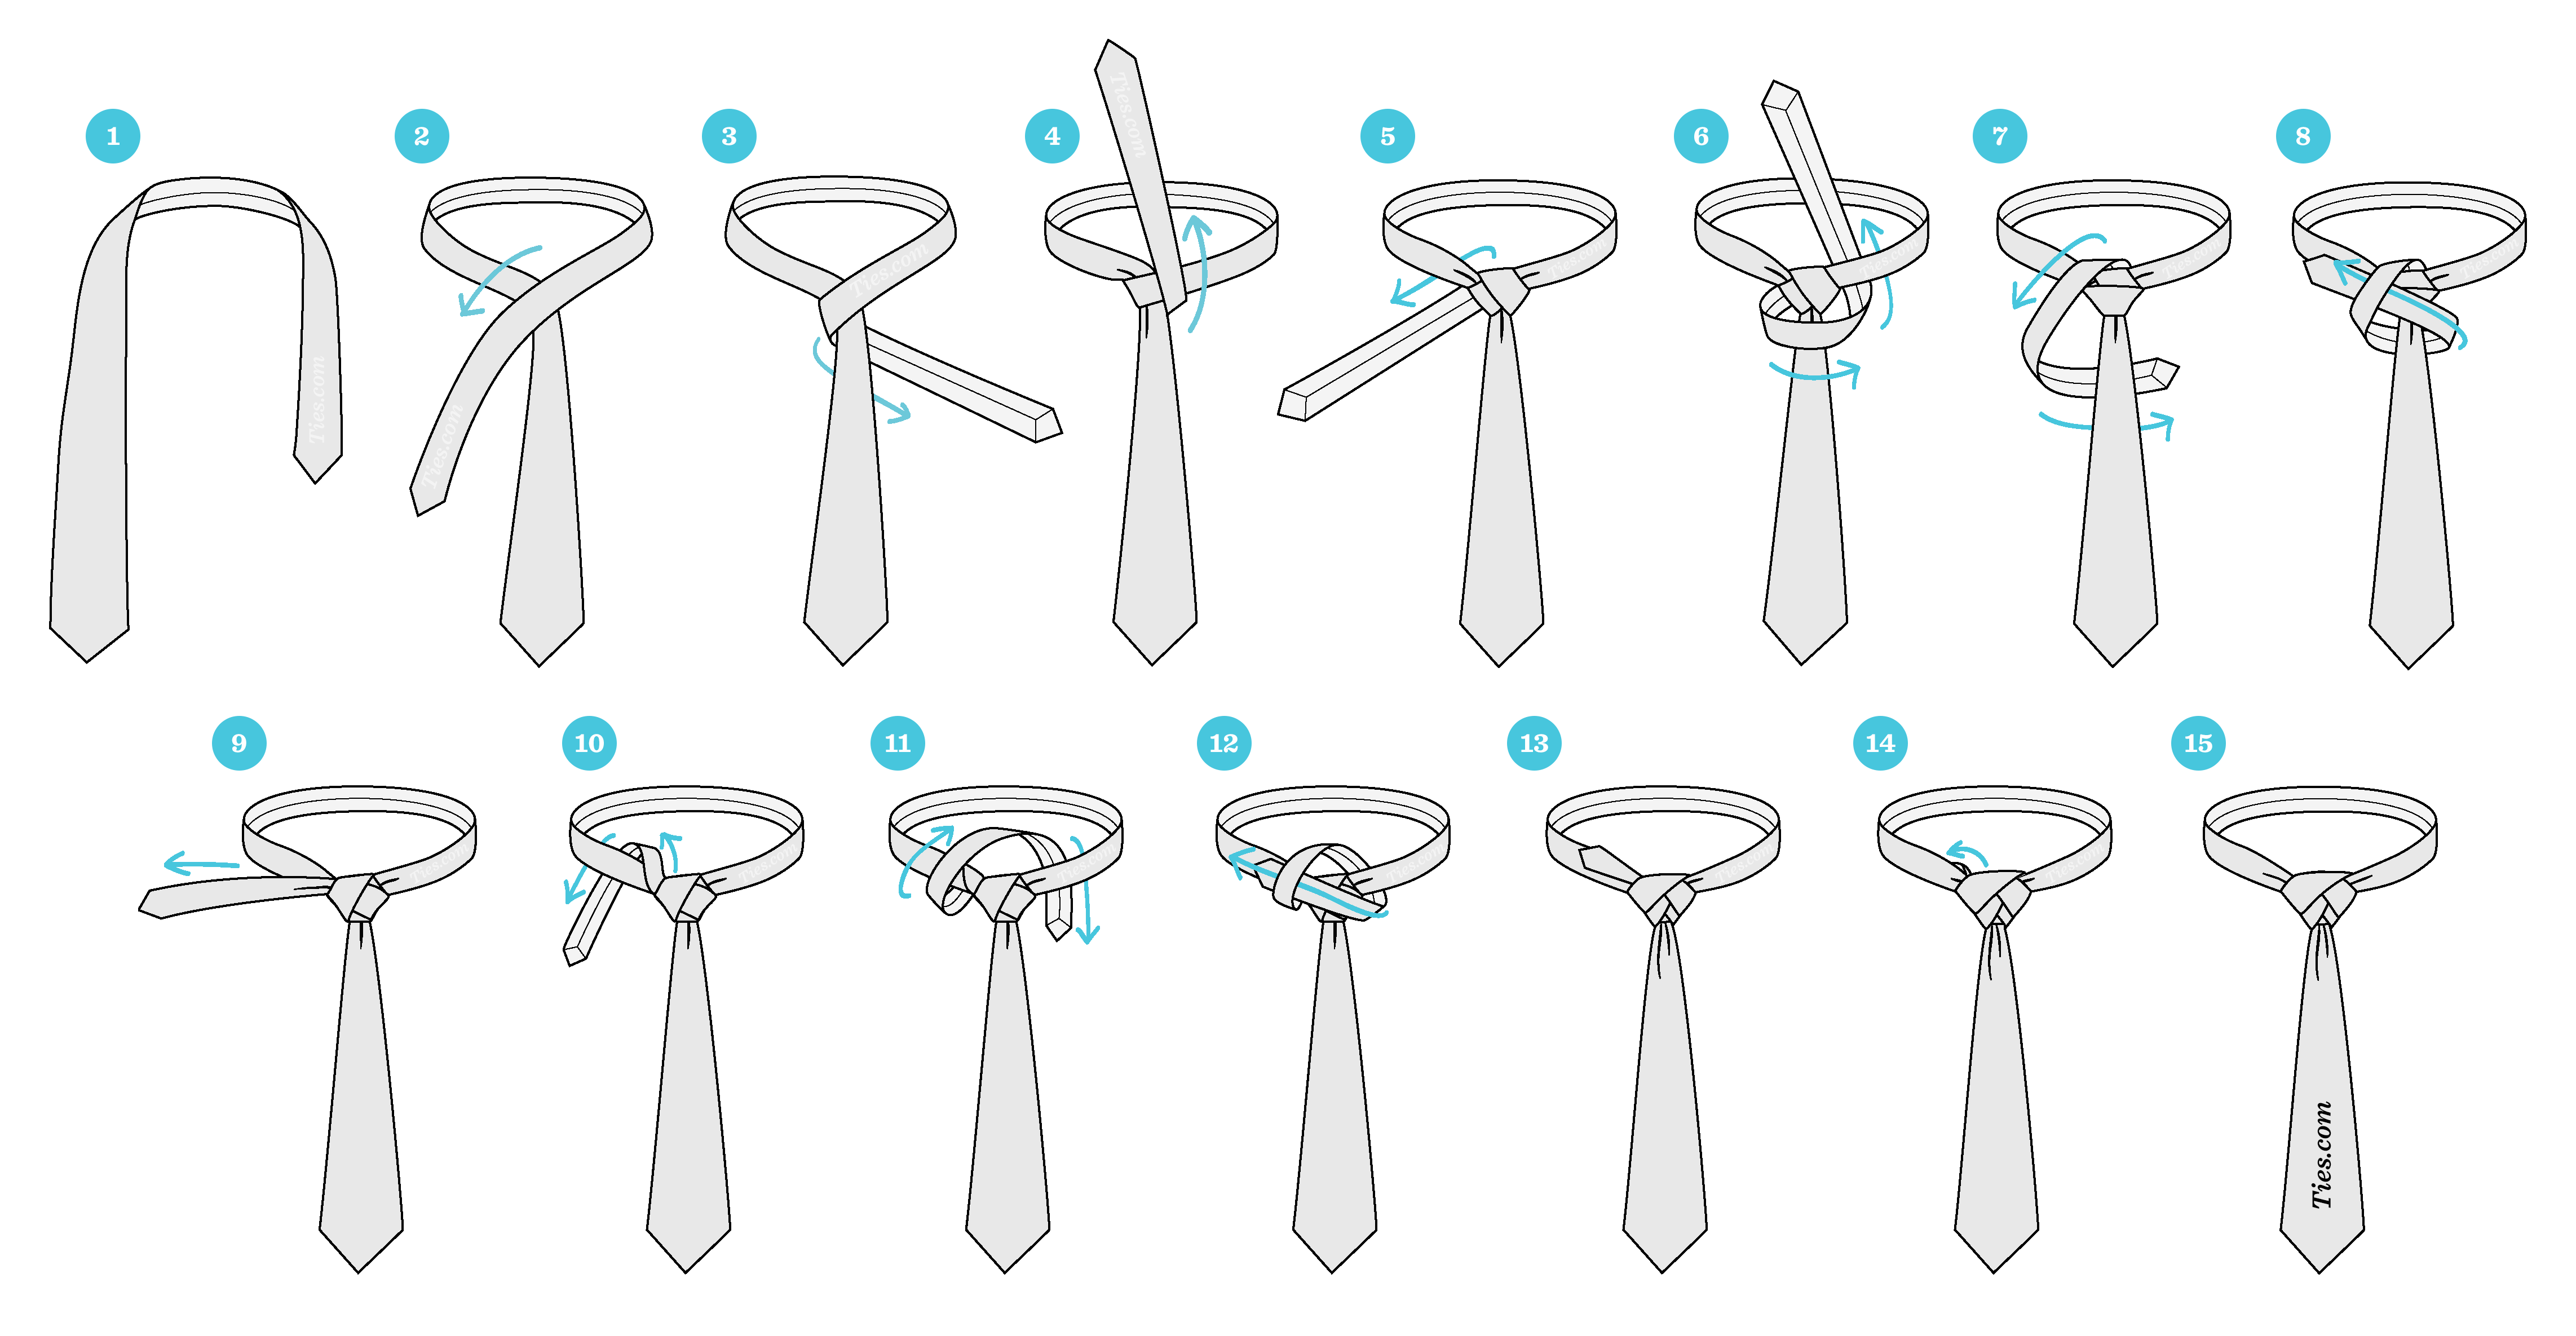
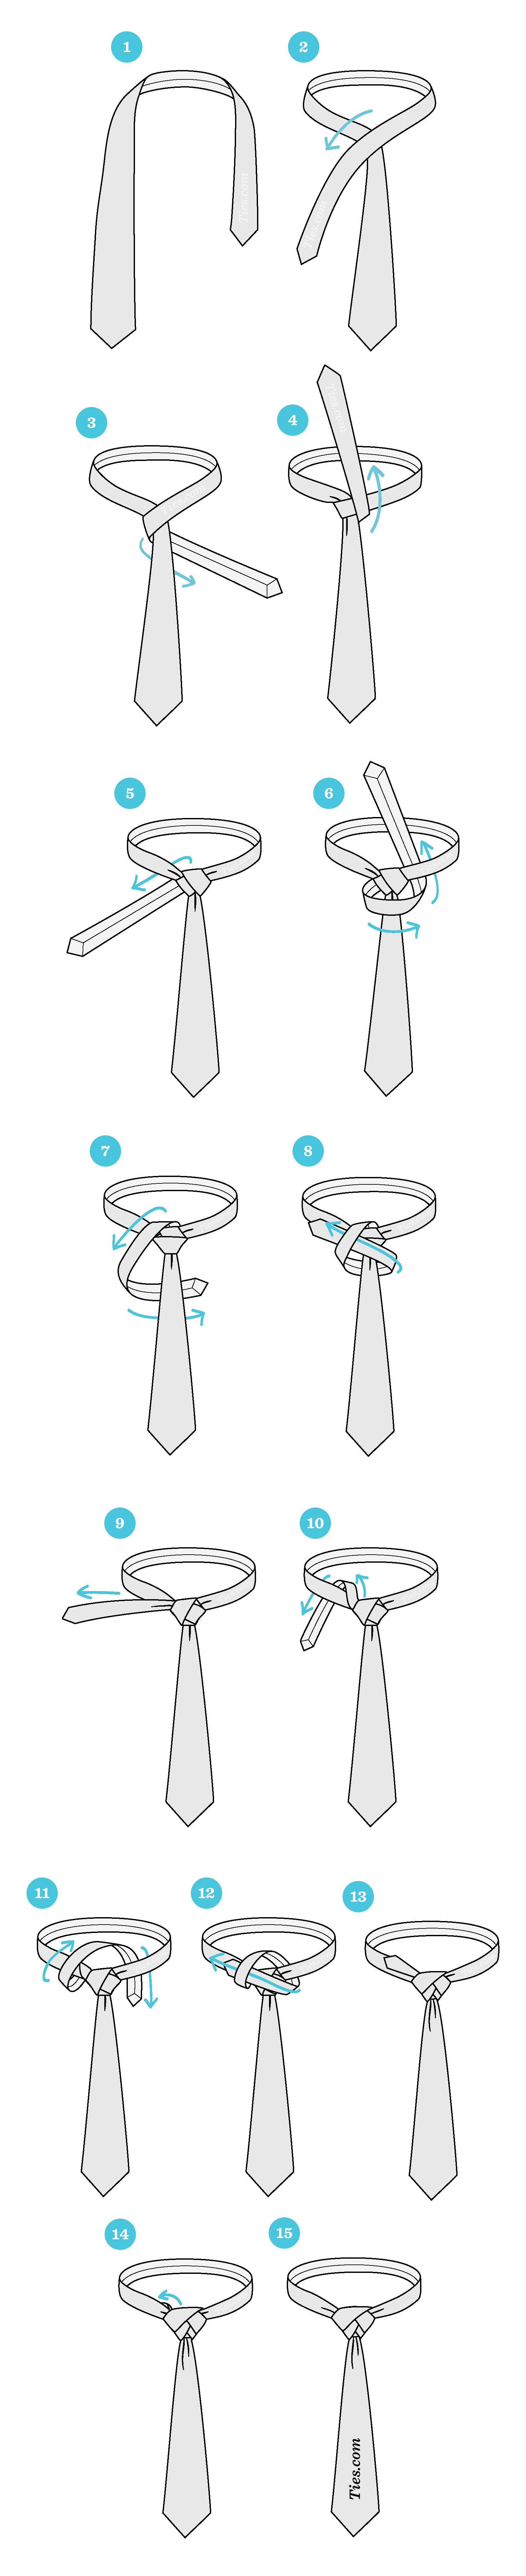
Eldredge Knot Step-by-Step Guide
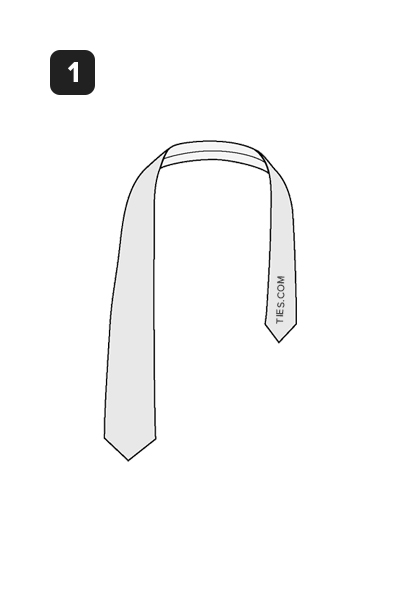
STEP 1
Start with the wide end of the tie on the left and the small end on the right. The tip of the wide end should
rest at the top of your belt buckle. Only move the active (small) end.
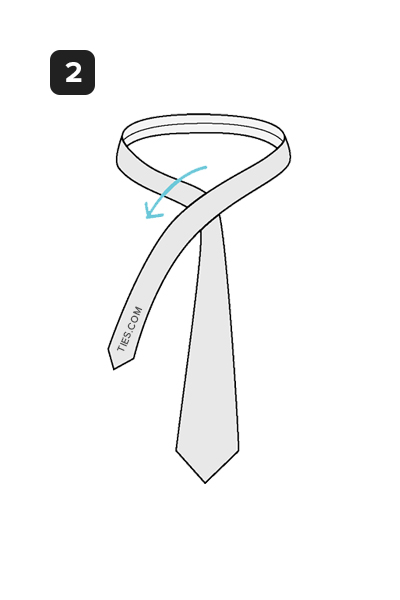
STEP 2
Small end over the wide end to the left.
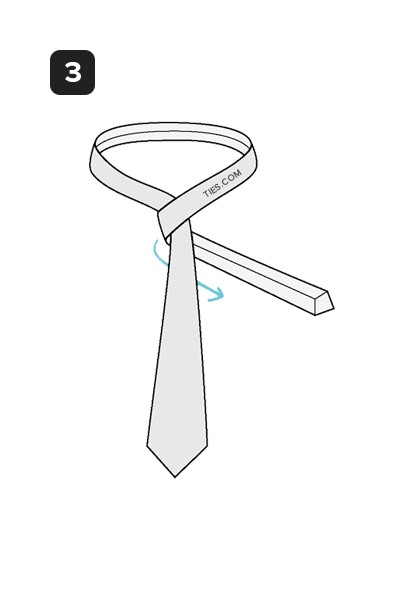
STEP 3
Under the wide end and to the right.
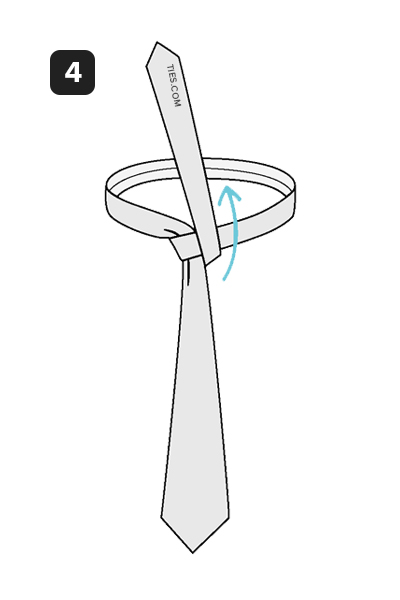
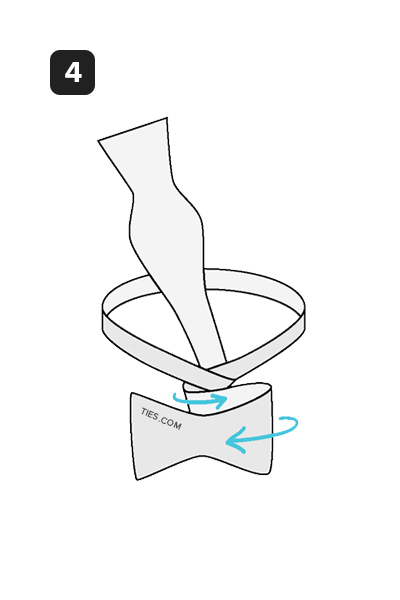
STEP 4
Up to the center, towards neck loop.
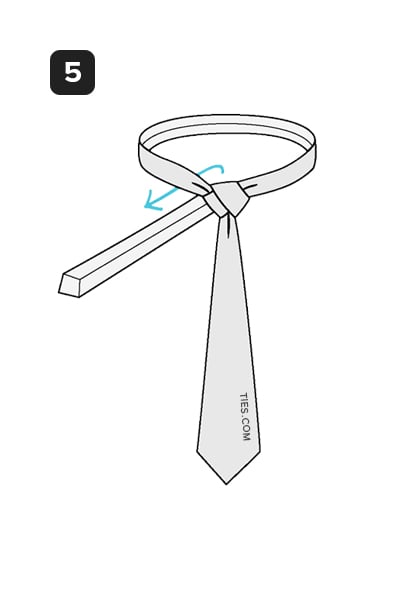
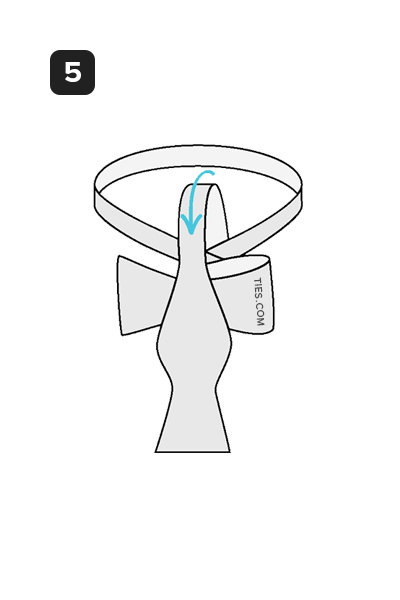
STEP 5
Through the neck loop and to the left.
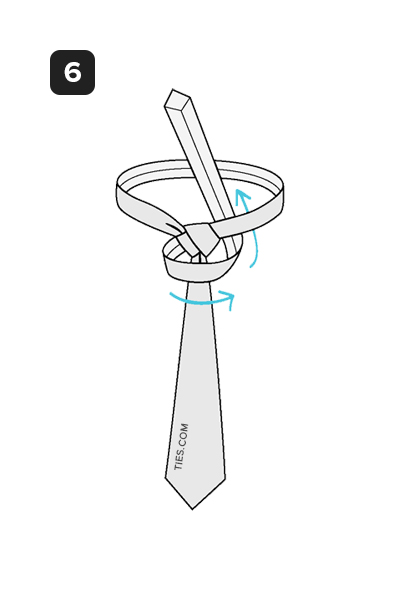
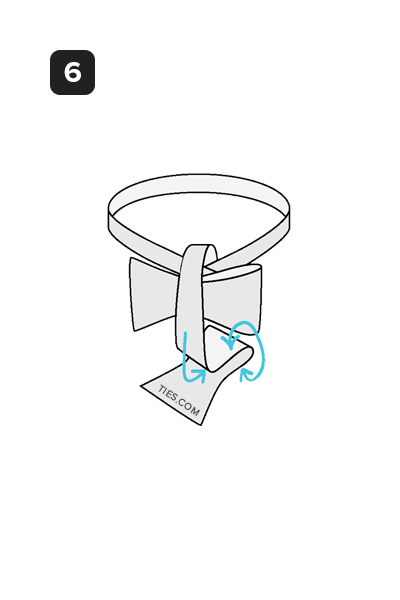
STEP 6
Across the front, to the right. Then up into the neck loop from underneath.
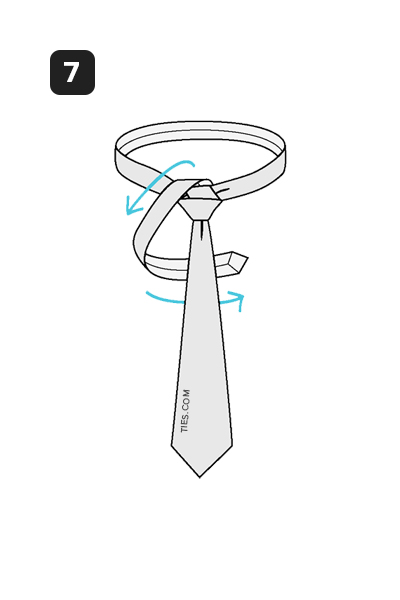
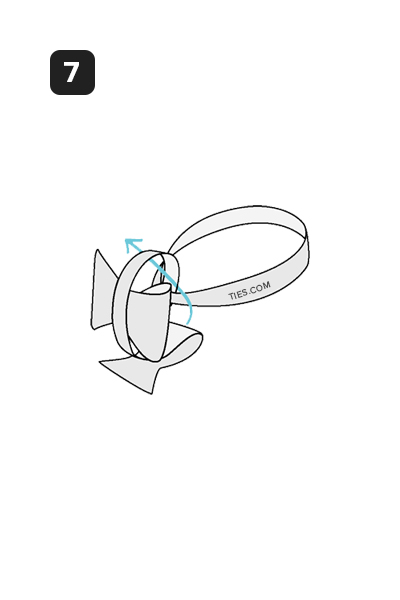
STEP 7
Down to the left and around the back of the wide end to the right. Keep this part loose.
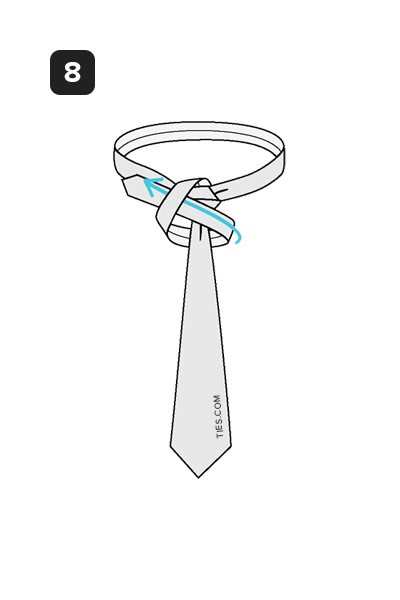
STEP 8
Bring it across the front towards the left and through the loop made in the previous step.
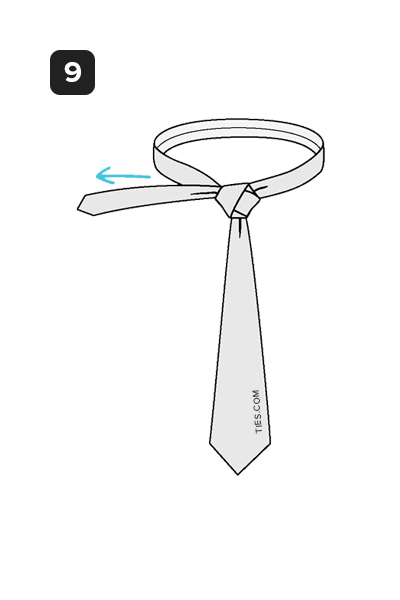
STEP 9
Pull the small end towards the left to tighten.
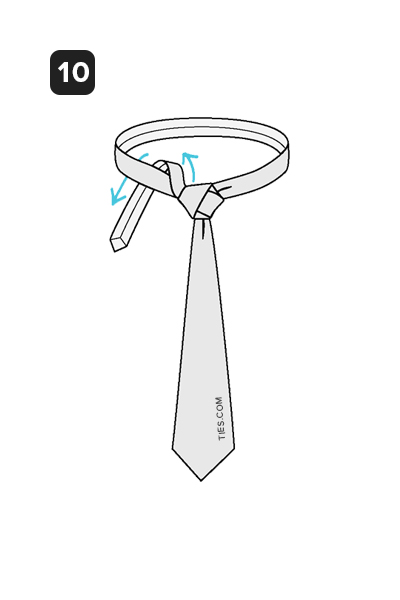
STEP 10
Up to the center, towards neck loop. Down through the neck loop and to the left.
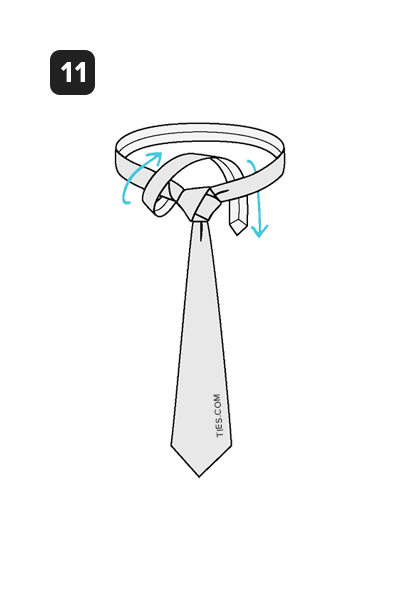
STEP 11
Up to the center, towards neck loop. Down through the neck loop and to the right. Keep this part loose.
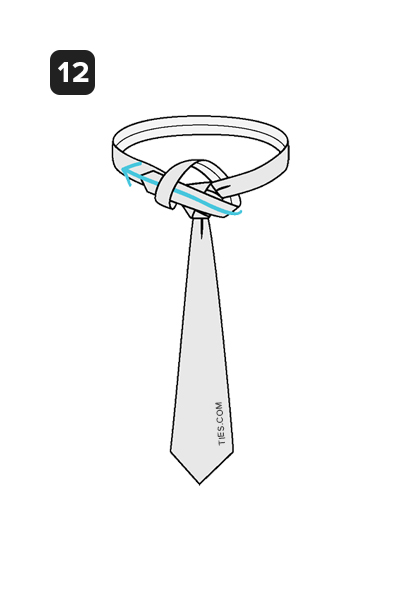
STEP 12
Across the front towards the left and through the loop made in the previous step.
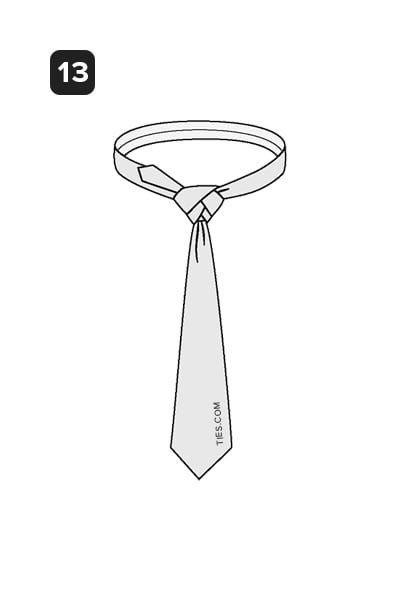
STEP 13
Pull the small end towards the left to tighten.
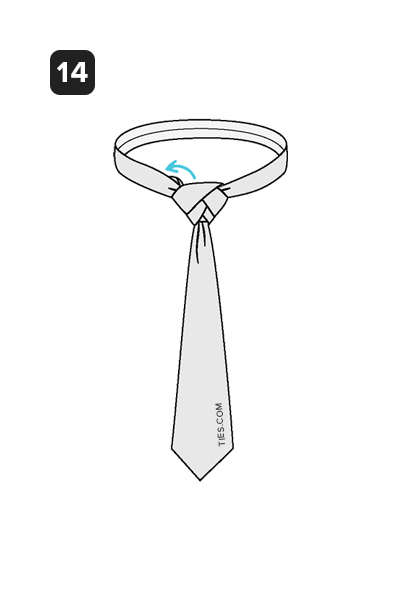
STEP 14
Tuck the rest of the small end behind neck loop on the left side.
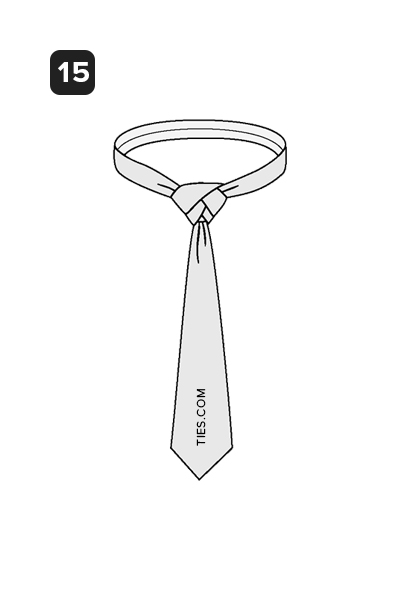
STEP 15
Strut your stuff.