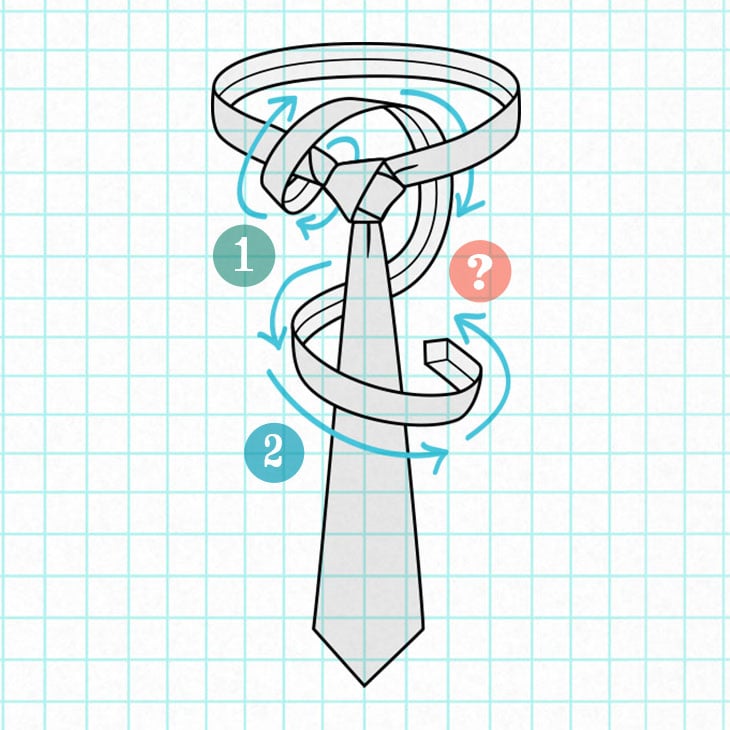
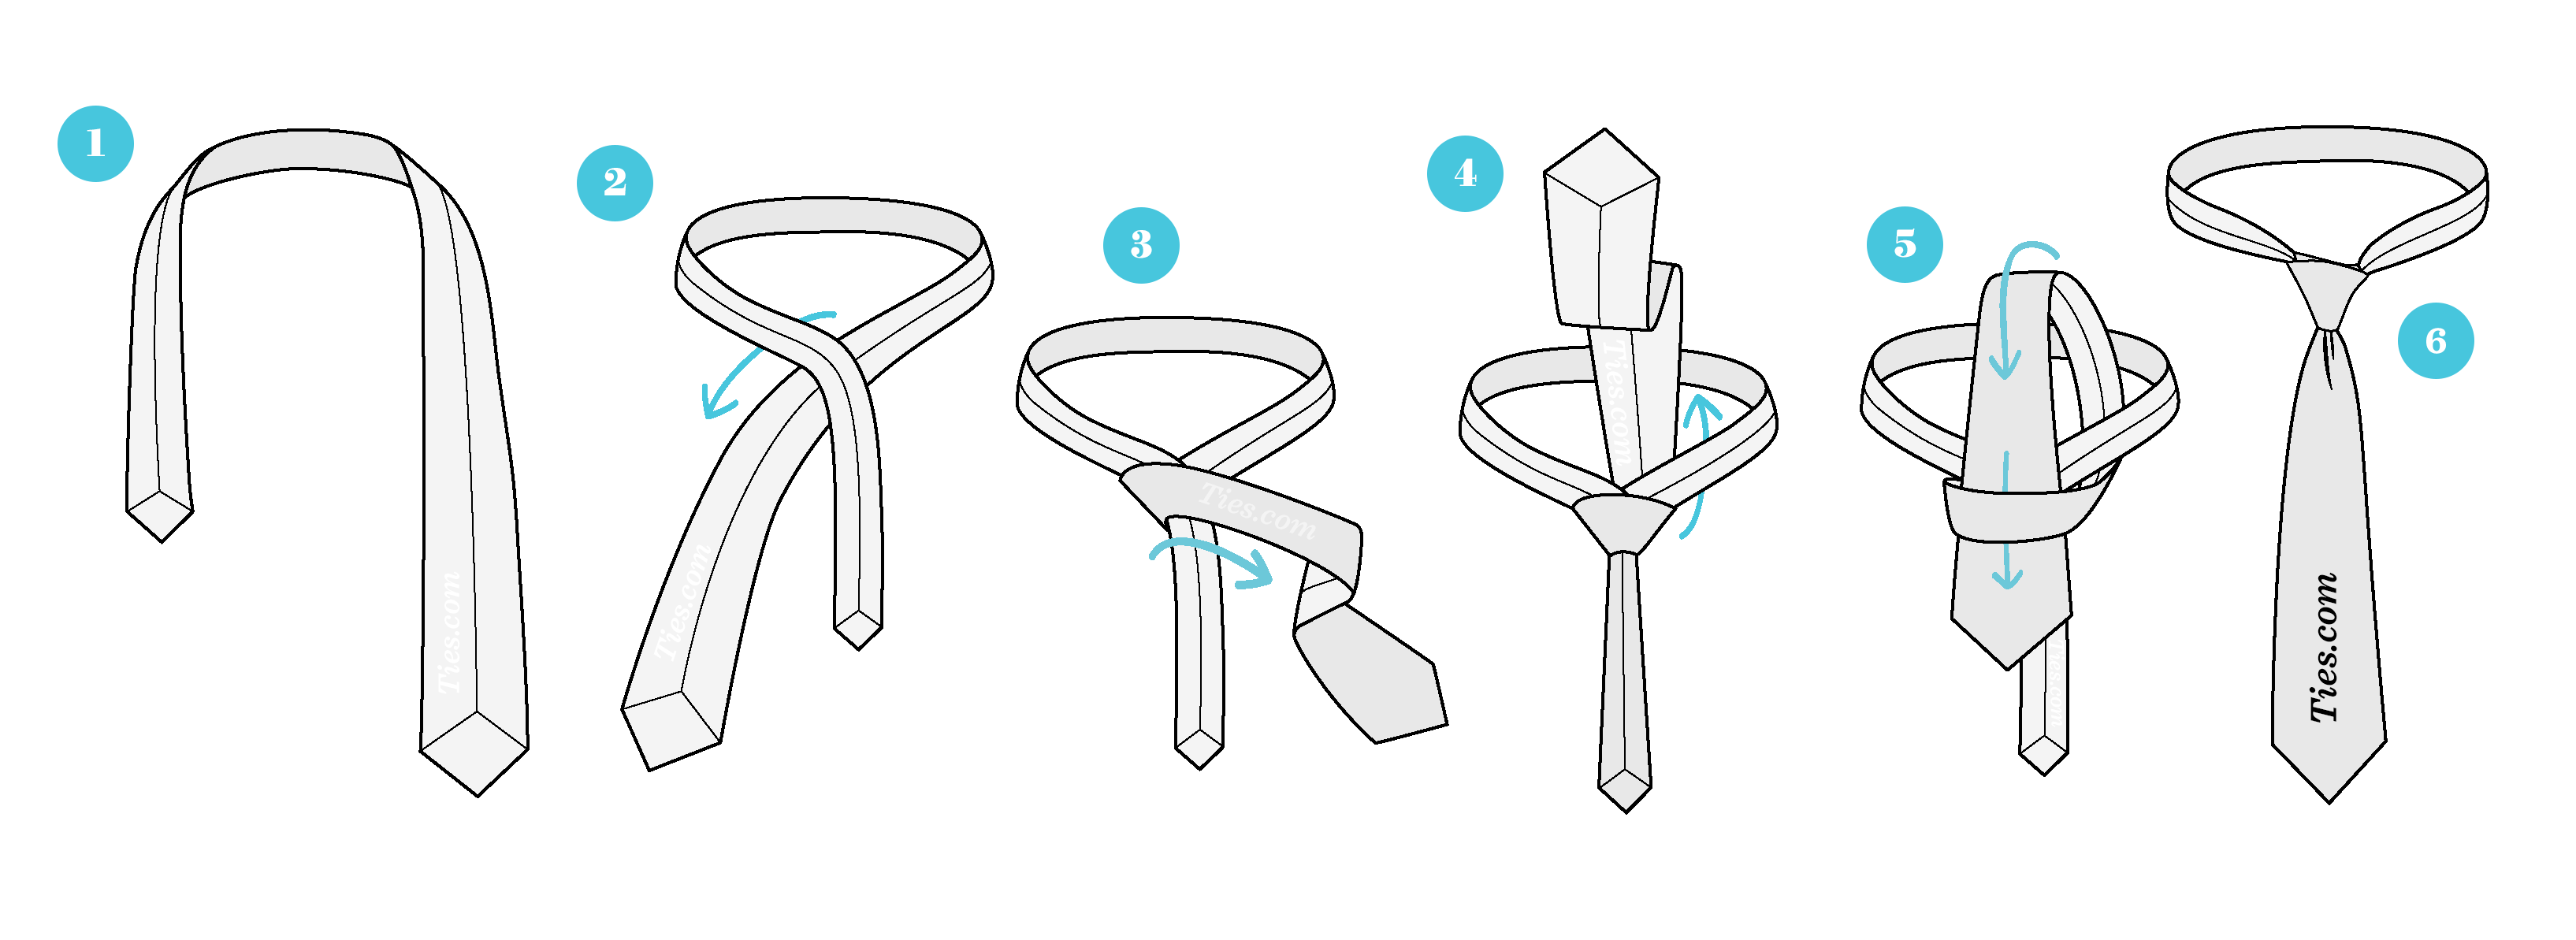
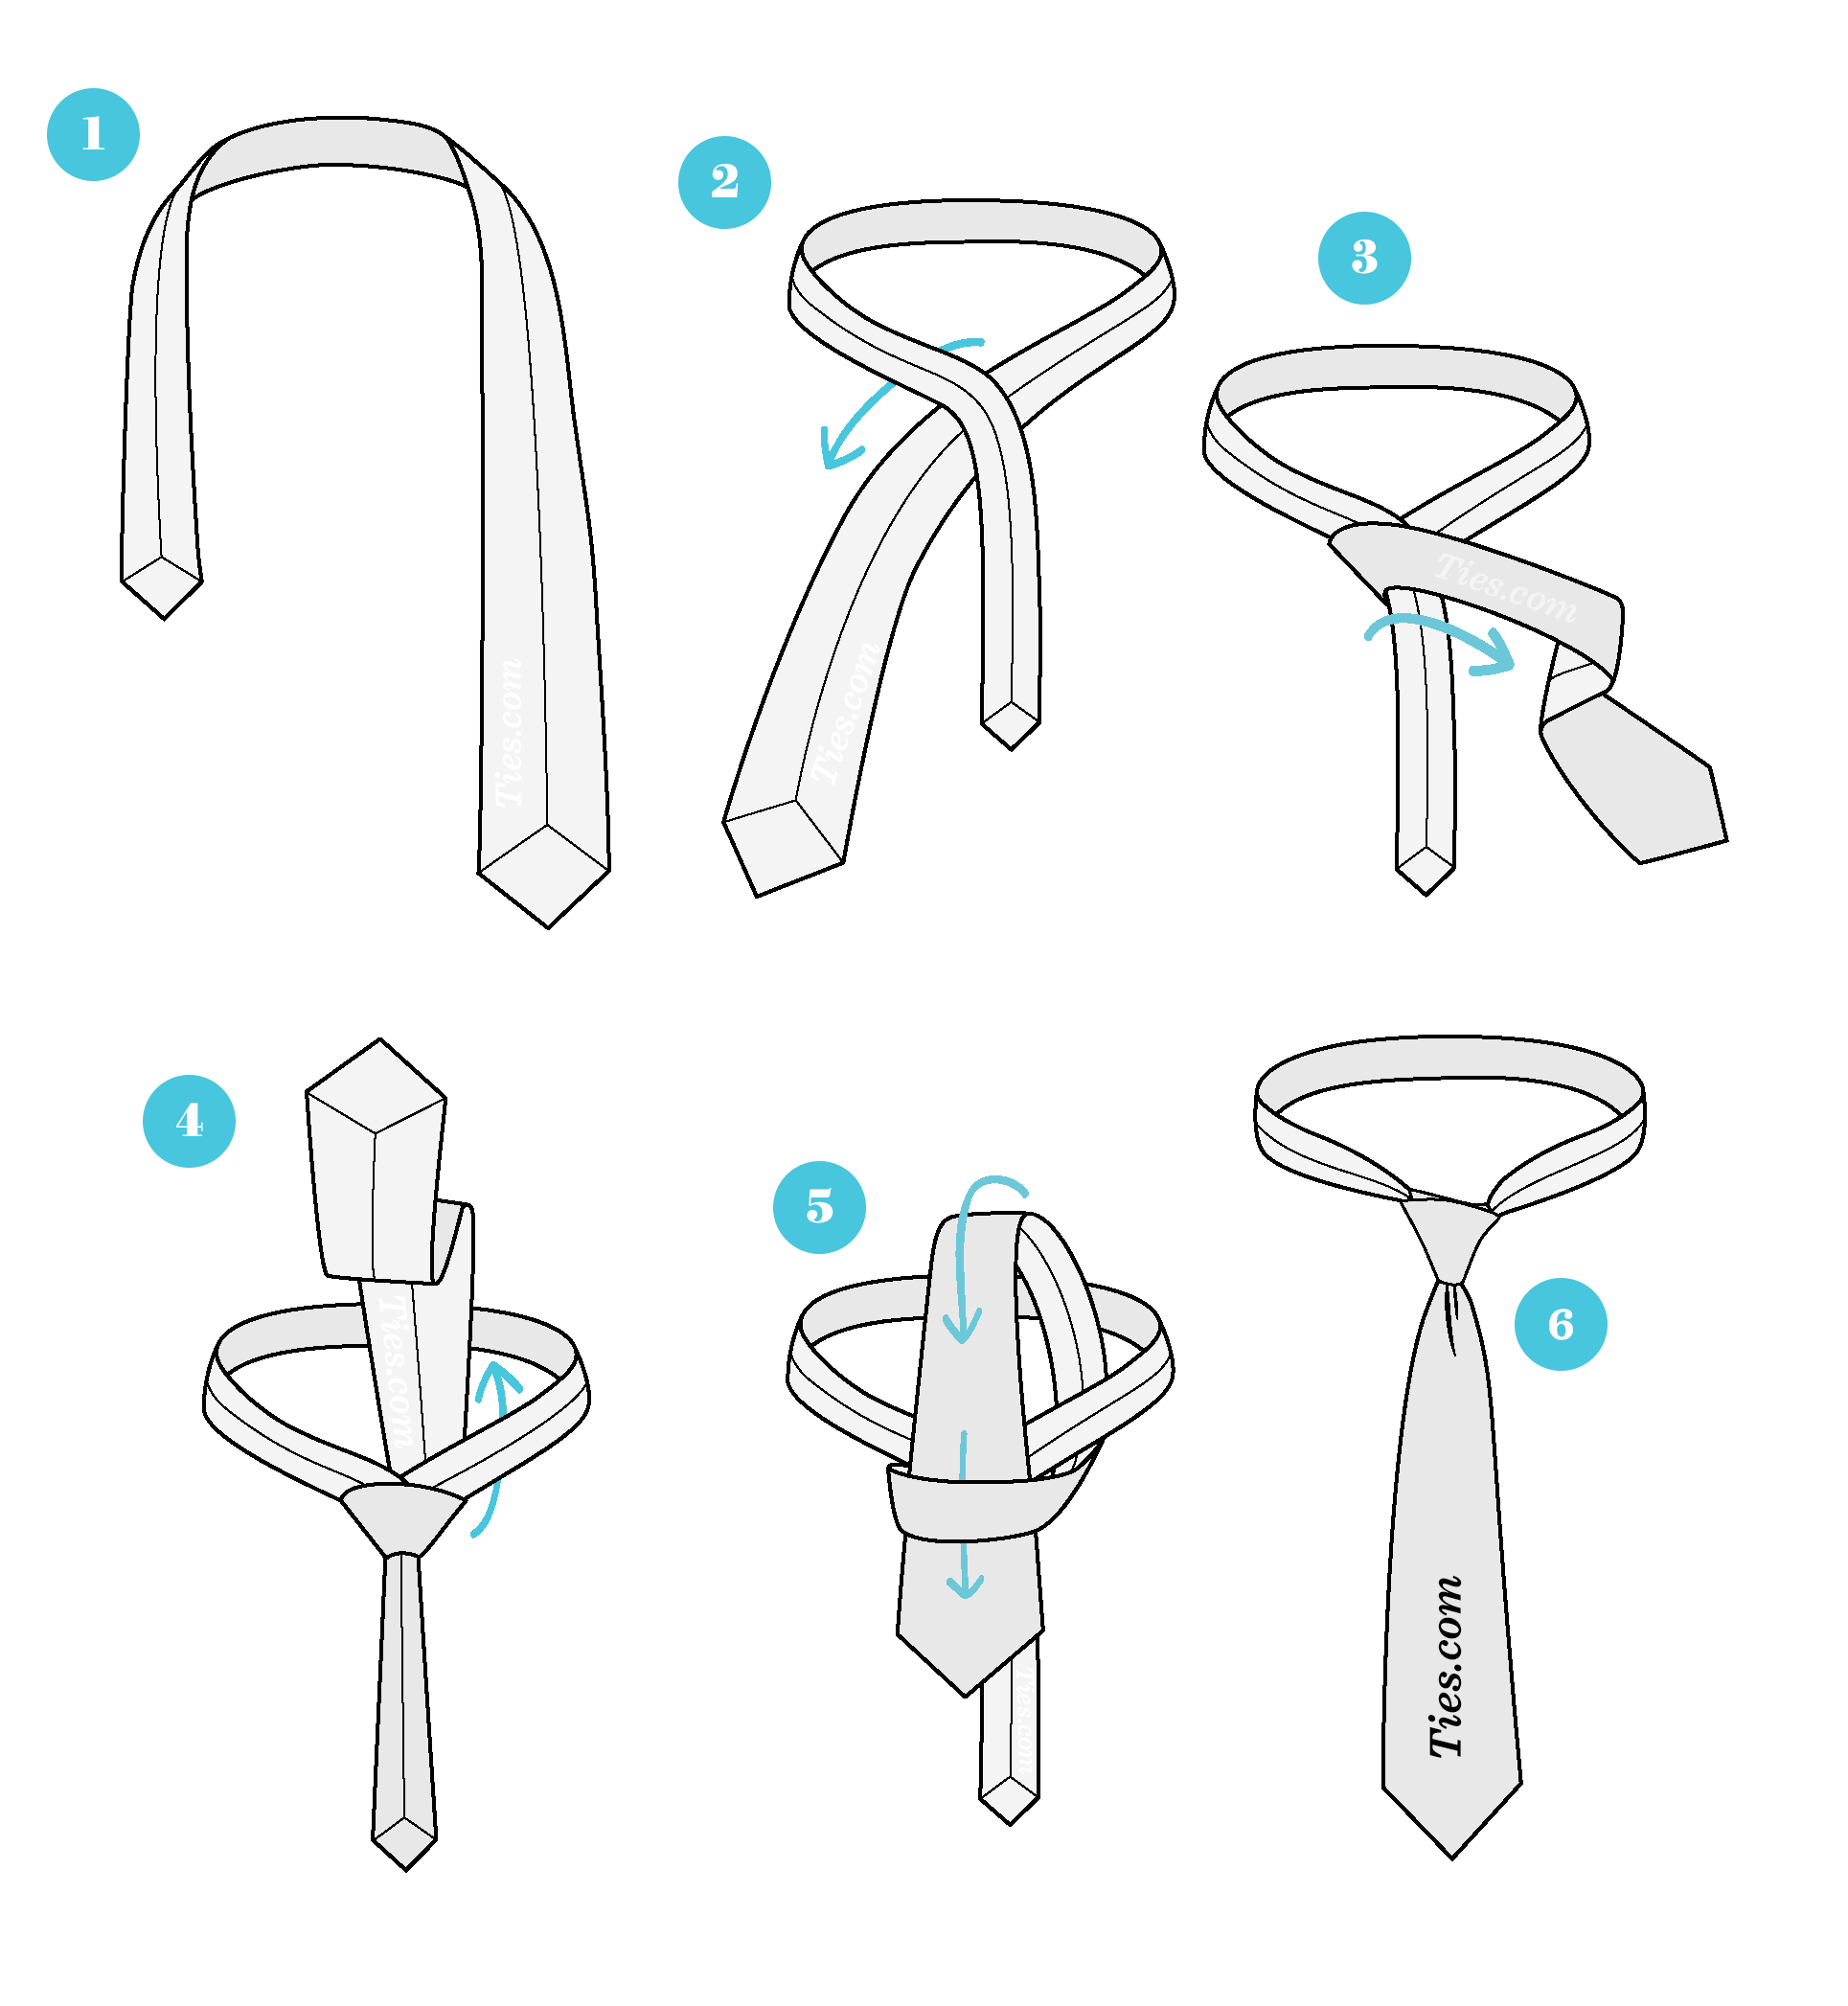
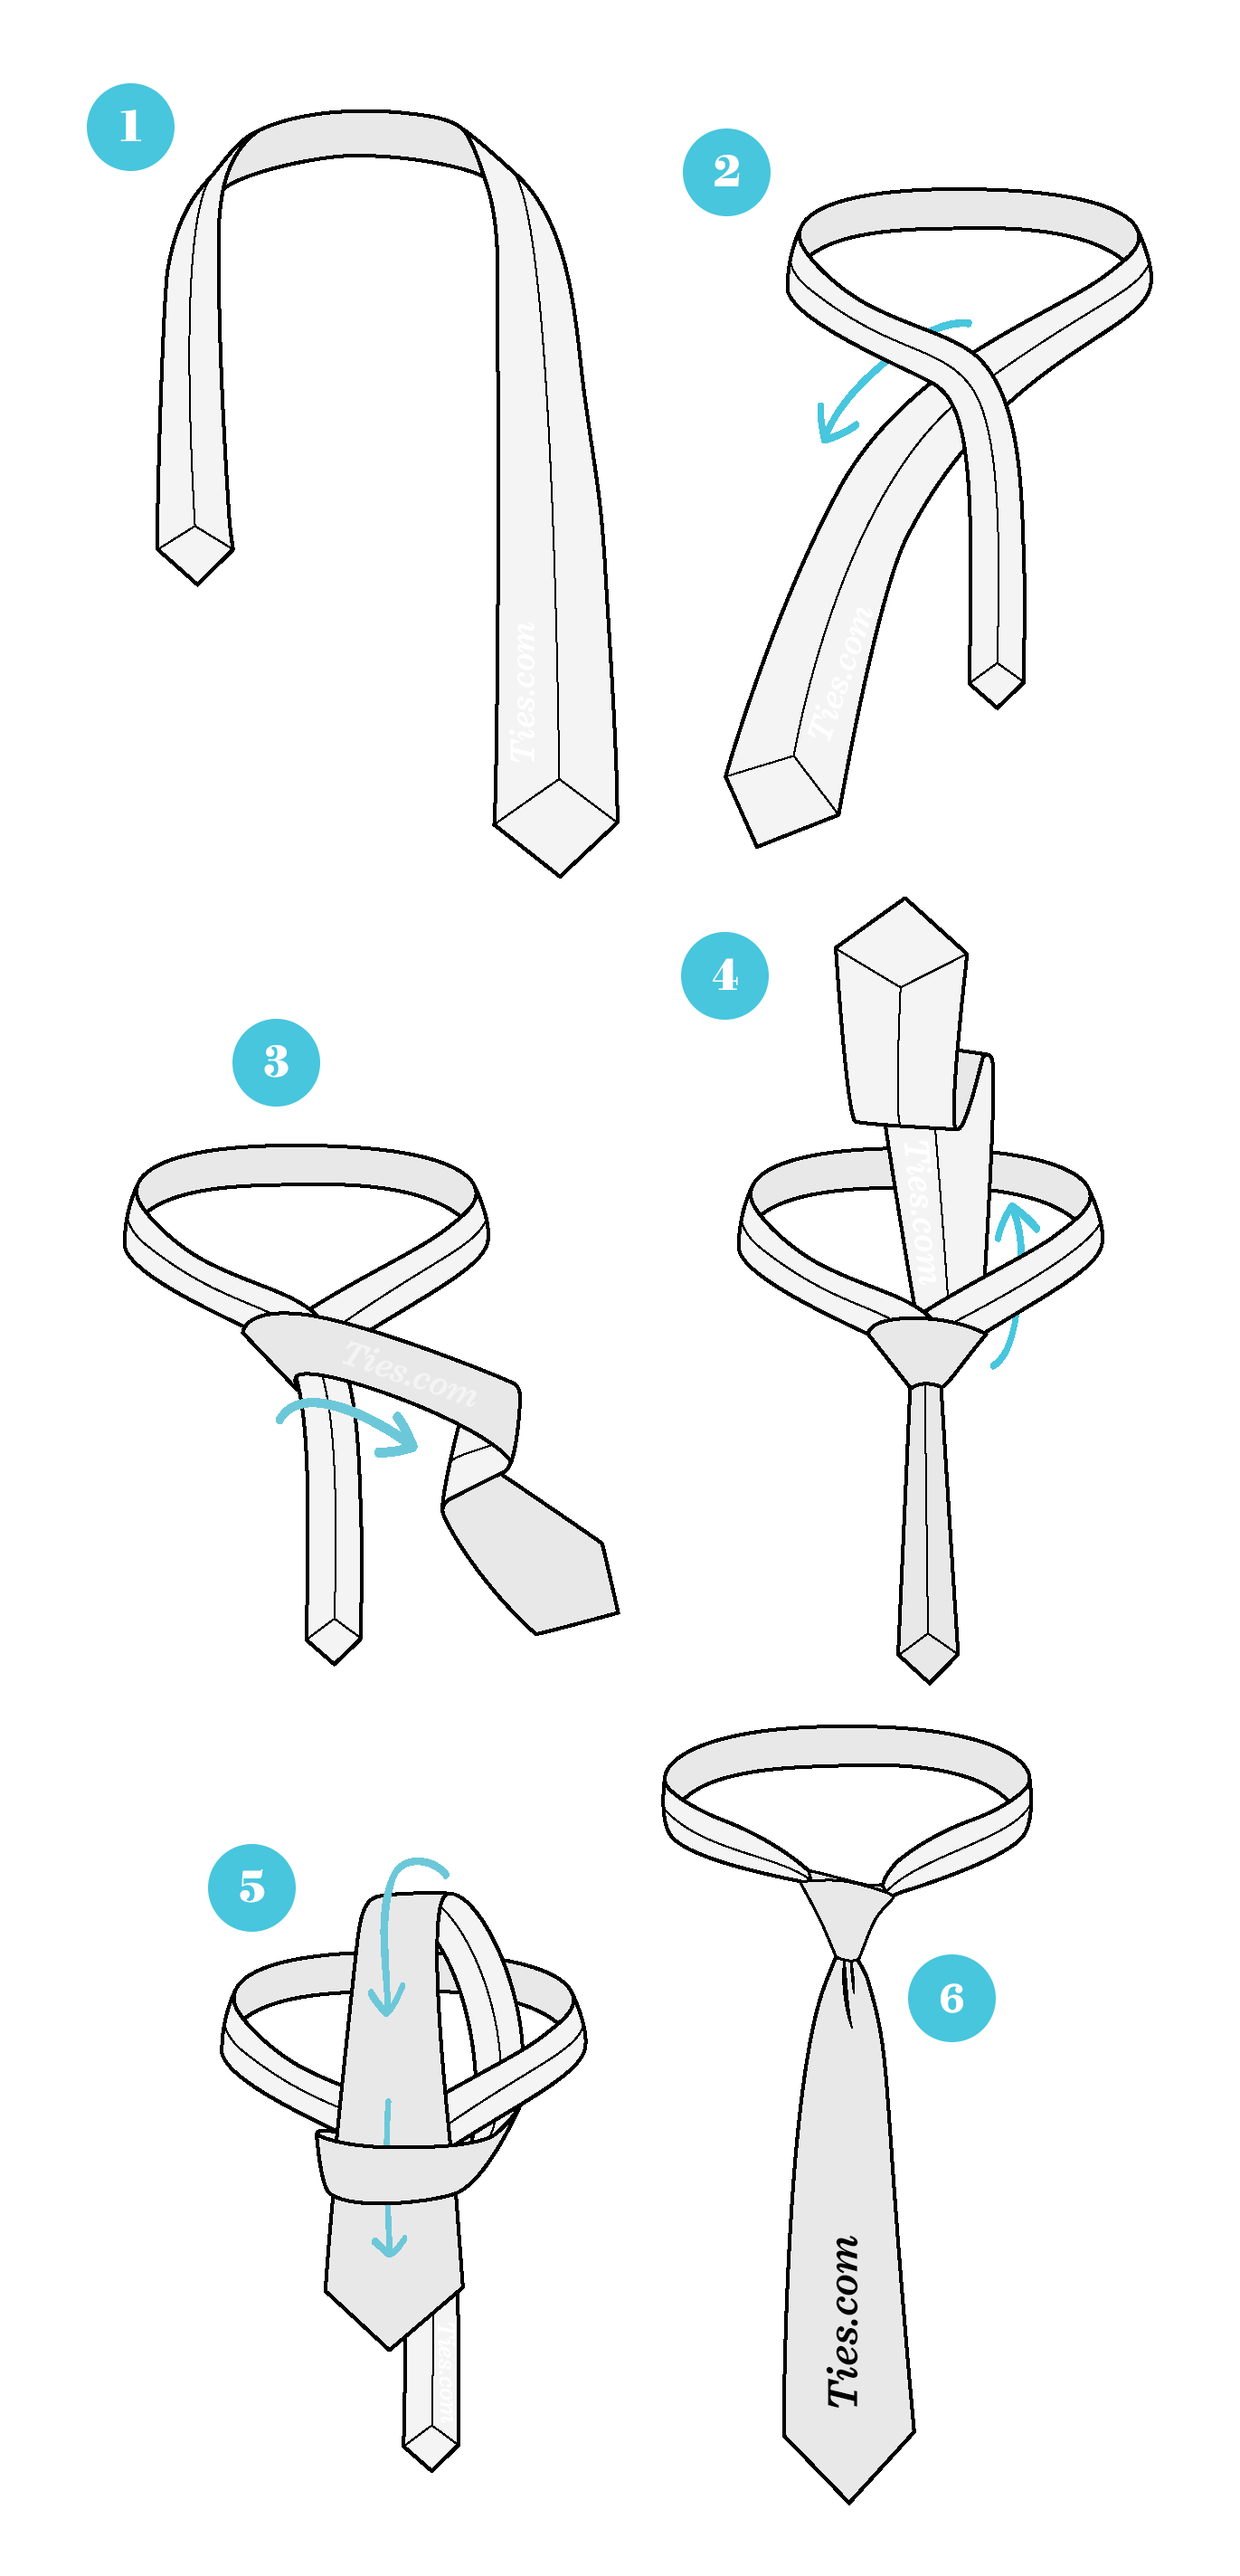
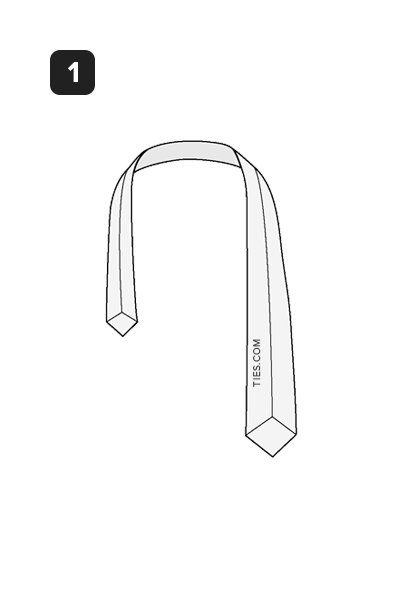
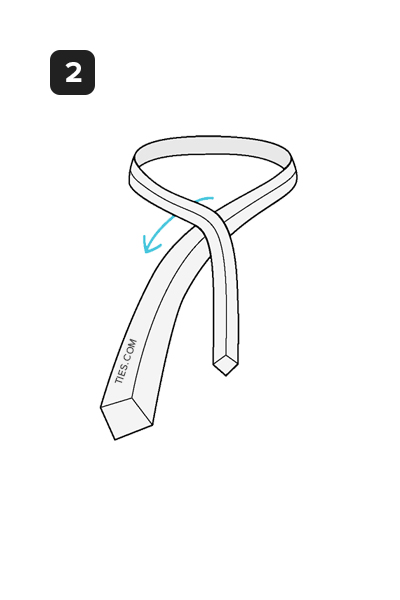
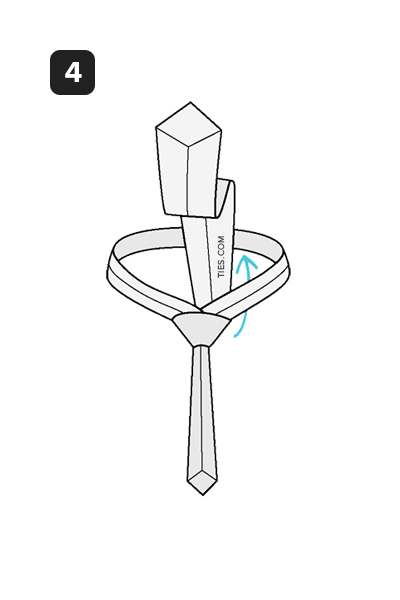
PRINCE ALBERT
Not all knots are created equal. Size, symmetry and shape can vary greatly from knot to knot and all should be taken into consideration. Thick ties often necessitate the use of smaller knots like the Four-in-Hand or the Simple knot. Thin ties generally benefit from larger knots like the Pratt or Windsor. Every knot has a distinct character. The Prince Albert swaggers with a refined elegance. The Kelvin throws caution to the wind. The Murrell grins like a Cheshire Cat. The Van Wijk winks like a scoundrel with a secret. The Eldredge and Trinity knots twirl and fold like futuristic necktie origami. Every knot serves its master differently. Try a few knots. Experiment. Play. Your necktie will thank you. If you're looking for the easiest knot for beginners start here.
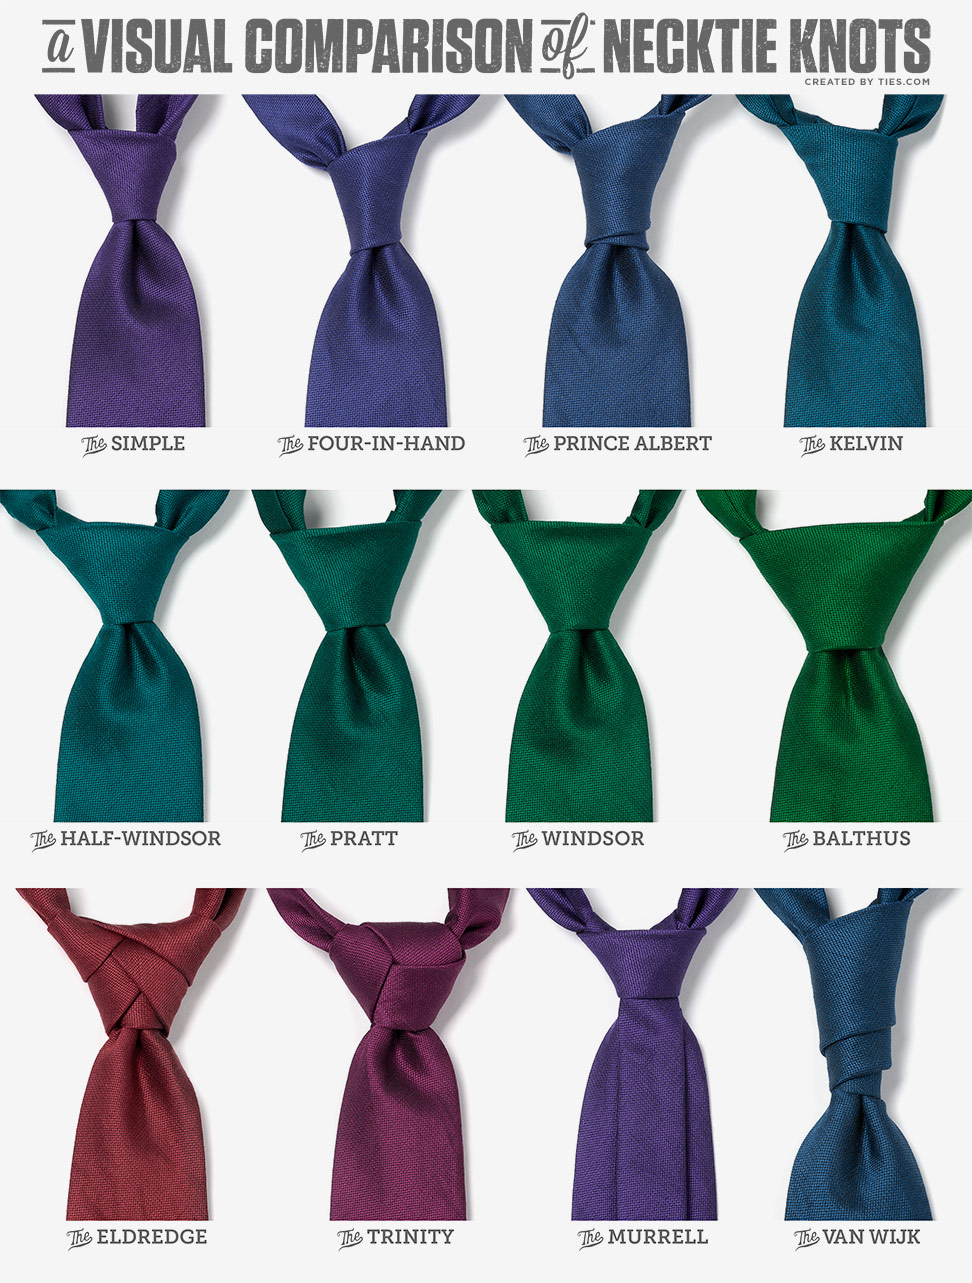
Seeing necktie knots laid out side-by-side is the fastest way to grasp how they differ from one another. In order to play fair, we tied each knot using neckties of the same material, thickness and width (3 ½ inches). We also made sure to photograph them to scale. This way you can appreciate the unique characteristics of each knot and discern the differences between them.
Of the knots we tied, the smallest is the Simple knot, sometimes known as the Oriental. If there is a way to tie a necktie smaller we haven't found it. The monstrous Balthus knot is the largest of the knots we tied but in theory you could make a knot even larger if you had a long enough necktie. Take note of the overall shape of each knot. The Windsor is almost a perfect triangle. The Four-in-Hand is much more narrow. The Prince Albert has a second fold that peeks out at the bottom. Some knots, like the Kelvin and Four-in-Hand lean noticeably to one side. The Trinity delivers a rounded silhouette while the Van Wijk is cylindrical and the longest of the knots.
Happy knotting! View the full infographic here.

Live Support
Ties.com customer care