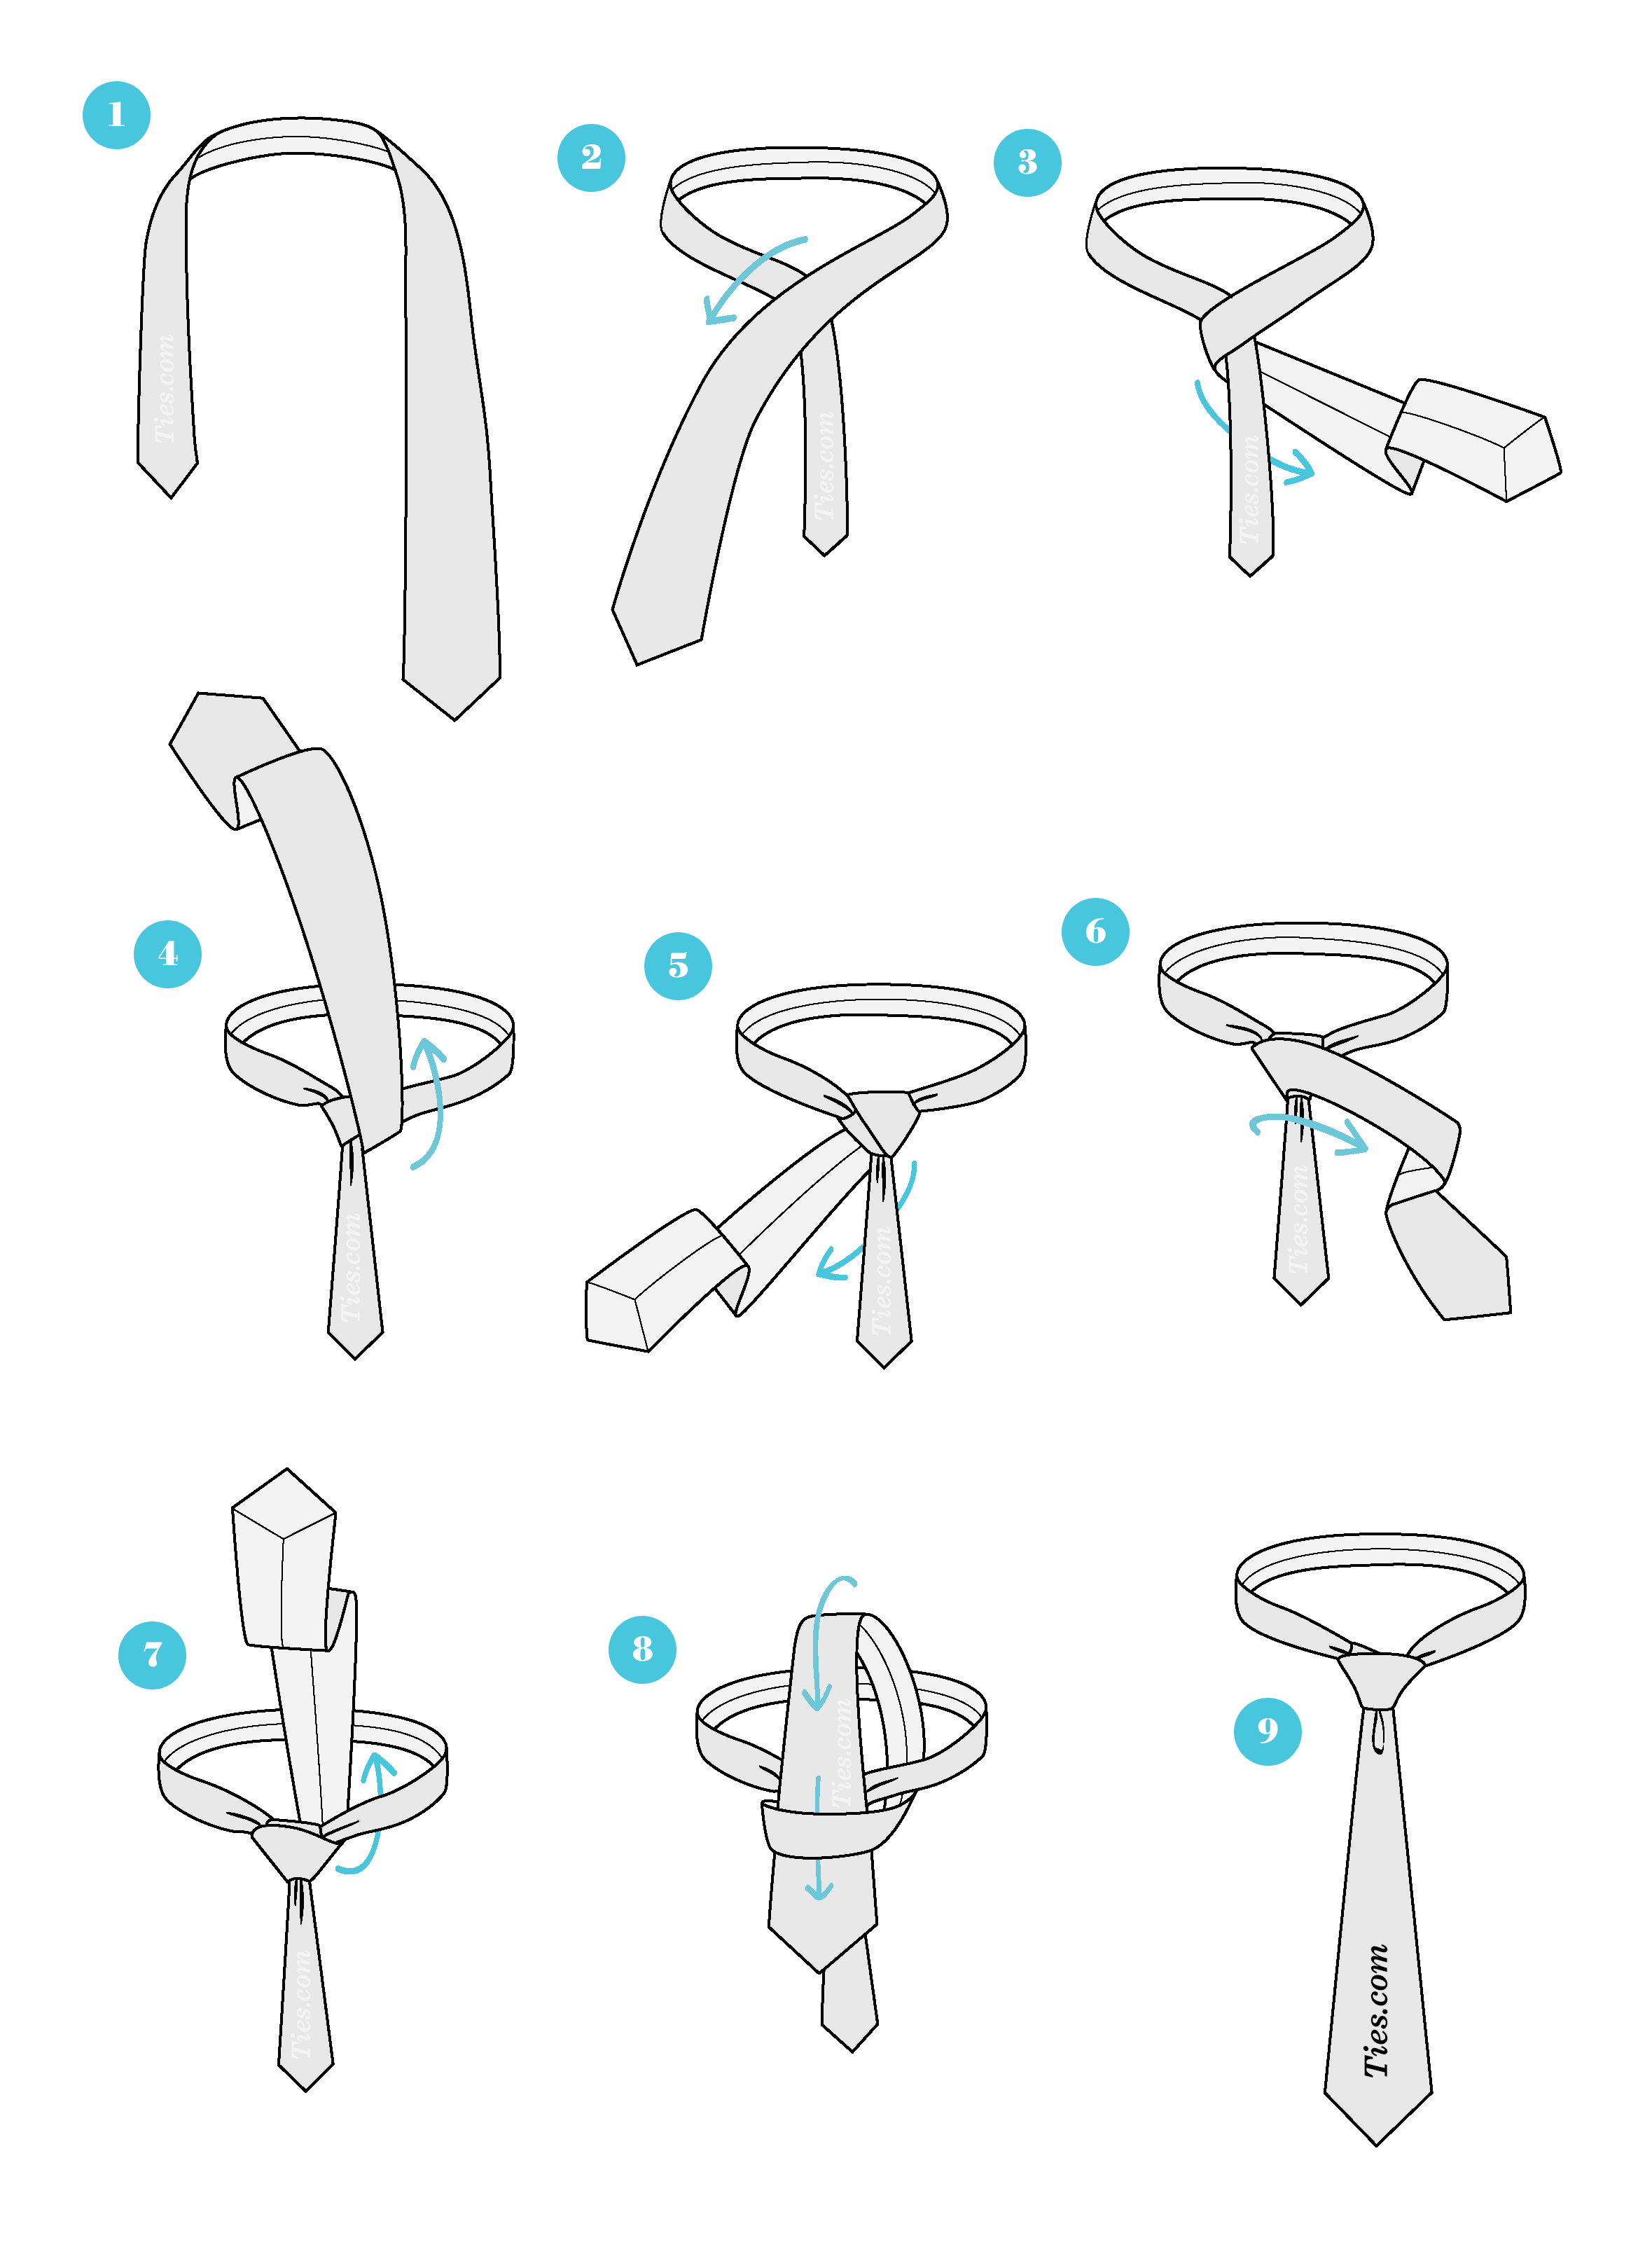

Half Windsor Knot Step-by-Step Guide

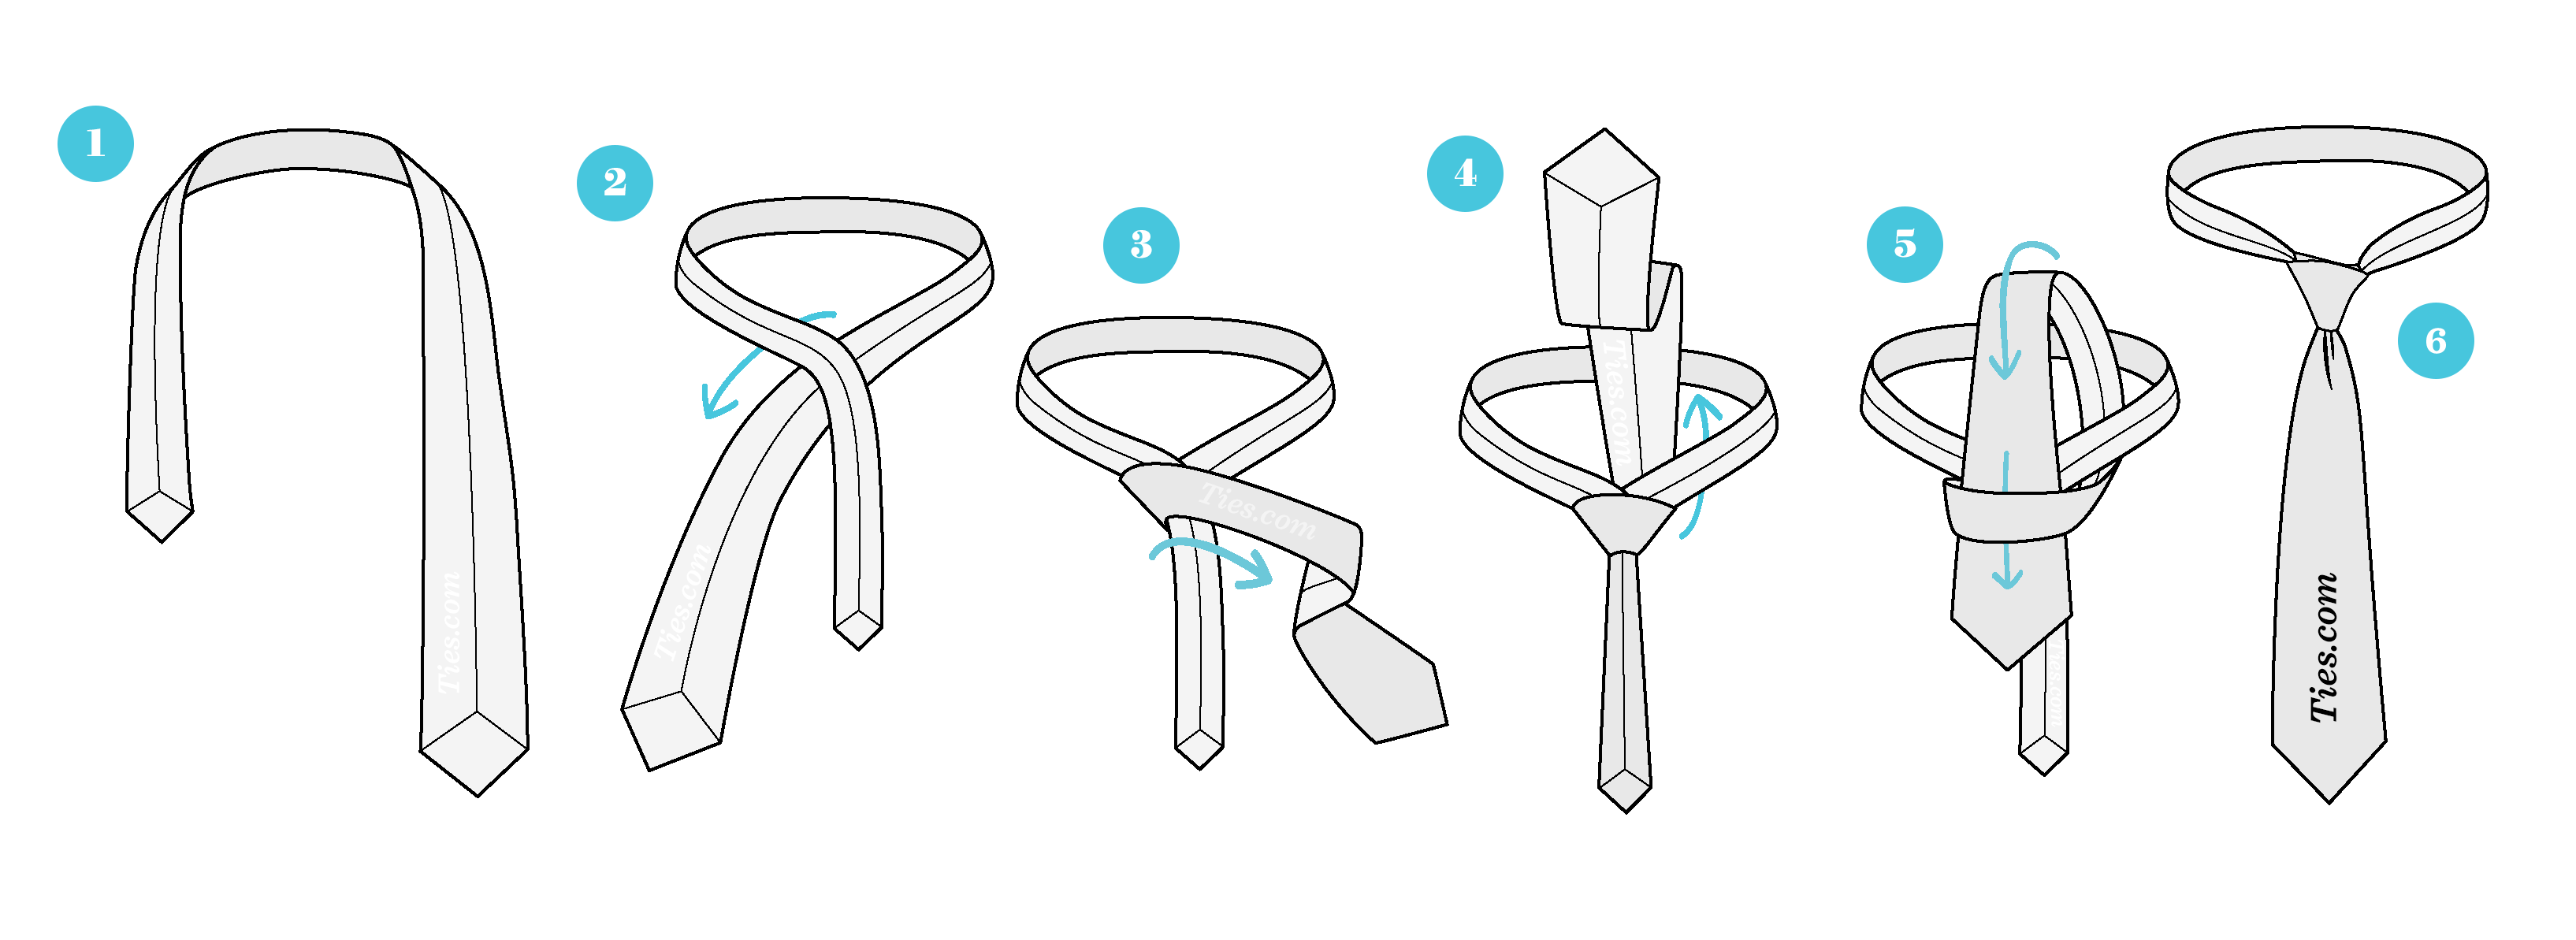
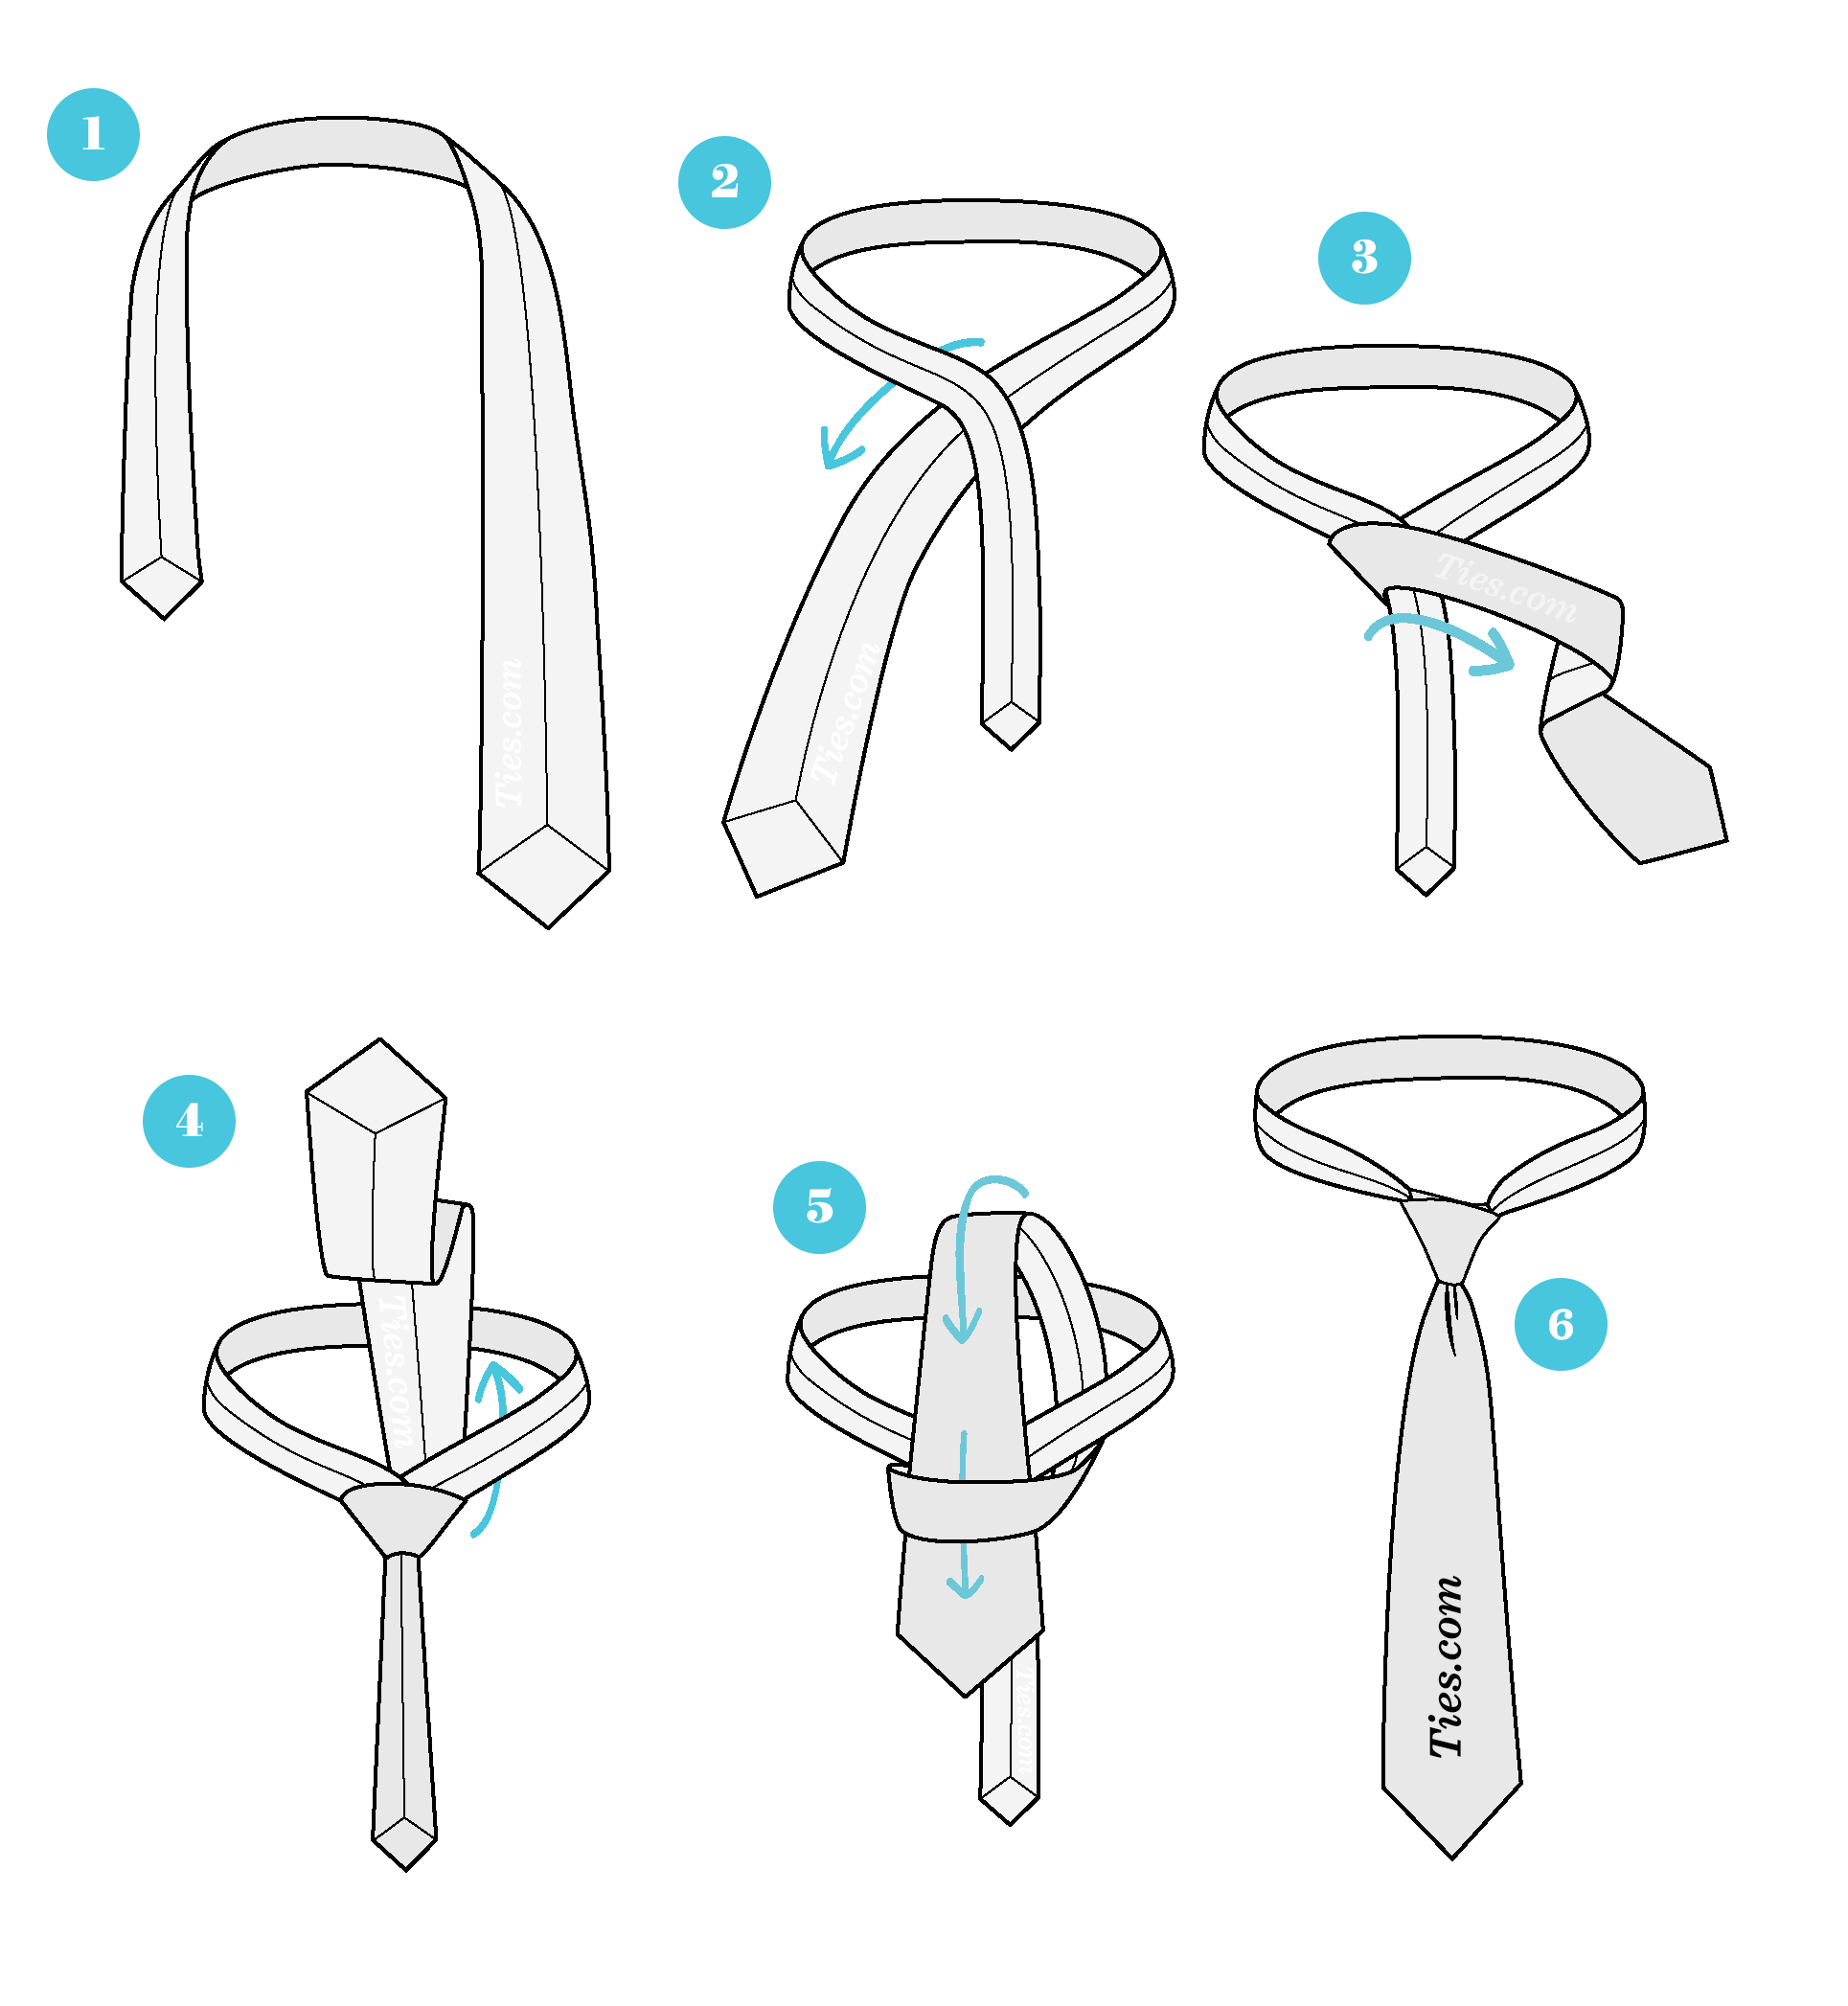
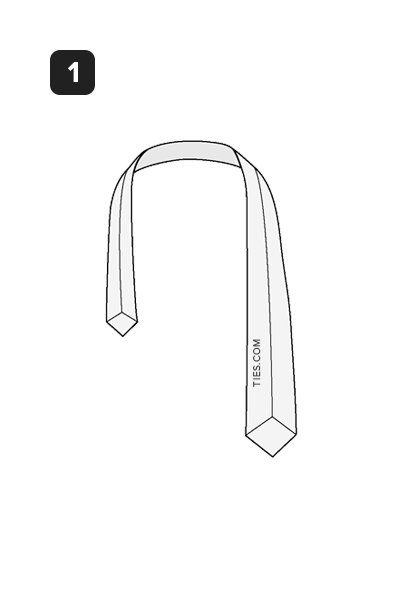
STEP 1
Start with the wide end of the tie on the right and the small end on the left. The tip of the small end should
rest slightly above your belly-button (this will vary depending on your height and the length & thickness of your
tie). Only move the active (wide) end.
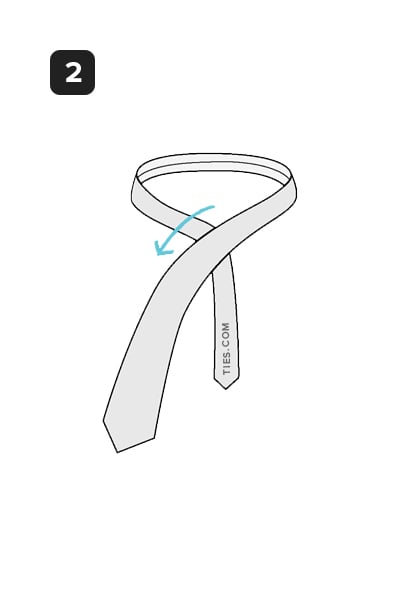
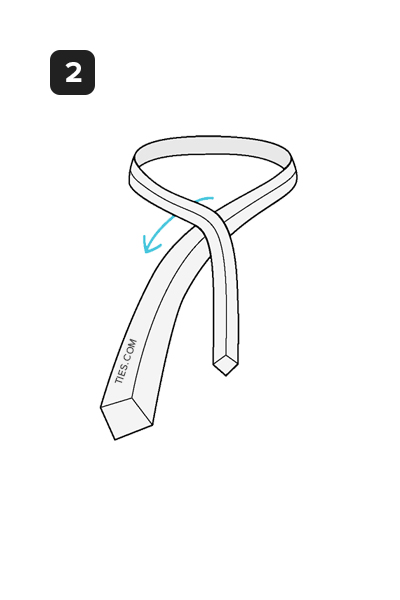
STEP 2
Wide end over the small end to the left.
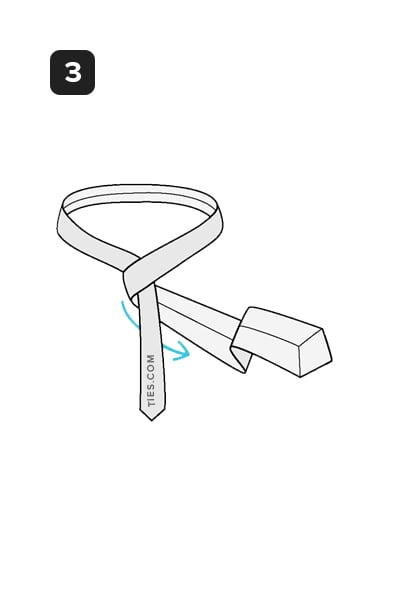
STEP 3
Under the small end and to the right.
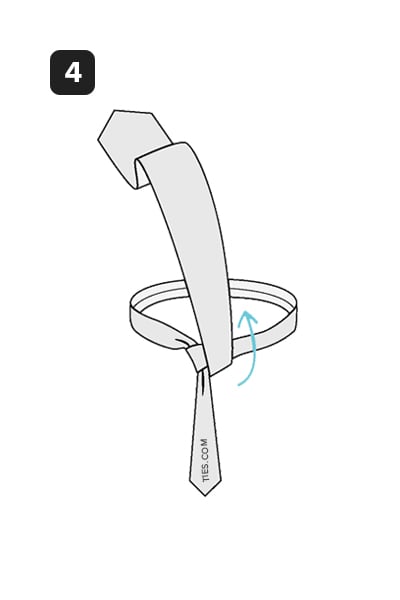
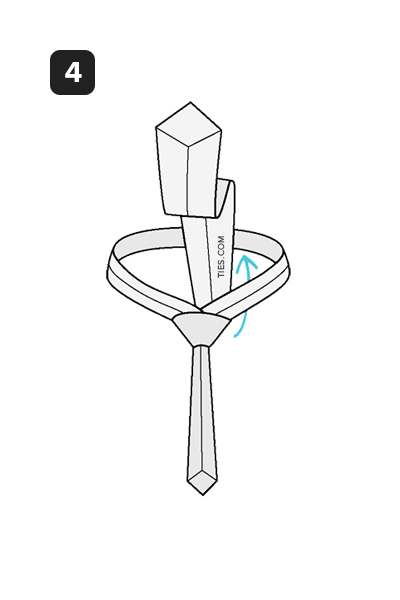
STEP 4
Up to the center, towards neck loop.
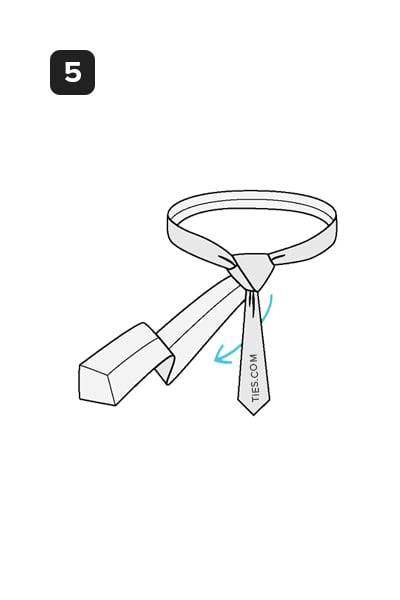
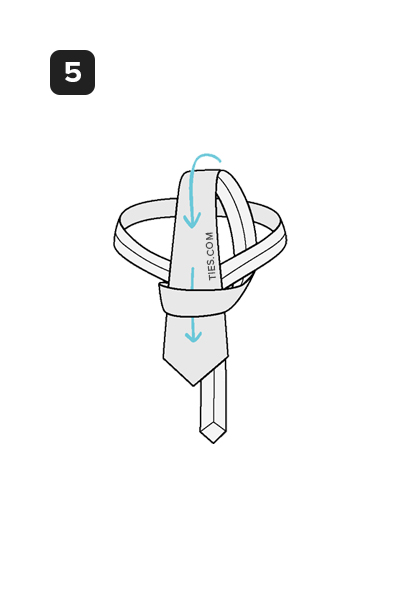
STEP 5
Through the neck loop and to the left.
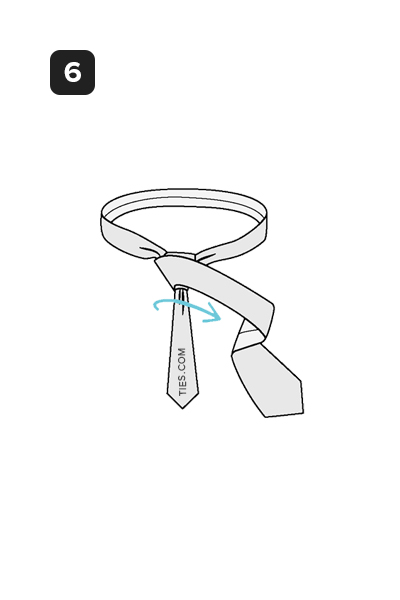
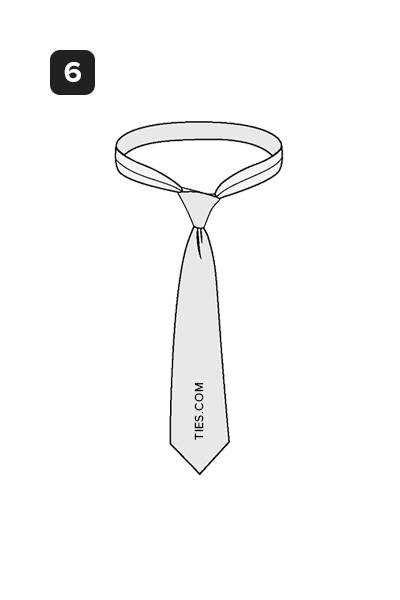
STEP 6
Across the front, over to the right.
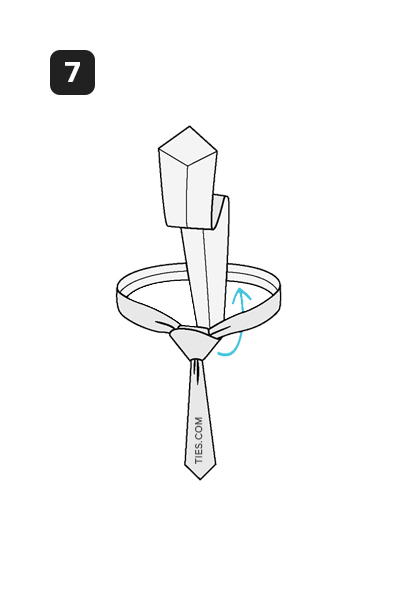
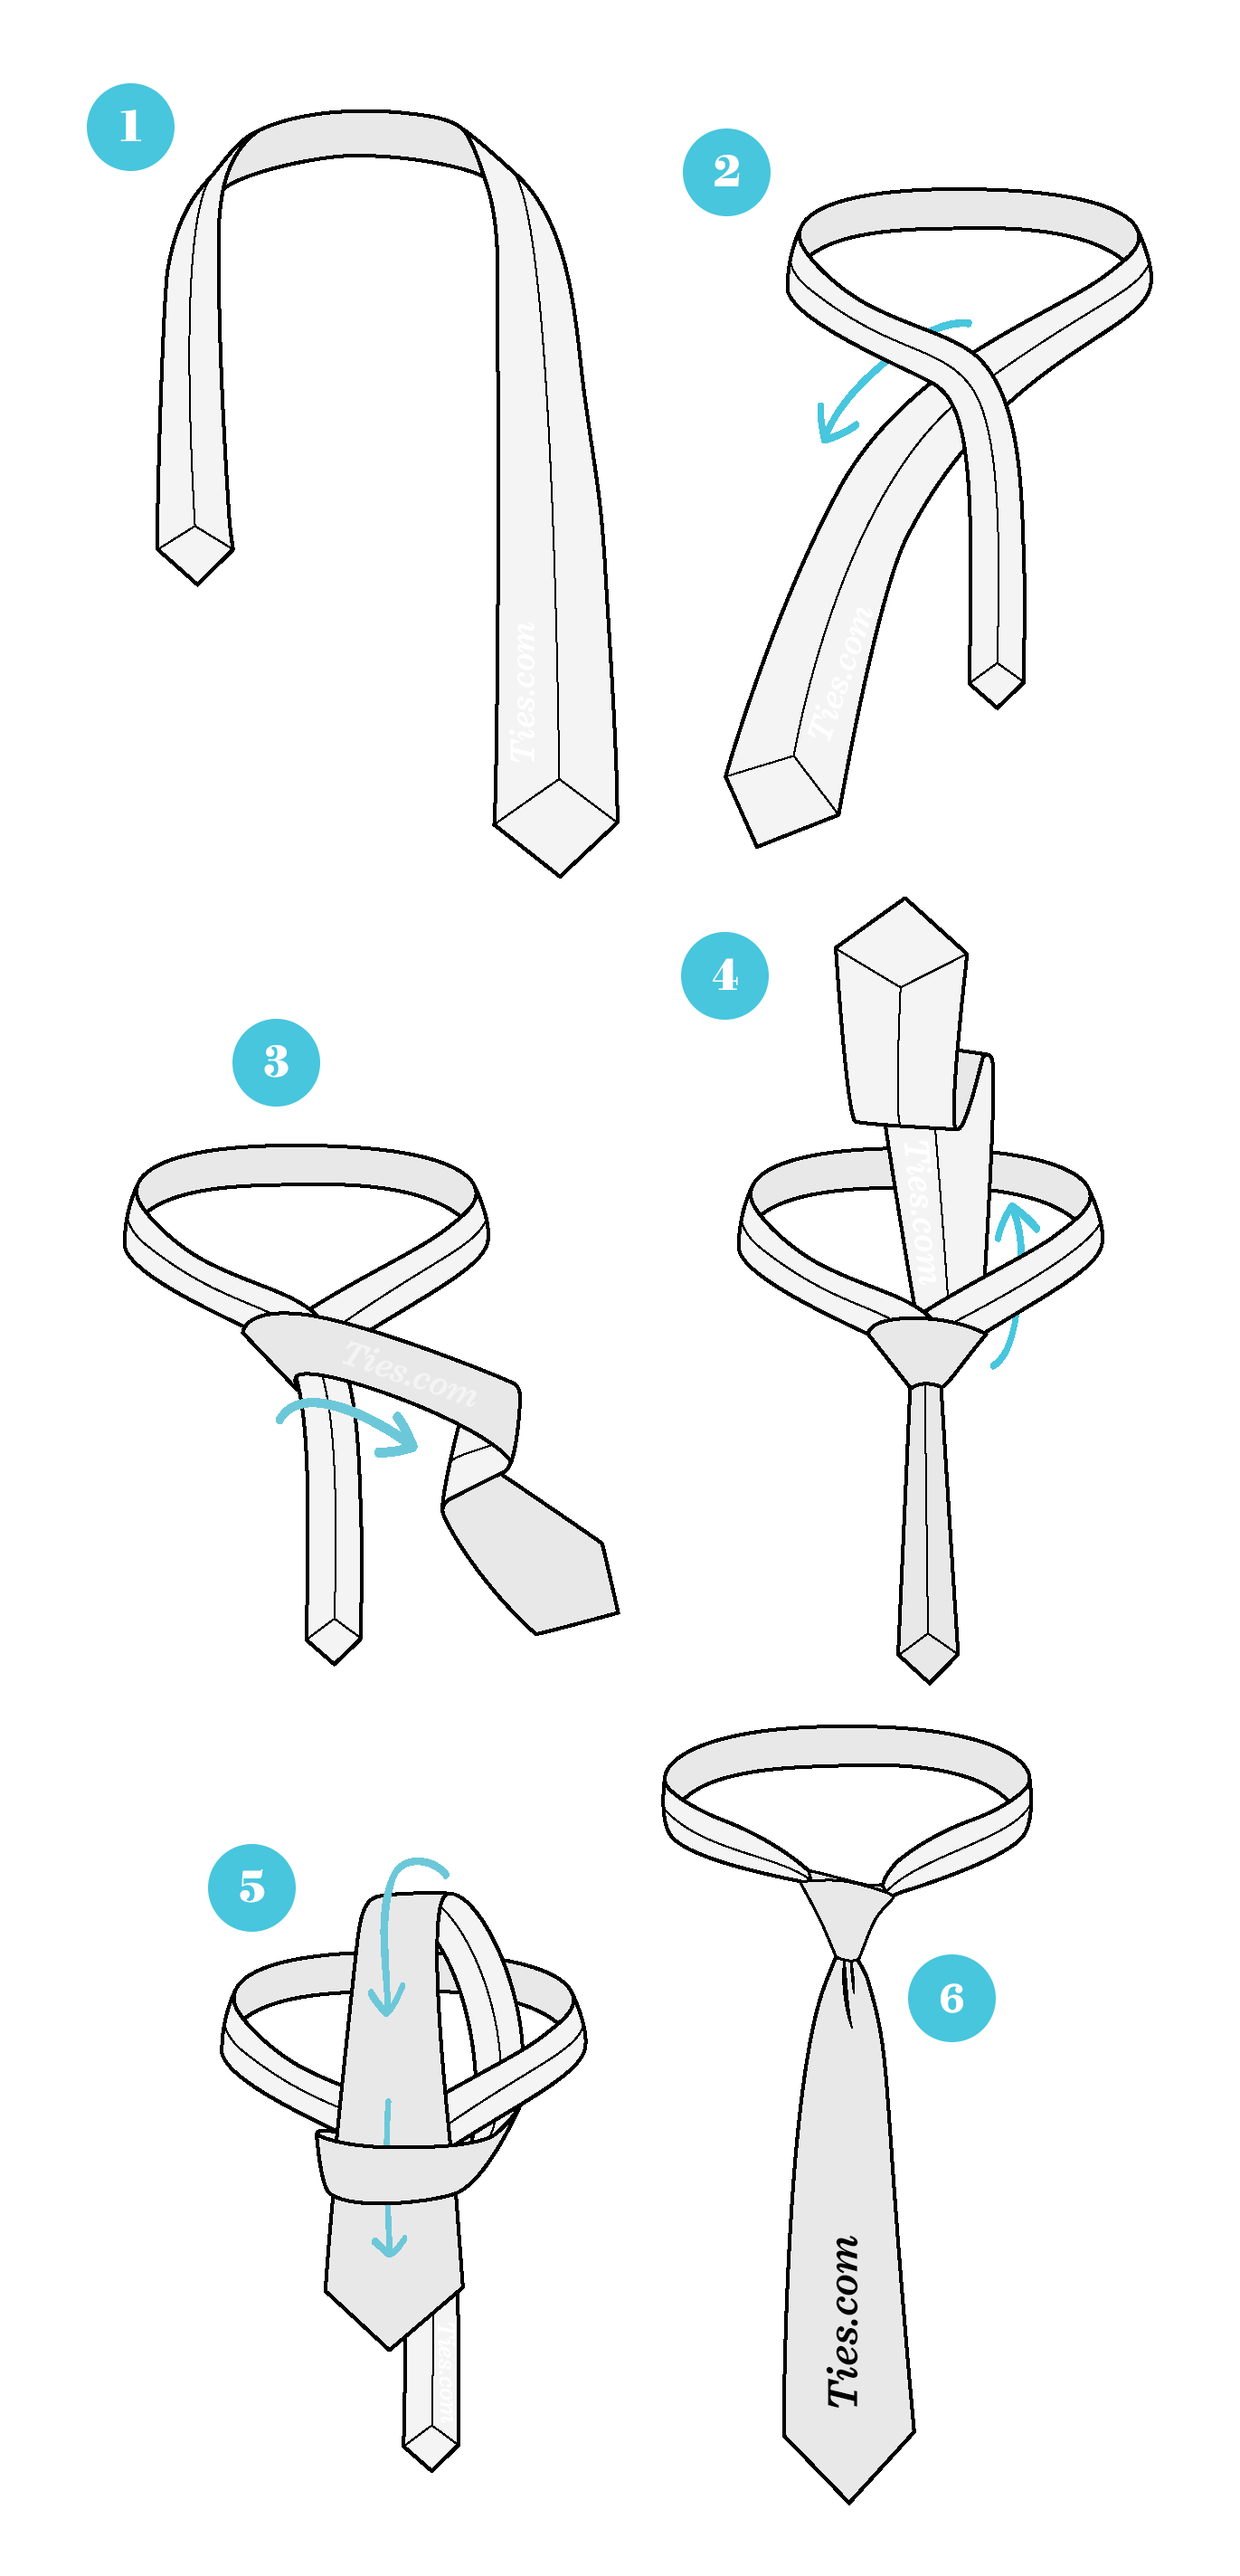
STEP 7
Up into the neck loop from underneath.
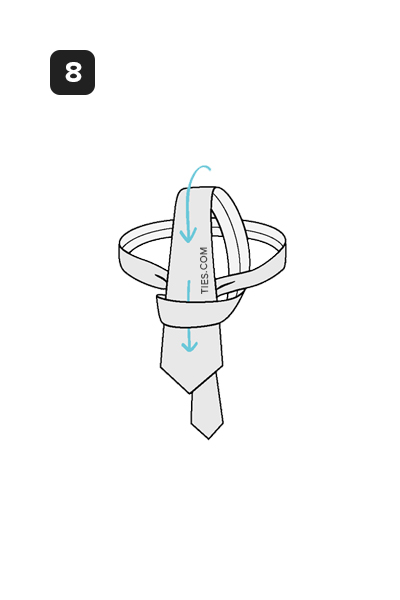
STEP 8
Down through the loop you've just created in the front.
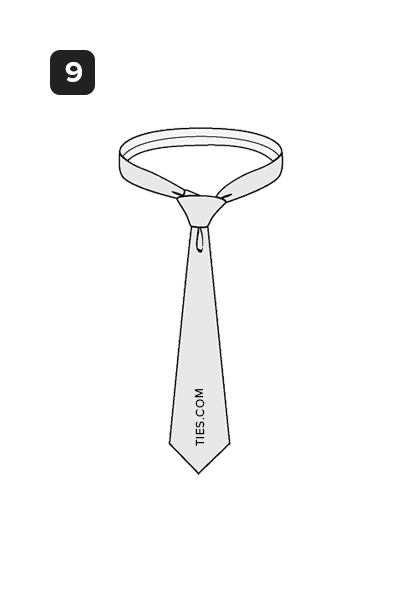
STEP 9
Tighten the knot by pulling down on the wide end. Slide the knot up & adjust.