
Golden days.
Robert
New York, NY
Will never buy a tie anywhere else again
Perfect color; ordered, shipped and to my door in 4 days with standard (FREE) shipping! Great quality.
Joy
Corpus Christi, TX
Great Tie!
Great quality and beautiful fabric...!!!
DJ565
Montclair, NJ
Nice tie and grerat value for the money
The picture on the website was extremely accurate. The overall tie construction was solid and making knots with the dimple was seamless. In summary, for the money, this was a very good purchase.
Marc
San Rafael, CA
Awesome
Beautiful color. Exactly what we were looking g for.
Mumof3boys
Pittsburgh PA
Yellow Ties for Brother's Wedding
I have been shipping with you guys for years. As the best man in my brother's wedding I'm happy I got my tasks completed. Thanks Ties.com
Wayne Timbur
Winnetka, IL.
1 Item Added to Your Bag
Your Cart:
Subtotal:
CONTINUE TO CART
How To Tie A Simple Knot (Oriental Knot) | Ties.com Skip to main content
    0
    More Knots

    How to Tie the Simple Knot (Oriental Knot)

    About the Simple Knot

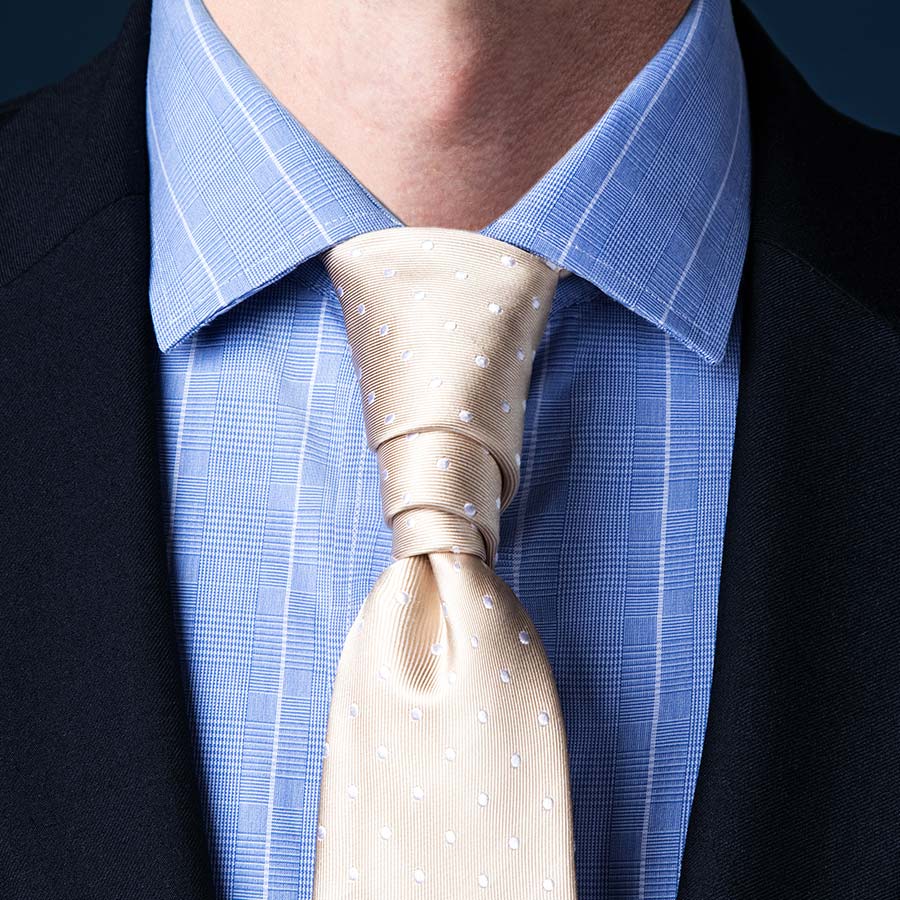
    Also known as the Oriental, Kent knot and Petit Noeud, the Simple Knot contains the fewest possible steps and is very easy to learn. Despite its simplicity, this knot is rarely worn in the West but maintains popularity in China. This may be because it is not self-releasing, making it more difficult to untie. The Simple knot is compact with an asymmetry causing it to lean toward the active end. This knot works well with thick neckties or for tall guys who need a little extra length. Live the simple life.
    KNOT SIZE 1/5
    SYMMETRY 4/5
    DIFFICULTY 1/5
    INVERTED TAIL

    The Simple Knot (Oriental Knot) Tying Instructions
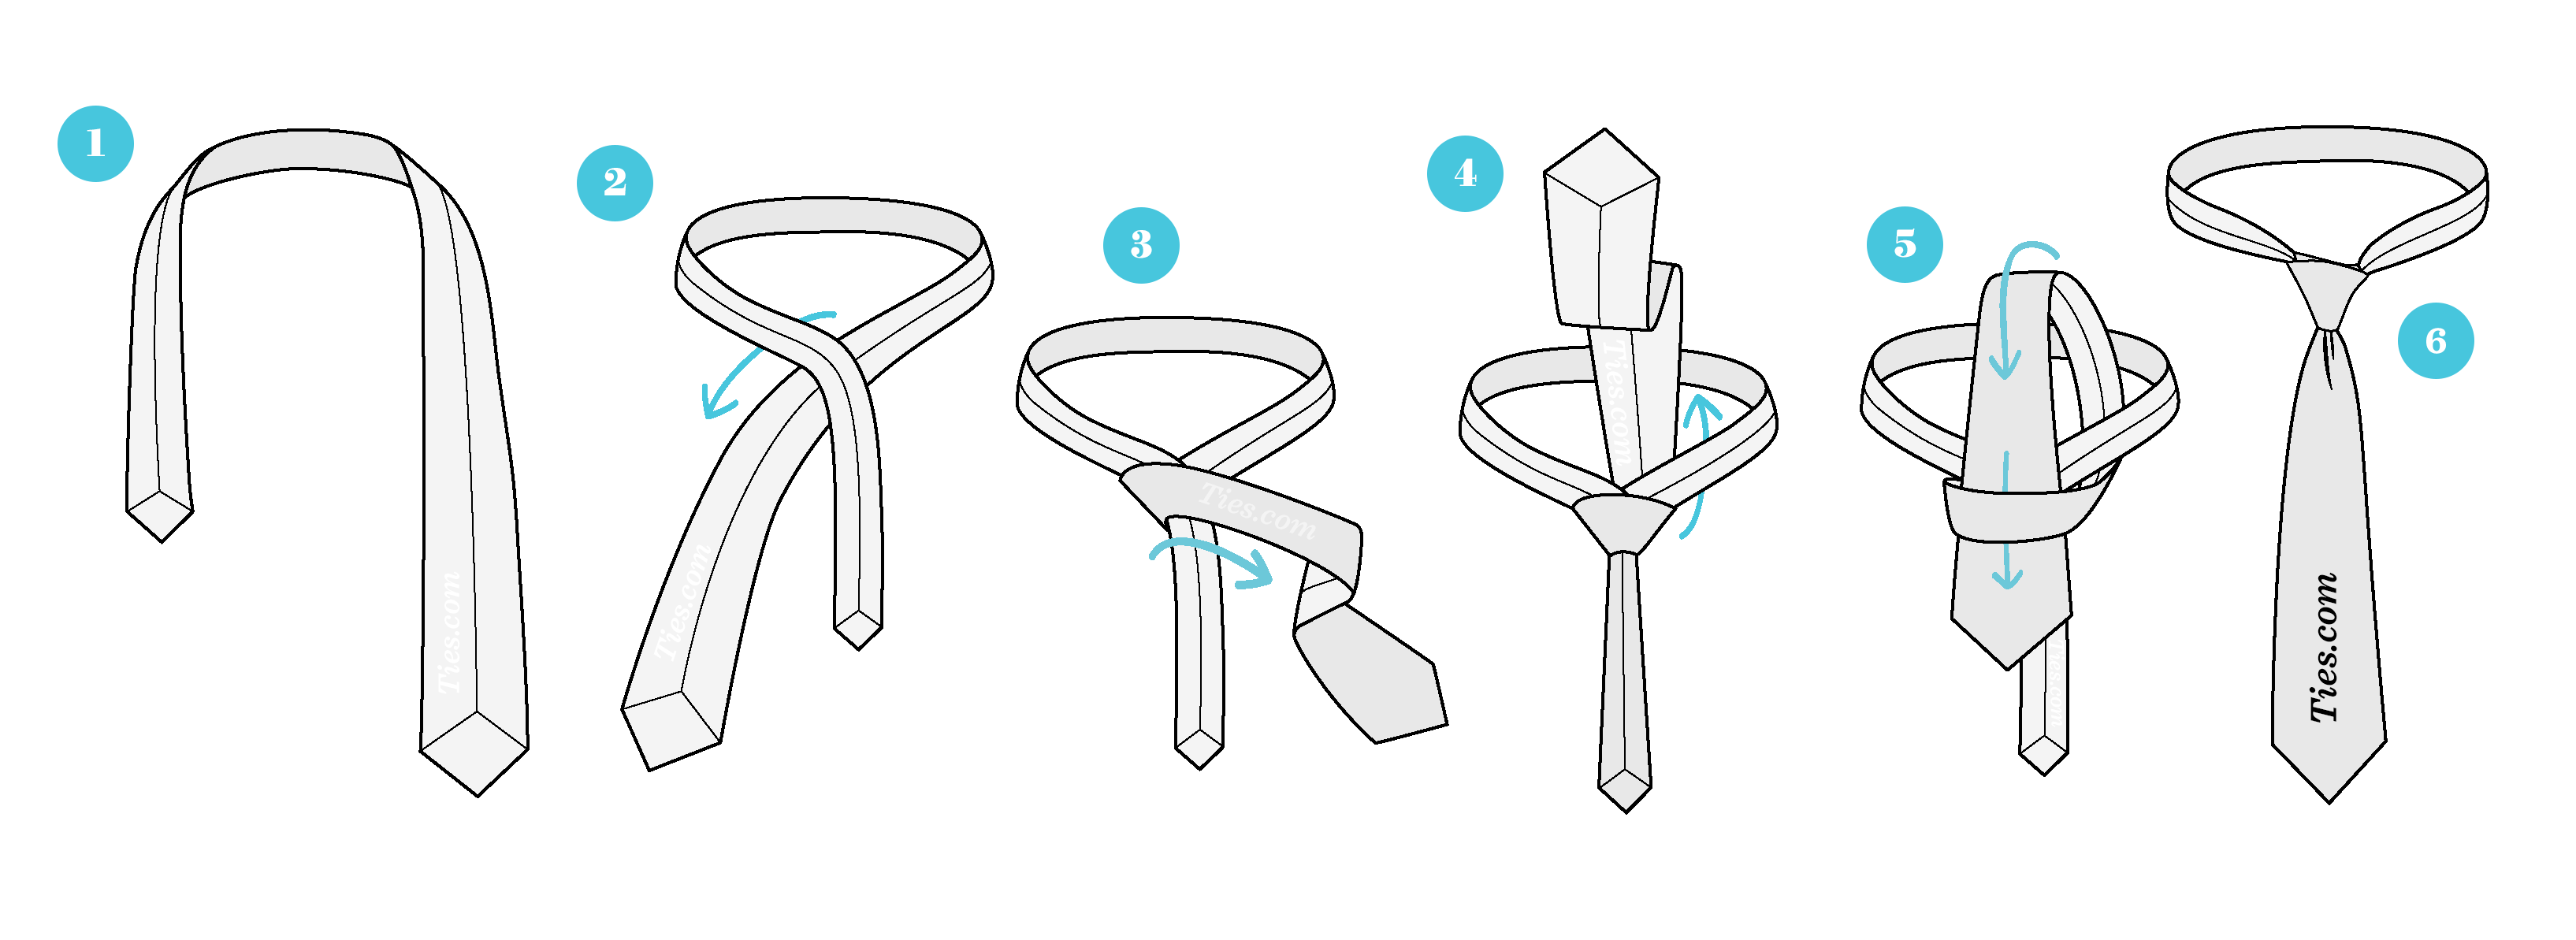
    Step 1 Step 2 Step 3

    Simple Knot (Oriental Knot) Step-by-Step Guide
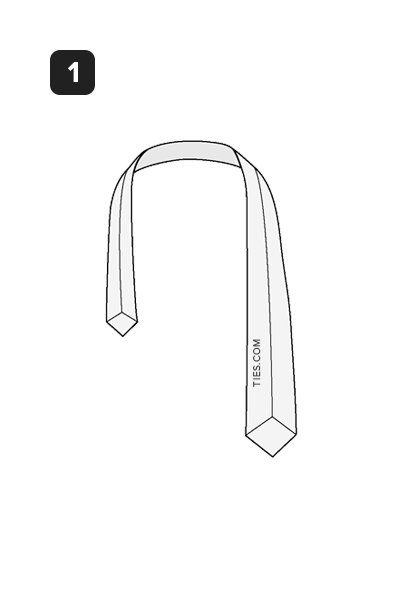
    Step 1

    STEP 1

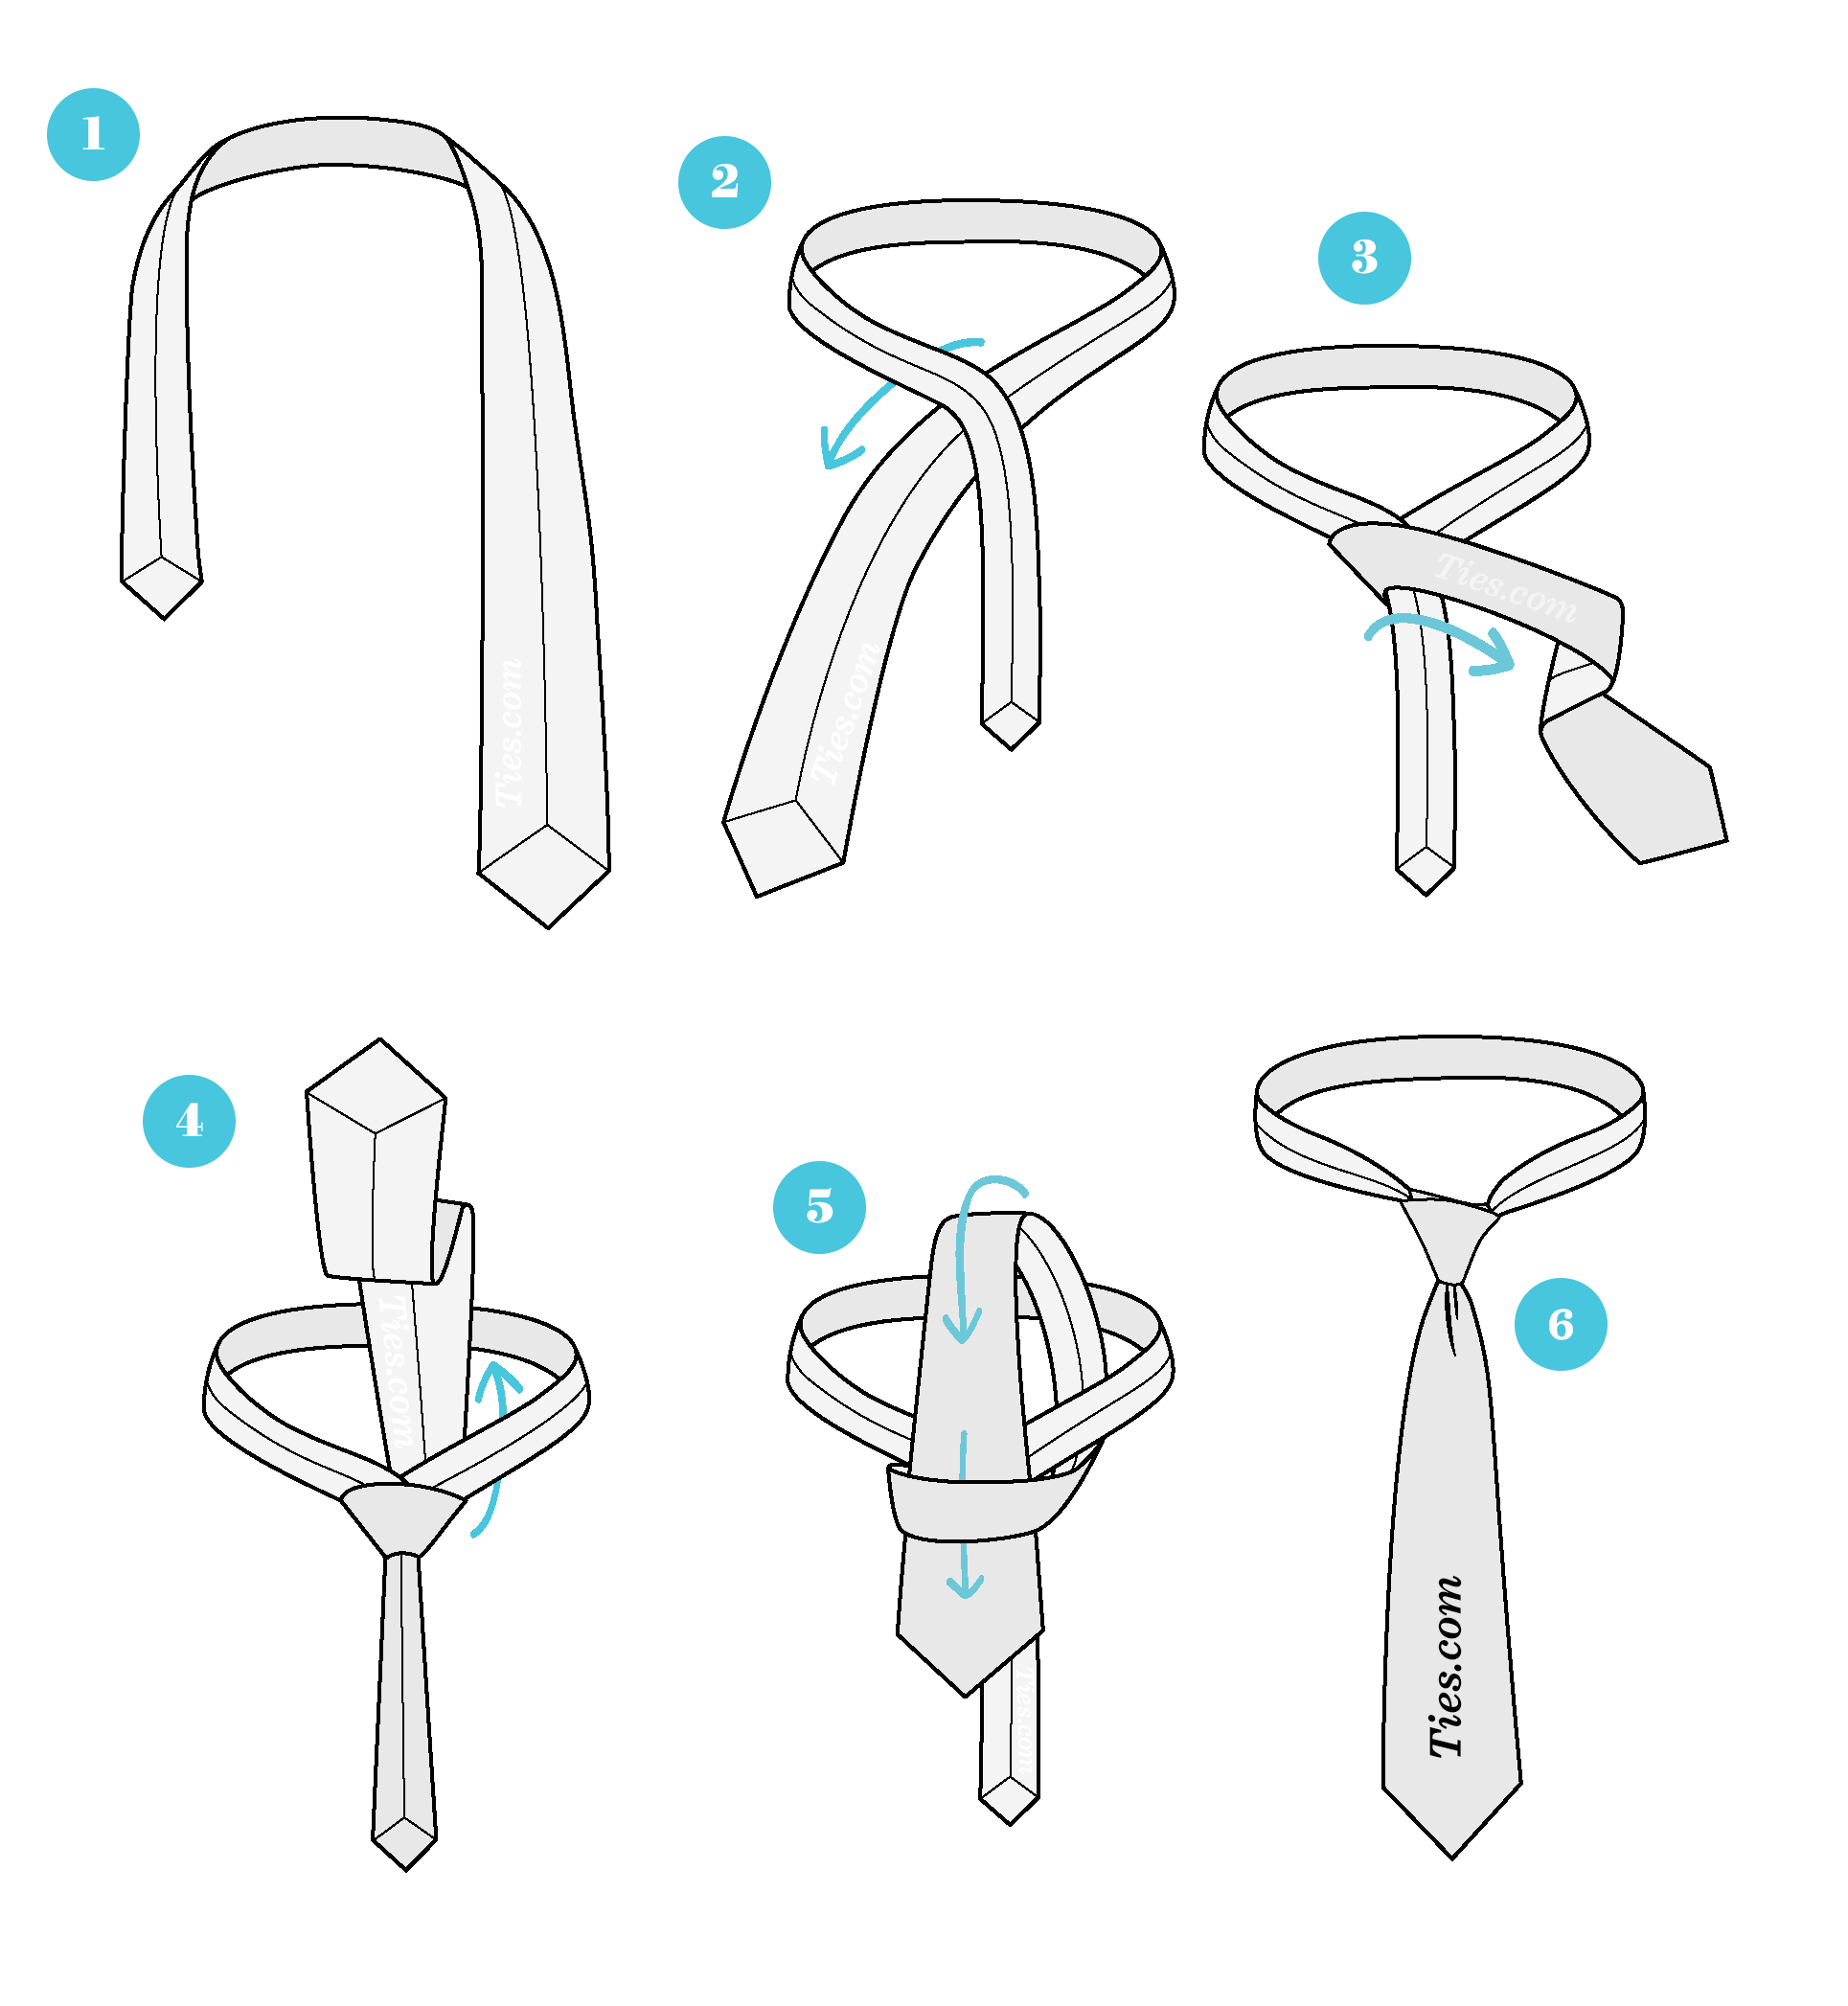
    Start with the backside of the tie facing away from you, the wide end is on the right and the small end is on the left. The tip of the small end should rest slightly above your belly-button (this will vary depending on your height and the length & thickness of your tie). Move only the active (wide) end.
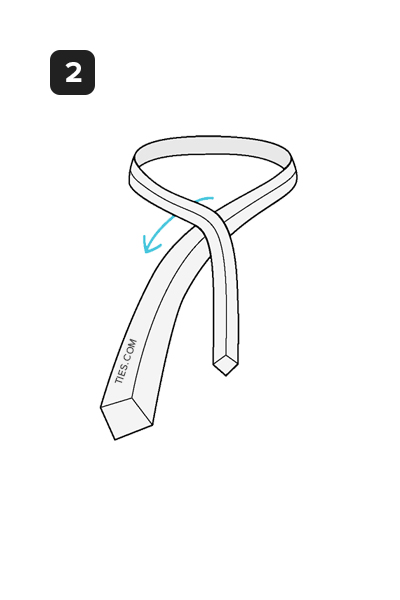
    Step 2

    STEP 2

    Wide end under the small end to the left.
    Step 3

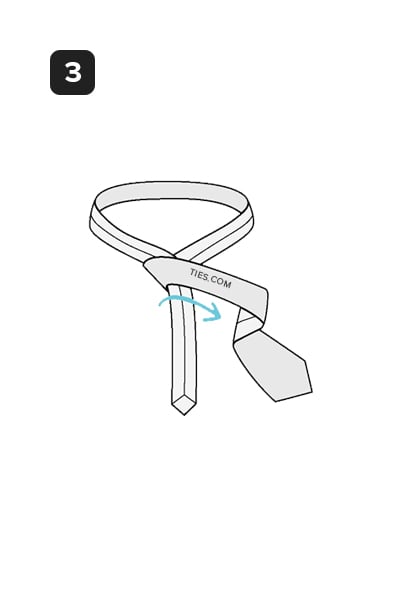
    STEP 3

    Across the small end to the right.
    Step 4

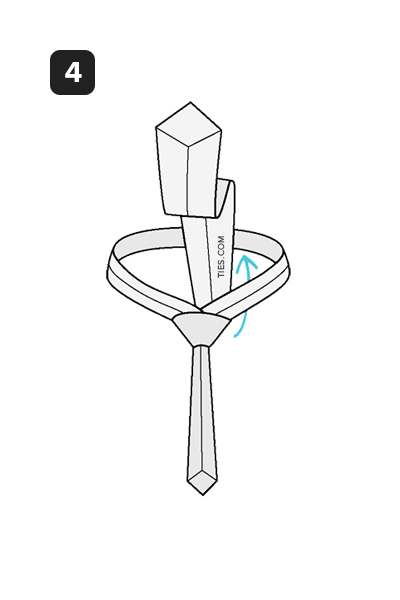
    STEP 4

    Up into the neck loop from underneath.
    Step 5

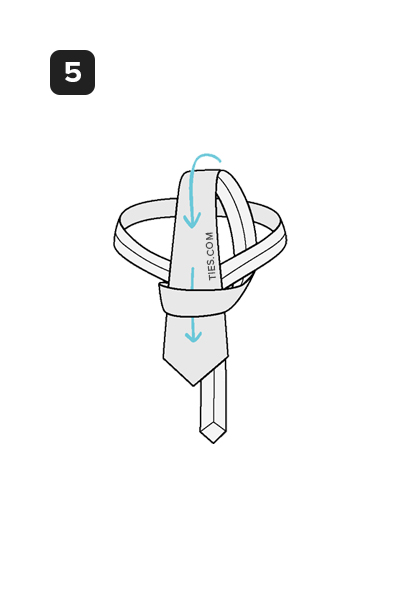
    STEP 5

    Down through the loop you've just made in the front.
    Step 6

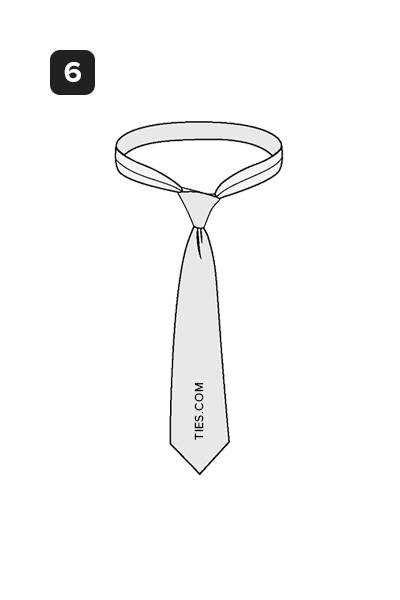
    STEP 6

    Pull down on the wide end to tighten. Slide the knot up to adjust.

    COOKIES & PRIVACY
    We use third-party cookies and trackers for analytics, advertising, and affiliate measurement. Choose Accept to allow them or Decline to keep only cookies needed for site functionality. Please see our Privacy Policy for more information.
    Our Best Kept Secret
    Get access to secret subscriber-only
    discounts when you join our newsletter.
    Instant Access