/wild-ties-flying-arrows-gray-tie" class="link js-related-color" data-color-label="Gray" data-img="https://www.ties.com/primg/gray-microfiber-flying-arrows-tie-252742-540-440-0.jpg" data-sec-img="https://www.ties.com/primg/gray-microfiber-flying-arrows-tie-252742-515-440-0.jpg" data-title="Flying Arrows Gray Tie" data-uri="/wild-ties-flying-arrows-gray-tie" data-id="252742" data-num="1"> Gray Microfiber Flying Arrows Tie Light Blue Microfiber Flying Arrows Tie Pink Microfiber Flying Arrows Tie
  • _Tossed Chess Pieces Purple Tie_
    $38.50
  • Back To Top Go Back To Top
    1 Item Added to Your Bag
    Your Cart:
    Subtotal:
    CONTINUE TO CART
    Filter By
    CLEAR
    The Easiest Way to Tie a Tie | Ties.com Skip to main content
      0
      More Knots

      The Easiest Way to Tie a Tie

      What’s the Easiest Knot to Tie?

      If you’re a beginner looking for the easiest way to tie a tie, look no further than the Four-in-Hand. It’s so simple, it’s basically “How to Tie a Tie for Dummies”. Why? This knot has very few moves and creates a slim, modern looking knot. As a bonus, it’s just as easy to untie as it is to tie. Master the Four-in-Hand and it will serve you well for a lifetime.
      KNOT SIZE 2/5
      SYMMETRY 3/5
      DIFFICULTY 1/5
      SELF-RELEASING

      How to Easily Tie a Tie By Yourself

      Step 1 Step 2 Step 3

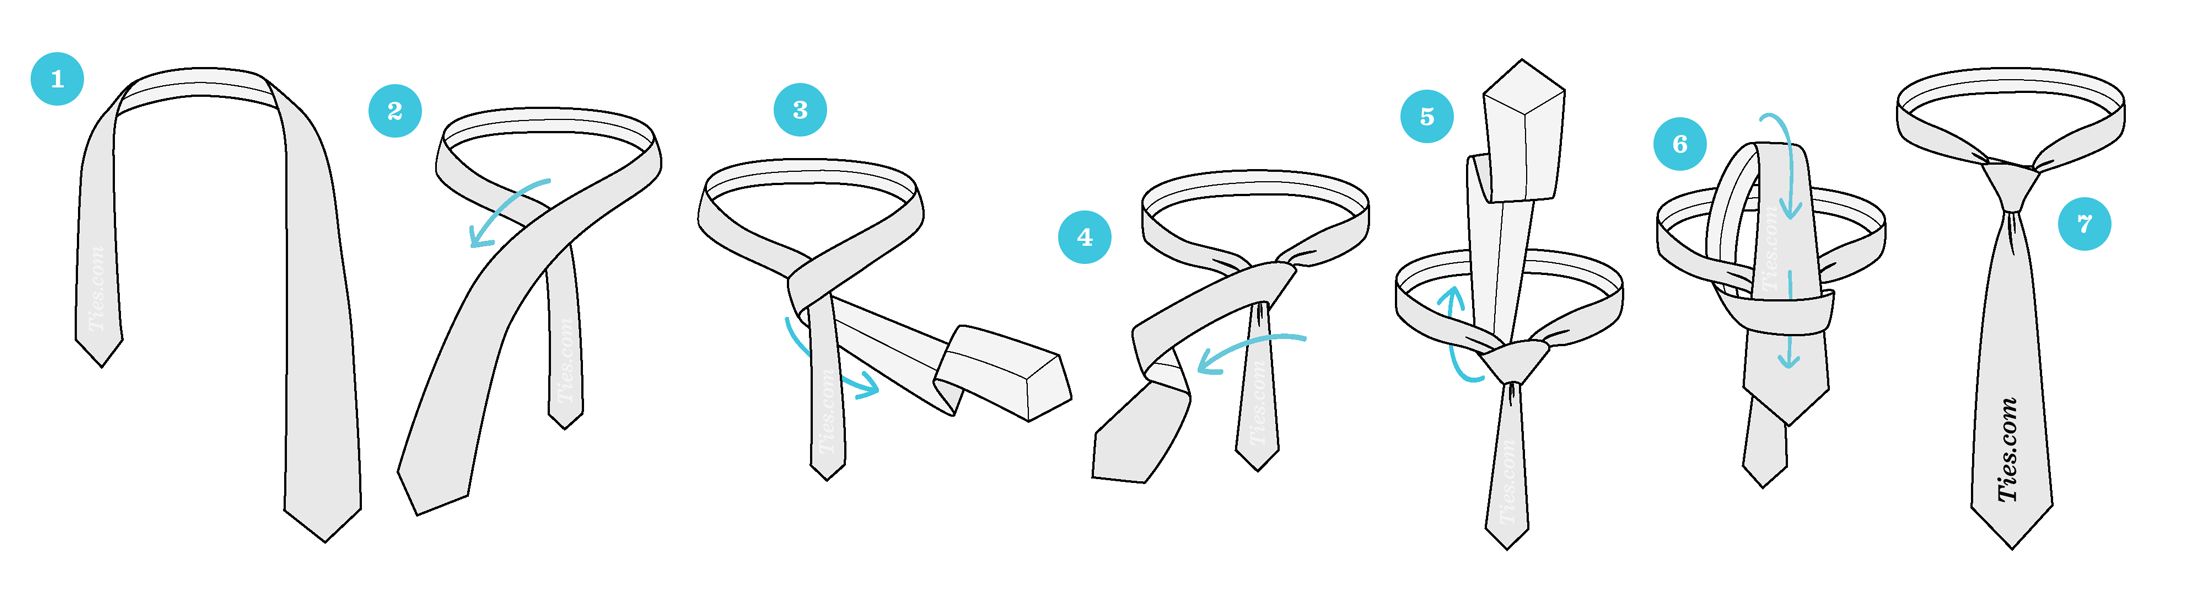
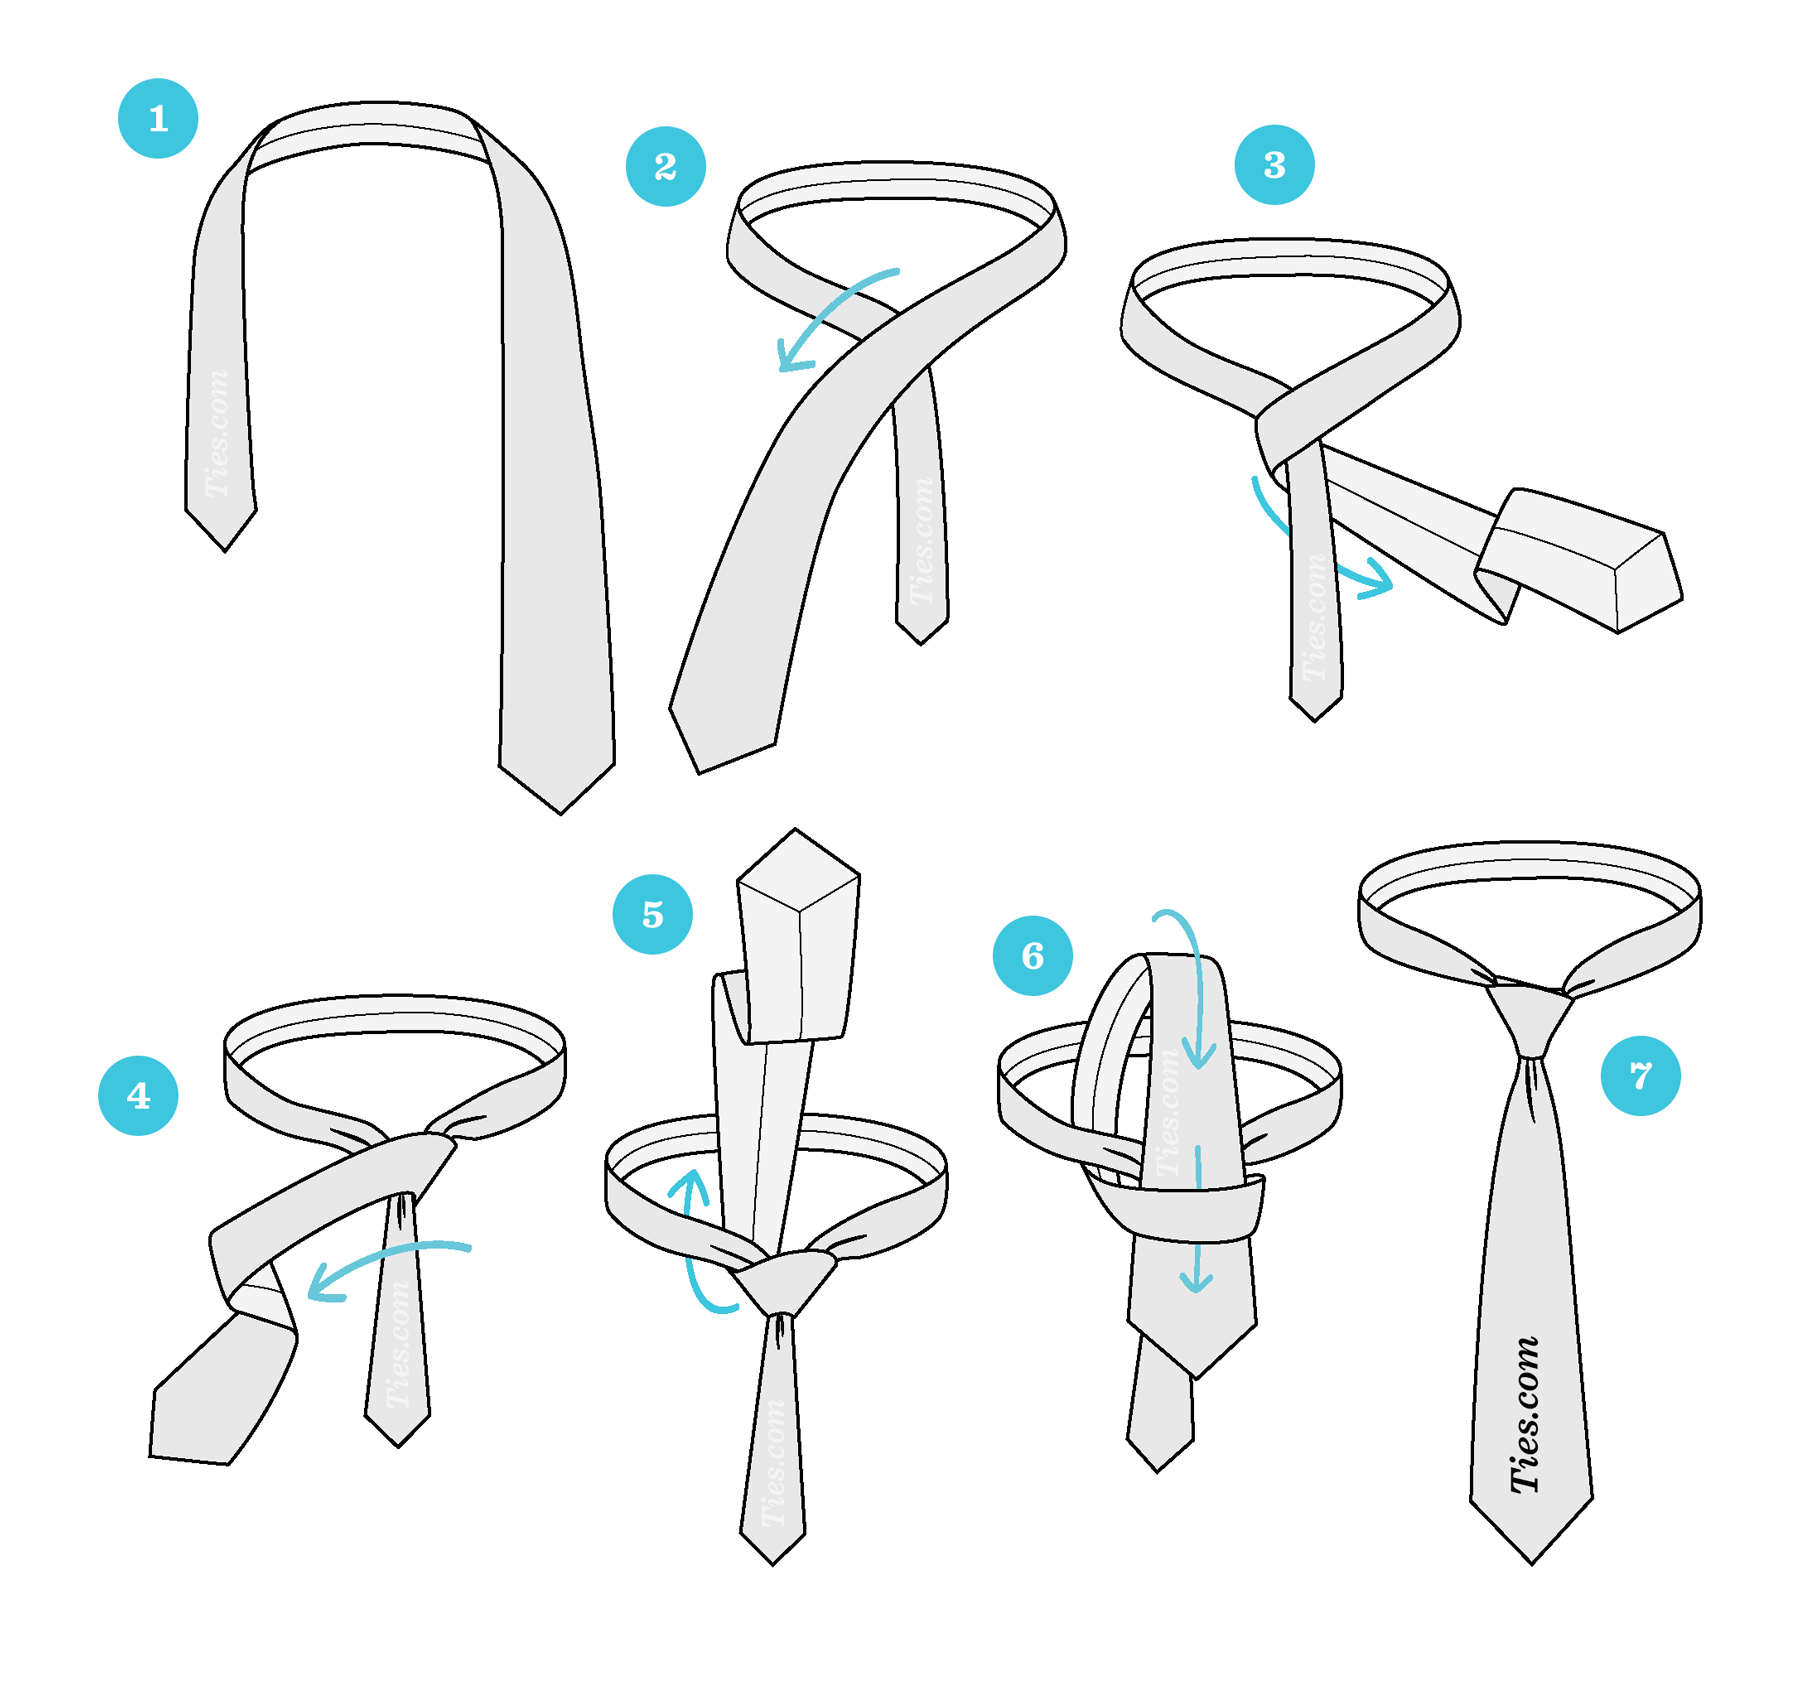
      Easily Tie a Tie Step-by-Step

      Step 1

      STEP 1

      Begin with the wide end of the tie on the right and the small end on the left. The small end should rest slightly above your belly-button (will vary based on your height and the length & thickness of your tie). Only move the active (wide) end.
      Step 2

      STEP 2

      Bring the wide end over the small end to the left
      Step 3

      STEP 3

      Under the small end and to the right
      Step 4

      STEP 4

      Move it across the front and to the left
      Step 5

      STEP 5

      Up into the neck loop from underneath
      Step 6

      STEP 6

      Now, bring it down through the loop you've just made in the front
      Step 7

      STEP 7

      Tighten by pulling down on the wide end and sliding the knot upward. Adjust and add a dimple if you desire.
      Our Best Kept Secret
      Get access to secret subscriber-only
      discounts when you join our newsletter.
      Instant Access