


How to Tie the Simple Knot (Oriental Knot)
About the Simple Knot
Also known as the Oriental, Kent knot and Petit Noeud, the Simple Knot contains the fewest possible steps and is very
easy to learn. Despite its simplicity, this knot is rarely worn in the West but maintains popularity in China. This may
be because it is not self-releasing, making it more difficult to untie. The Simple knot is compact with an asymmetry
causing it to lean toward the active end. This knot works well with thick neckties or for tall guys who need a little
extra length. Live the simple life.
The Simple Knot (Oriental Knot) Tying Instructions
Simple Knot (Oriental Knot) Step-by-Step Guide
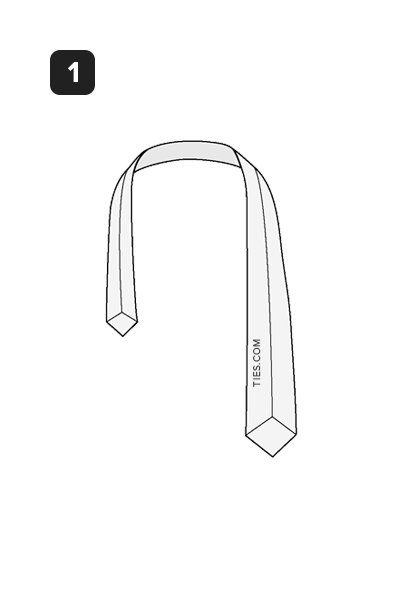
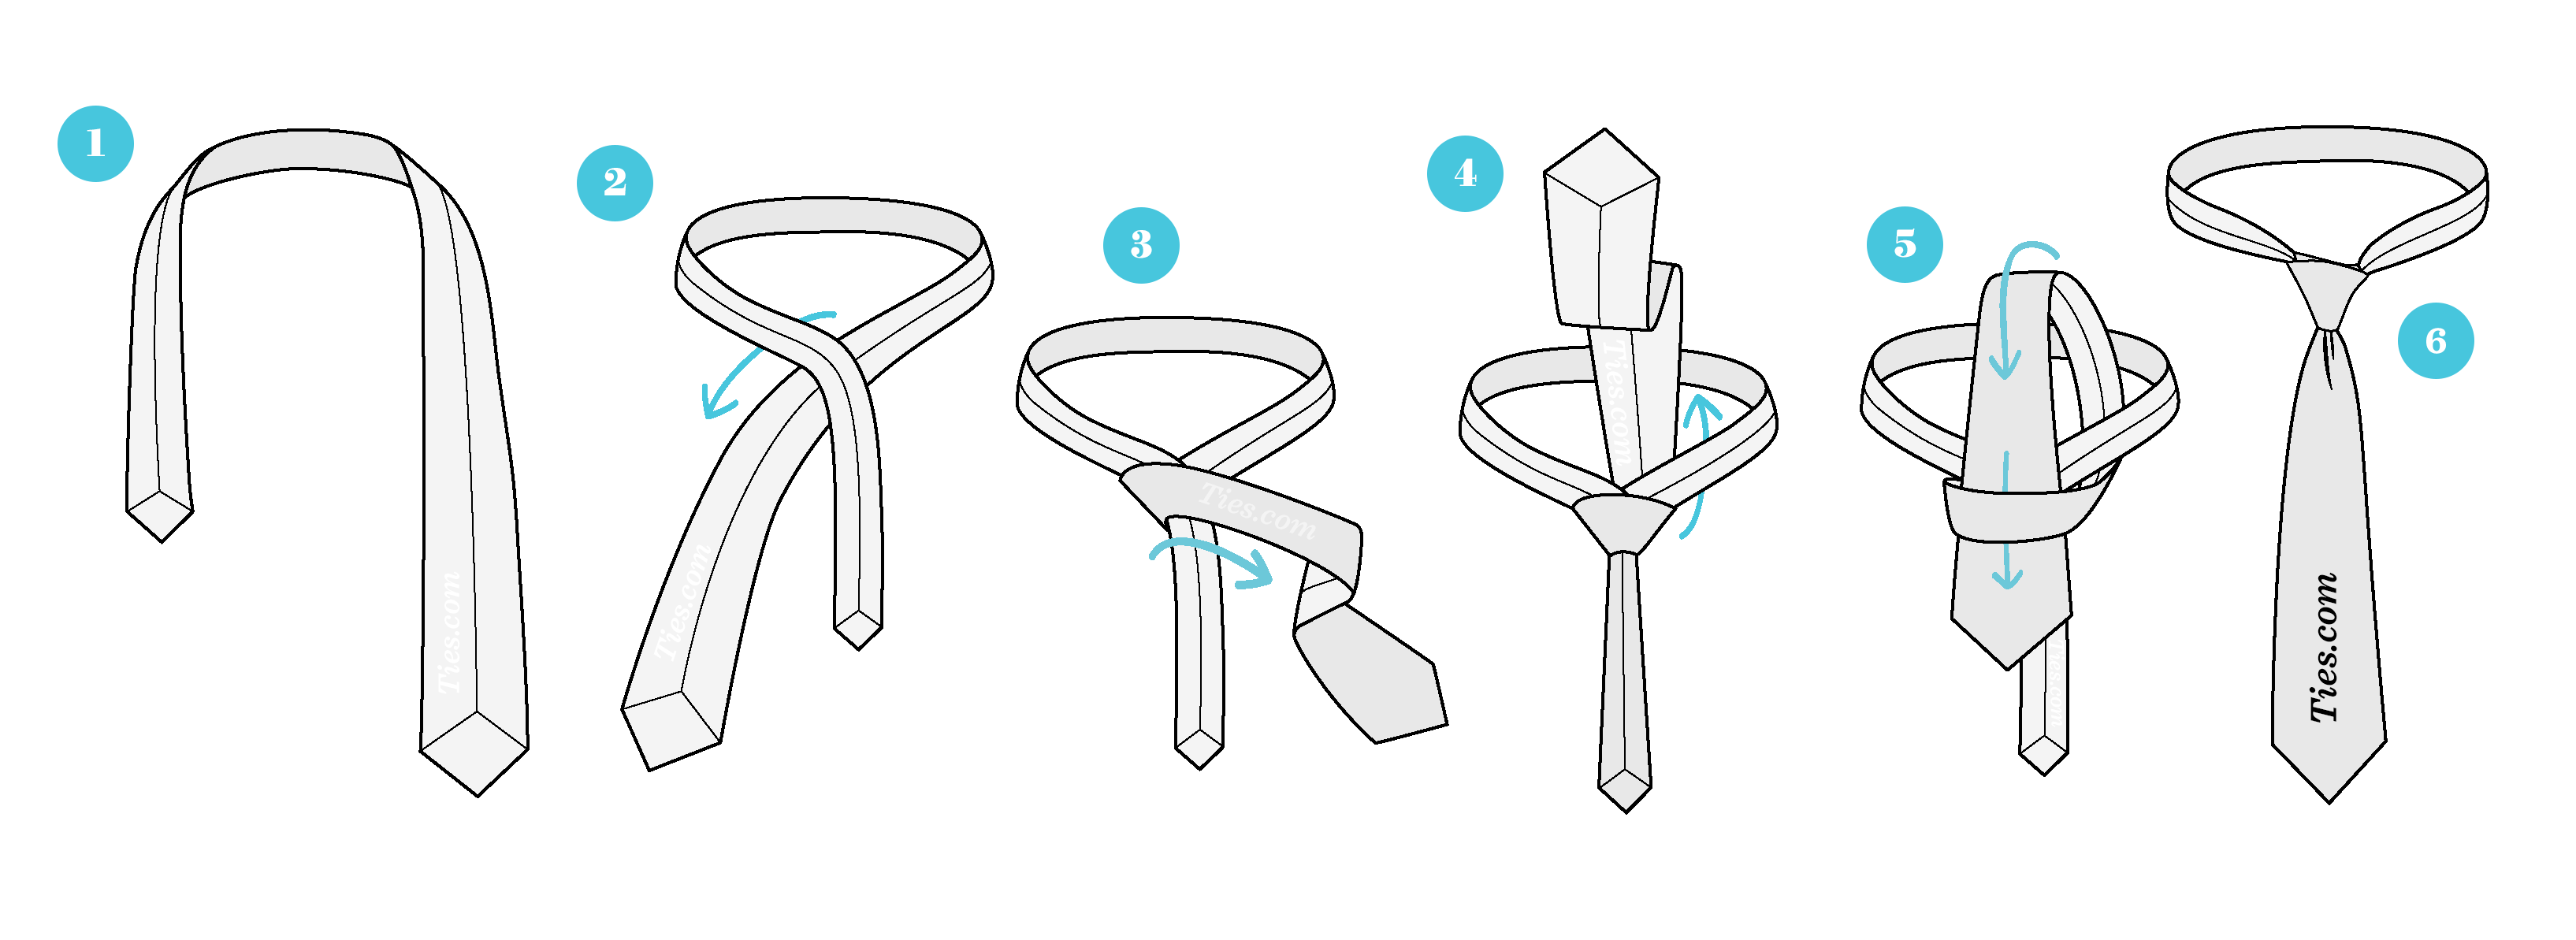
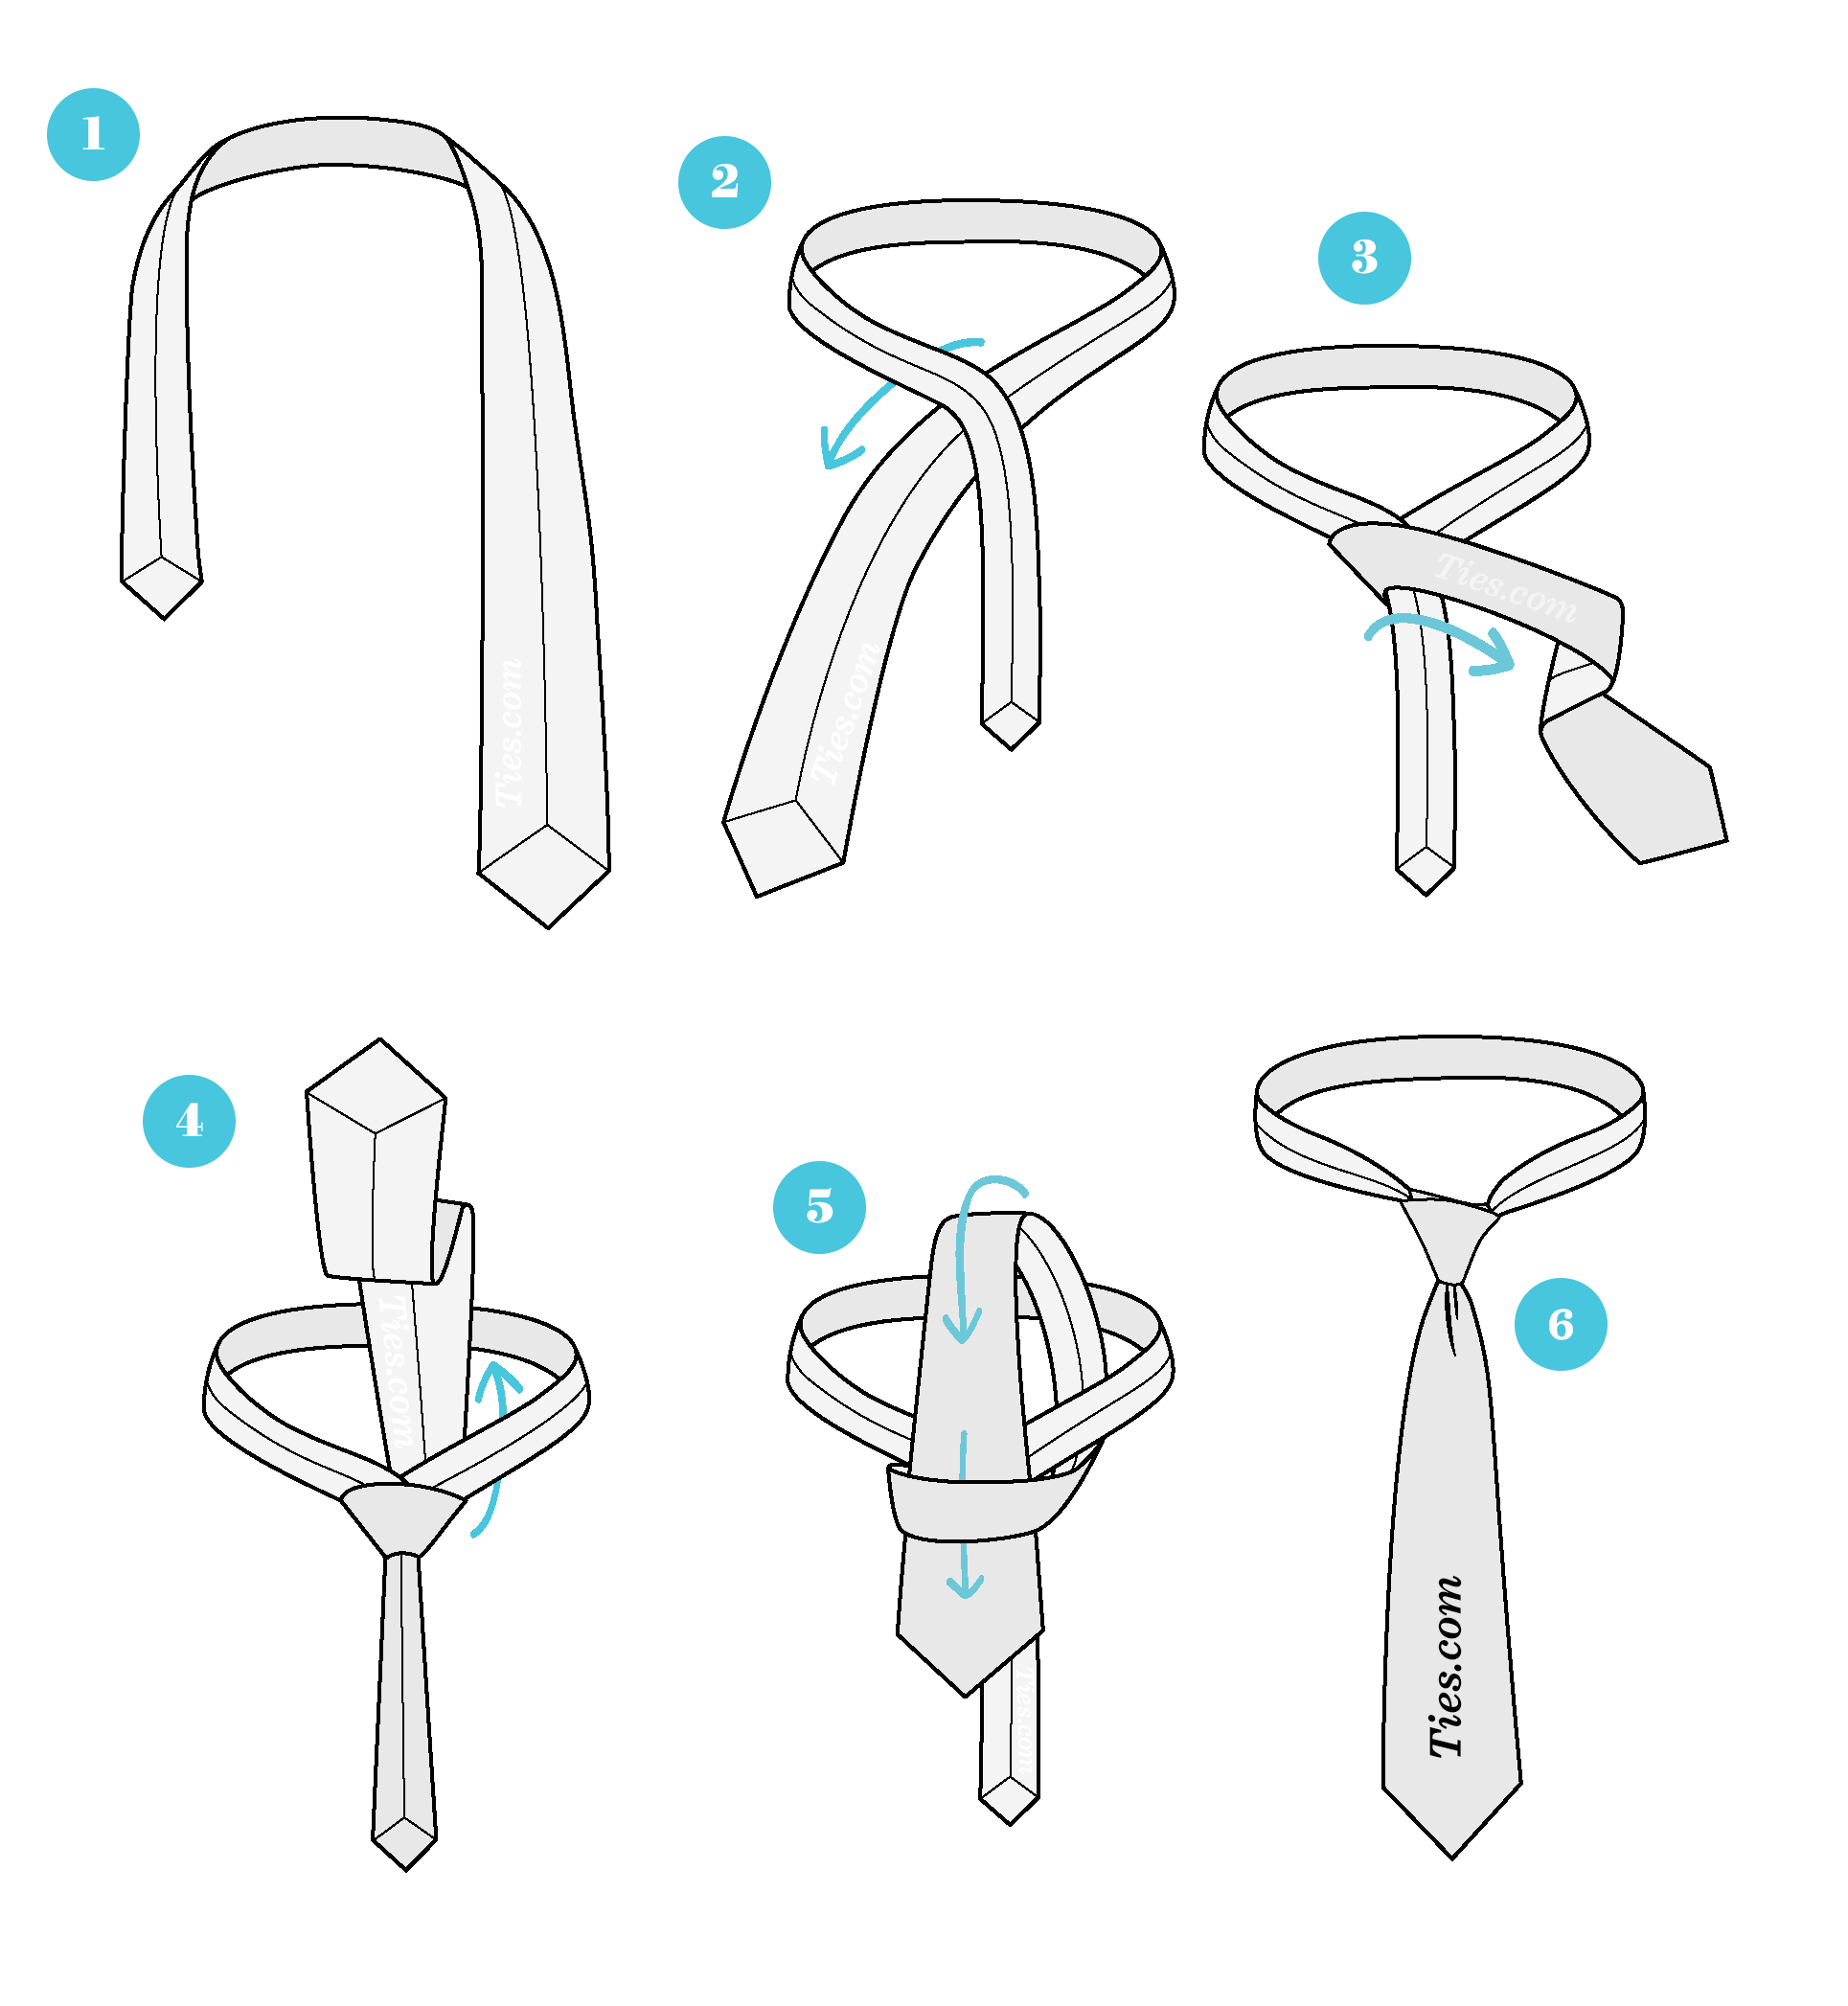
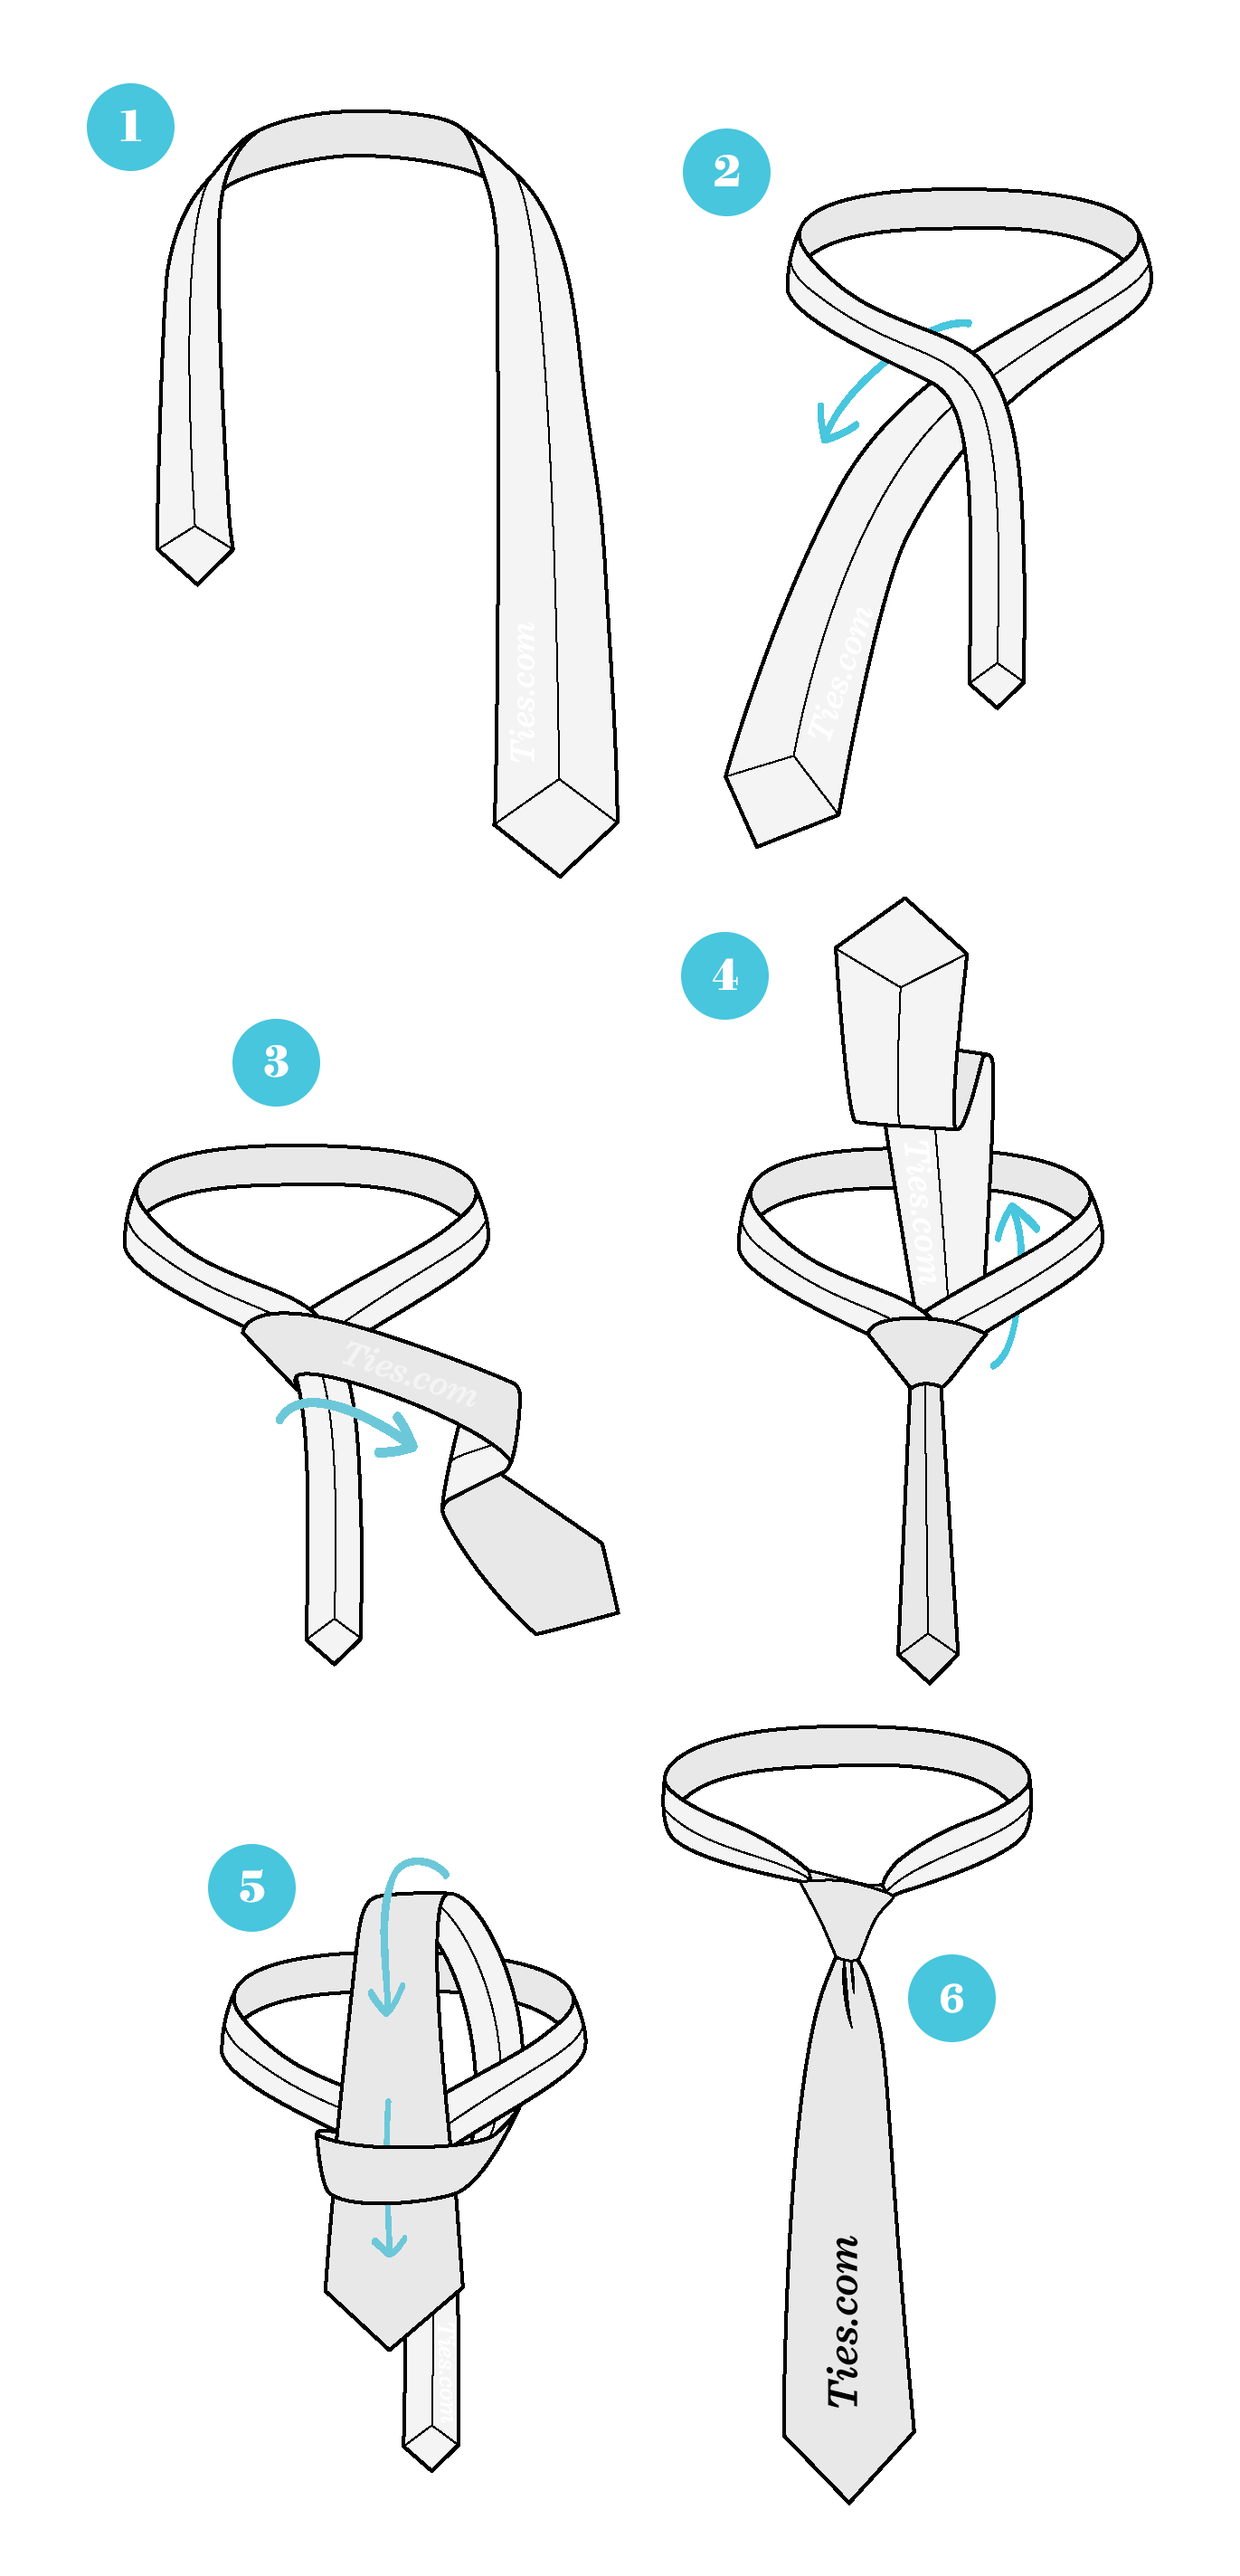
STEP 1
Start with the backside of the tie facing away from you, the wide end is on the right and the small end is on
the left. The tip of the small end should rest slightly above your belly-button (this will vary depending on your
height and the length & thickness of your tie). Move only the active (wide) end.
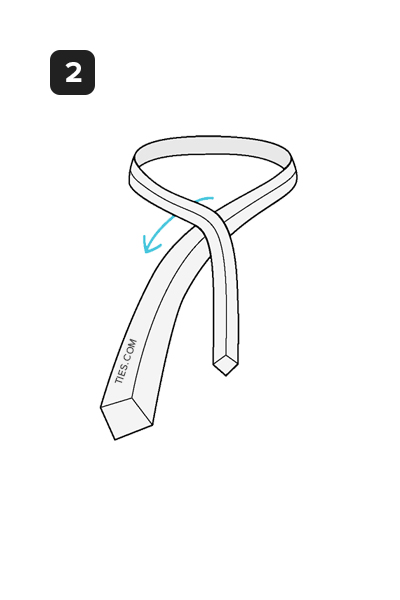
STEP 2
Wide end under the small end to the left.

STEP 3
Across the small end to the right.
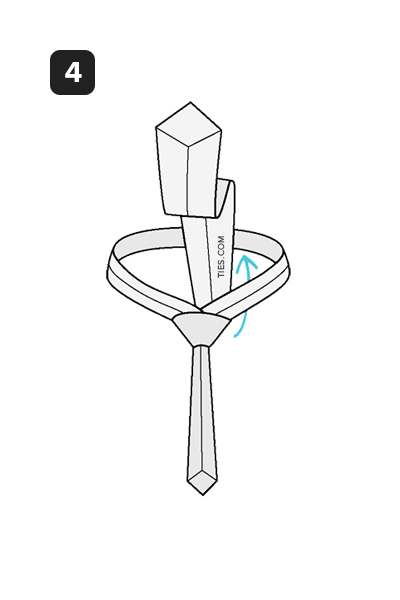
STEP 4
Up into the neck loop from underneath.
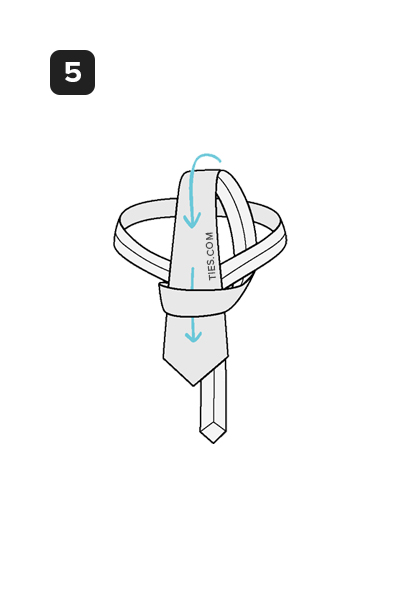
STEP 5
Down through the loop you've just made in the front.
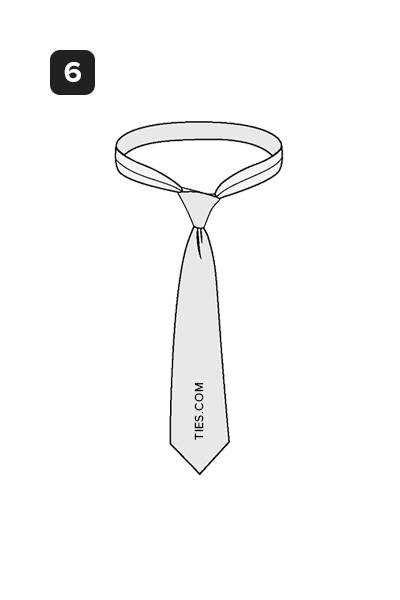
STEP 6
Pull down on the wide end to tighten. Slide the knot up to adjust.


